
Crafting during the holiday season is one of the best ways to bring families together, spark creativity, and create lasting memories. This DIY Glittery Holiday Elf Trio is the perfect craft project to combine festive cheer with eco-conscious crafting. By using recycled toilet paper rolls and vibrant glitter foam sheets, you can transform everyday items into a charming set of holiday elves that brighten any room.

This craft is kid-friendly, classroom-appropriate, and ideal for adding a handmade touch to your seasonal decor. Whether you’re making them to decorate your mantle, using them as holiday party table centerpieces, or just having fun crafting with your kids, these sparkly elves are guaranteed to bring joy. With just a few simple supplies and some creative flair, you can make your own trio of glittery helpers in no time.
Materials Needed
- 3 empty toilet paper rolls (standard size)
- Glitter foam sheets in red, green, yellow, black, and white
- Craft glue or hot glue gun (with supervision)
- Scissors
- Black marker or black paper for facial features
- Pink or red blush (or pink paper circles) for cheeks
- Small pom-poms for hats
- Optional: googly eyes, cotton balls, gold trim, mini bells

Step-by-Step Instructions
Step 1: Cut and Prepare the Foam Pieces
Start by measuring and cutting the glitter foam sheets to wrap around each toilet paper roll. You’ll need one rectangle of glitter foam per roll, enough to fully cover the roll vertically and overlap slightly at the seam. Then, cut out small accessories: collars, buttons, belts, pockets, and hats. Zigzag patterns work great for elf collars and hat brims—use pinking shears for a quick decorative edge.
Step 2: Cover the Roll with Glitter Foam
Apply a line of glue down the length of the roll and wrap your chosen glitter foam around it snugly. Hold in place until secure. Make sure the seam ends at the back of the elf. Repeat this step for all three rolls, using different color combinations for each elf to make them unique.
Step 3: Create the Elf’s Outfit and Collar
Glue on a collar at the top of each roll using contrasting foam colors. Add fun outfit details like buttons, aprons, or belts. Use yellow foam for buttons, black and yellow for belts, and red or green for decorative pockets. Press firmly for a few seconds to ensure each piece adheres well.
Step 4: Make and Attach the Elf Hat
Cut a triangle shape from glitter foam to form a cone-style elf hat. Wrap the triangle into a cone and glue the edges together. Add a pom-pom to the tip of each hat. Decorate with white dots or trim if desired. Once dry, glue the hat to the top of each roll. Slightly angle the hat to give each elf some personality.
Step 5: Add Facial Features and Ears
Use a black marker to draw simple eyes and smiles—or cut small shapes from black paper and glue them on. For cheeks, glue pink circles of paper or dab on a bit of blush. Cut small ear shapes from skin-toned paper or foam and glue them to the sides of the roll, just under the hat brim.
Step 6: Decorate and Customize the Elf
Now comes the fun part—adding extra flair! Use mini bells, glitter trim, or fabric scraps to accessorize your elves. You can make one elf look like a toy maker, one like a baker, and another like a scout. Let kids design their own expressions and styles to make each elf feel special.
Customization Ideas
1. Classic Christmas Elf
Use red and green glitter foam, gold buttons, and a red pom-pom for a traditional North Pole look. Perfect for mantel displays or under the Christmas tree.
2. Winter Wonderland Elf
Swap the red and green for silver, white, and icy blue foam. Add snowflake stickers and silver trim to create a frosty helper.
3. Candy Cane Elf
Use pink, red, and white color themes. Decorate the outfit with stripes or polka dots to match a sweet holiday aesthetic. These make adorable gifts or name holders for a party table.

Educational and Seasonal Uses
Teachers can use this craft in winter units to teach about upcycling and holiday traditions around the world. It’s also a wonderful way to reinforce fine motor skills in young children through cutting and gluing activities. As a seasonal decoration, these elves can serve as placeholders, mantel pieces, or be turned into ornaments by attaching a string to the hat.
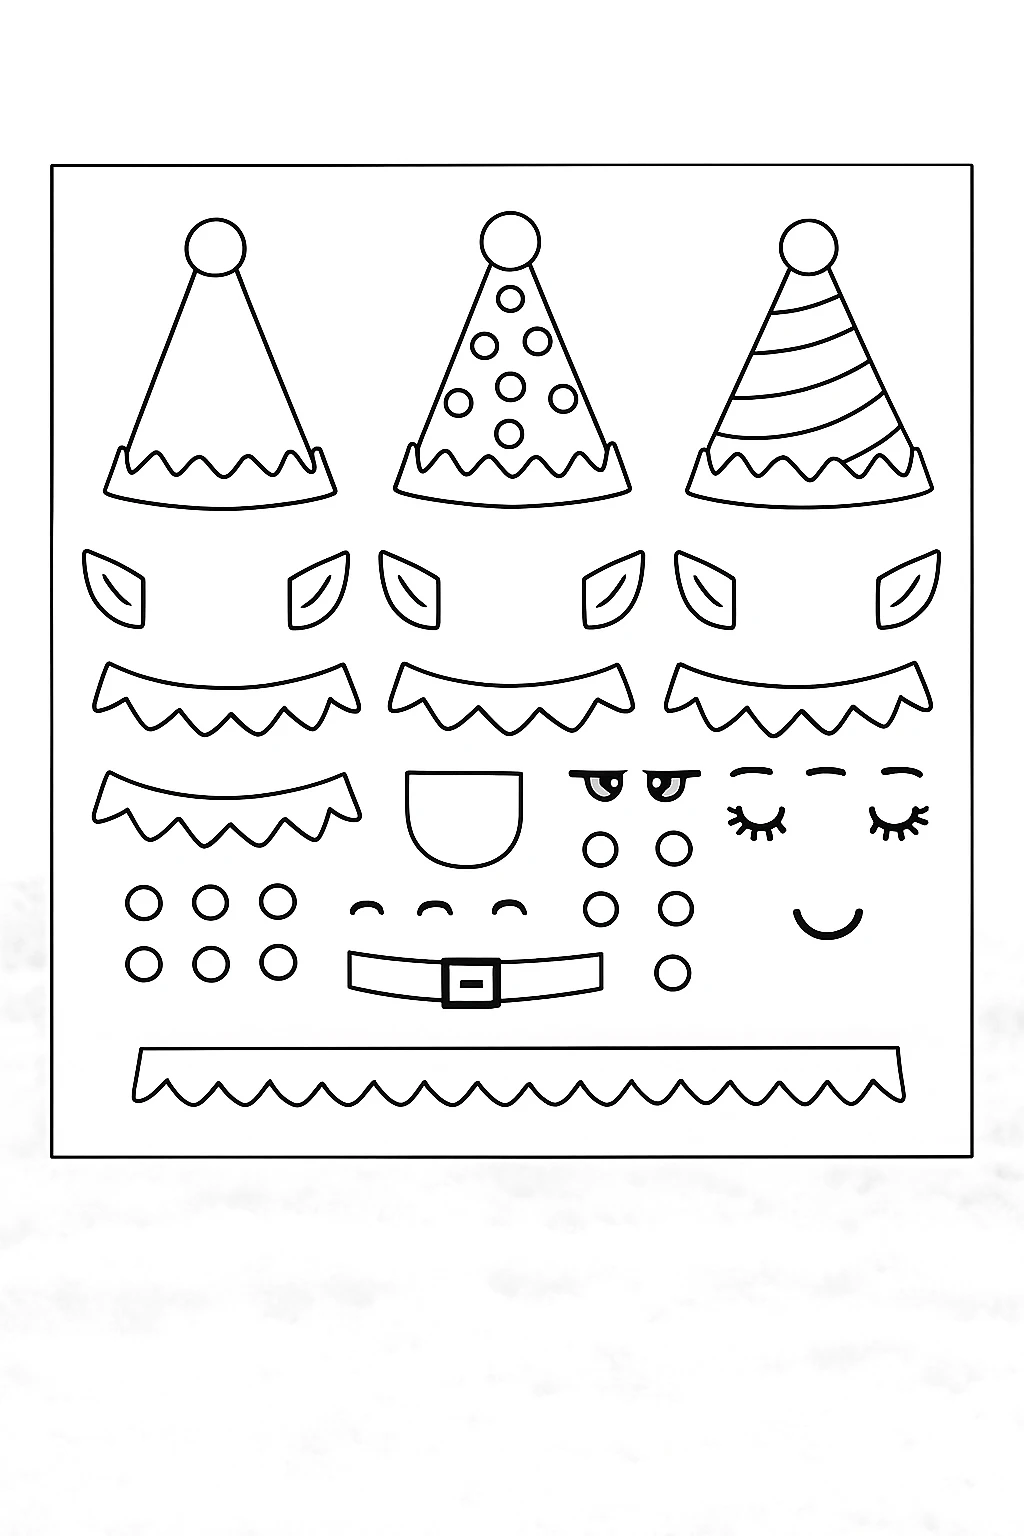
Printable Template
To make this project even easier, we’ve created a ready-to-print template that includes:
- Elf collars, hats, ears, and facial features
- Printable on standard 8.5" x 11" paper or cardstock
- Great for coloring before cutting out
Simply print the template, let kids color and decorate the pieces, cut them out, and follow the steps above to assemble. This makes the craft more accessible and adds another layer of creativity for young artists.
Conclusion
Creating a Glittery Holiday Elf Trio from recycled toilet paper rolls is a delightful way to celebrate the season while being eco-friendly. With minimal supplies and tons of customization options, this project is great for home, classrooms, and holiday parties alike. Let your imagination guide you, and watch as your DIY elves bring sparkle and smiles to everyone around!

DIY Glittery Holiday Elf Trio From Recycled Rolls
Equipment
- Scissors
- Craft glue or hot glue gun
- Black marker
Materials
- 3 Empty toilet paper rolls
- Glitter foam sheets in red, green, yellow, black, and white
- Craft glue or hot glue gun
- Scissors
- Black marker or black paper For facial features
- Pink or red blush or pink paper circles For cheeks
- Small pom-poms For elf hats
- Optional: googly eyes, cotton balls, gold trim, mini bells
Instructions
- Step 1: Cut and Prepare the Foam Pieces – Measure and cut glitter foam to wrap each toilet paper roll and prepare outfit and hat pieces.
- Step 2: Cover the Roll with Glitter Foam – Glue the foam around the roll snugly, securing the seam at the back.
- Step 3: Create the Elf’s Outfit and Collar – Attach a zigzag collar and add buttons, belts, or pockets for a festive look.
- Step 4: Make and Attach the Elf Hat – Form a cone from glitter foam, add a pom-pom, decorate, and glue it on top of the roll.
- Step 5: Add Facial Features and Ears – Draw or glue on eyes and smiles, add cheeks, and glue on elf ears under the hat brim.
- Step 6: Decorate and Customize the Elf – Add bells, trim, or other accessories to give each elf personality.