
Turn ordinary paper cups into enchanting holiday décor with this adorable Santa’s Workshop Gnome Tower craft! With just a few simple materials and a sprinkle of creativity, you’ll create whimsical gnome figures perfect for Christmas centerpieces, mantle decorations, or festive classroom displays. This project is ideal for all ages and provides a great opportunity to experiment with textures, colors, and holiday-themed embellishments.
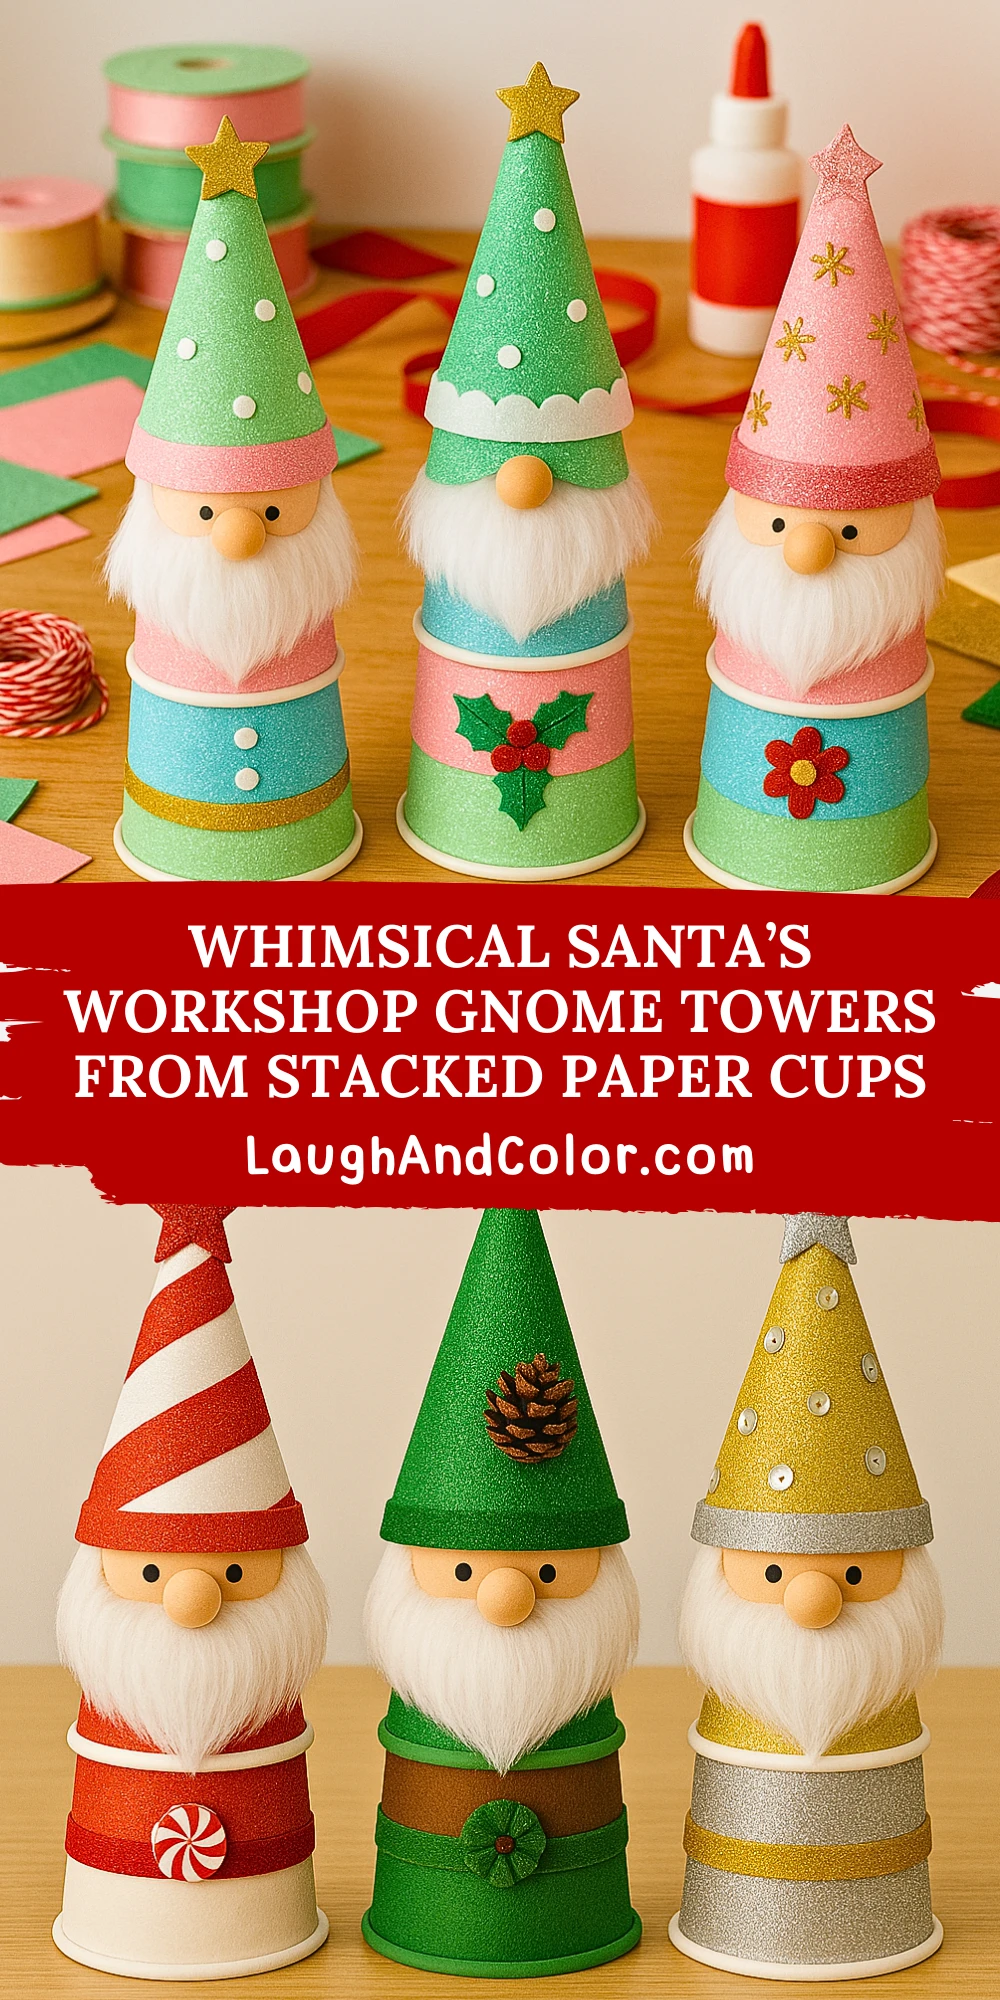
Whether you're crafting with kids or looking for a low-cost handmade decoration for your holiday setup, these gnome towers will bring a magical touch to your Christmas season. Stack the cups, add glittery hats, fluffy beards, and decorative details—each gnome becomes its own unique character. Plus, this craft is great for practicing fine motor skills and introducing children to DIY holiday crafting.
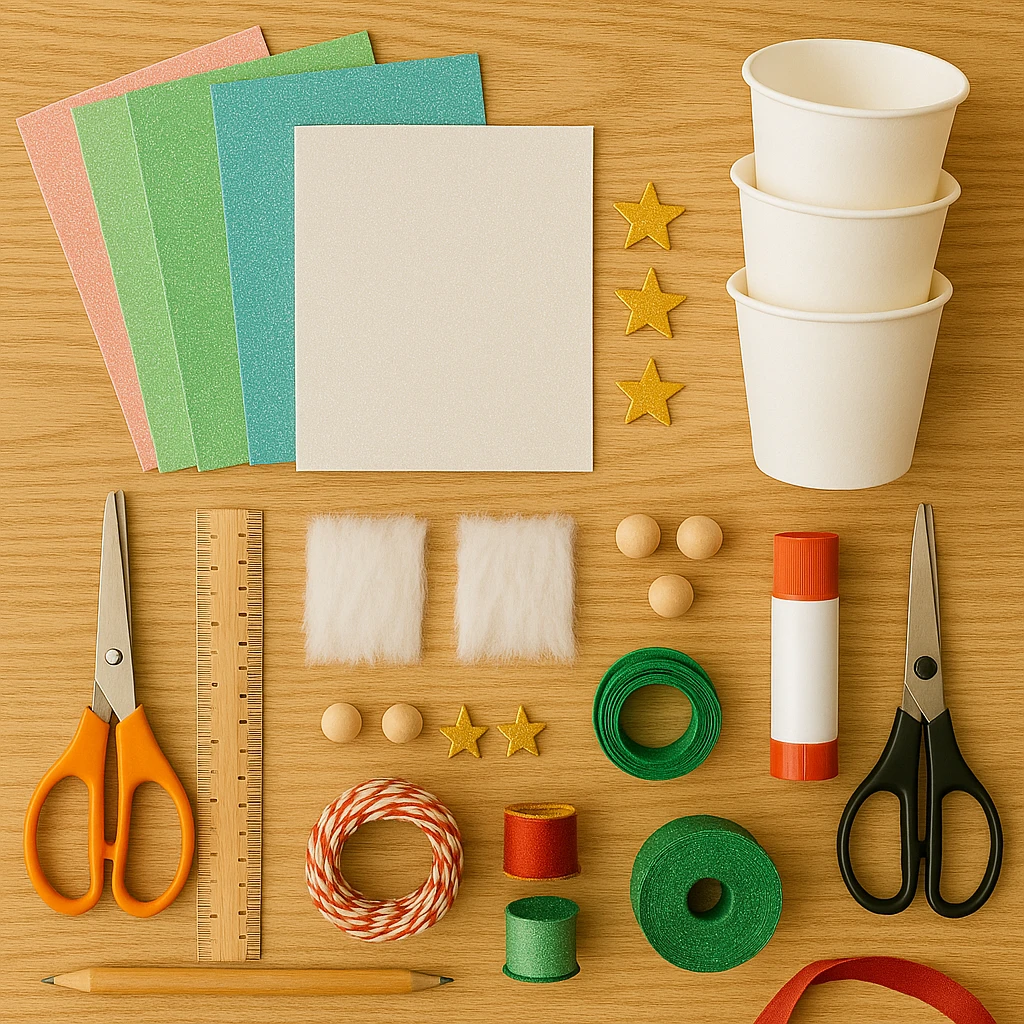
Materials Needed
- 3 standard 8 oz paper cups (per gnome)
- Glitter foam sheets (assorted colors)
- Faux fur fabric or cotton for beard
- Small wooden bead or pom-pom for nose
- Glue stick or craft glue
- Scissors
- Mini star toppers (foam or wooden)
- Decorative tape or ribbon
- Holiday stickers, buttons, or embellishments
- Pencil and ruler (for measuring and tracing)
Step-by-Step Instructions
Step 1: Prepare the Cups
Start by choosing three sturdy paper cups for each gnome. These will form the towered body. You can choose white or any solid-colored cups as your base. Make sure they are clean and dry before decorating.
Step 2: Wrap and Decorate the Body
Measure the height and circumference of each cup and cut strips of glitter foam or colored paper to wrap around them. Use glue to adhere the wrap securely. Alternate colors between top, middle, and bottom cups for a layered outfit effect. Add ribbons, tape, or buttons to decorate each section of the body.
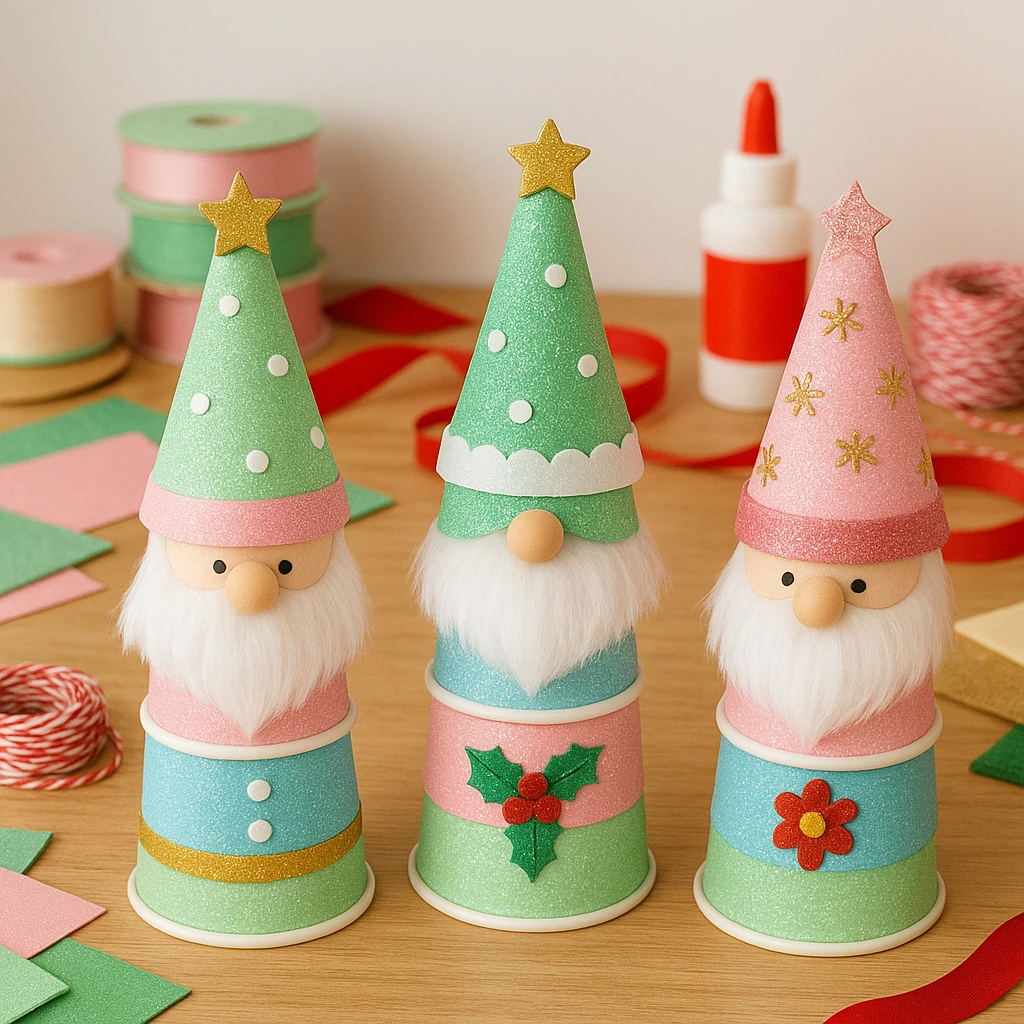
Step 3: Make the Hat
Cut a triangle from glitter foam sheet approximately 6 inches wide at the base and 6 inches tall. Roll it into a cone and glue the edge to form a pointed hat. Let it dry for a few minutes. Decorate the hat with polka dots, mini stars, or scalloped trims. Finish it off by gluing a foam or wooden star at the tip.
Step 4: Create the Beard and Nose
Trim a triangle or oval shape from faux fur fabric for the gnome’s beard. Glue it just below the rim of the top cup. Add a small wooden bead or pom-pom for the nose and place it where the beard meets the hat’s edge. Hold it in place until the glue sets.
Step 5: Assemble the Gnome Tower
Stack the three decorated cups with the largest (or sturdiest) at the base. Use a small dot of glue between each cup for stability. Finally, attach the hat on top of the uppermost cup, securing it with glue.
Let the whole tower dry for at least 30 minutes before moving or displaying.
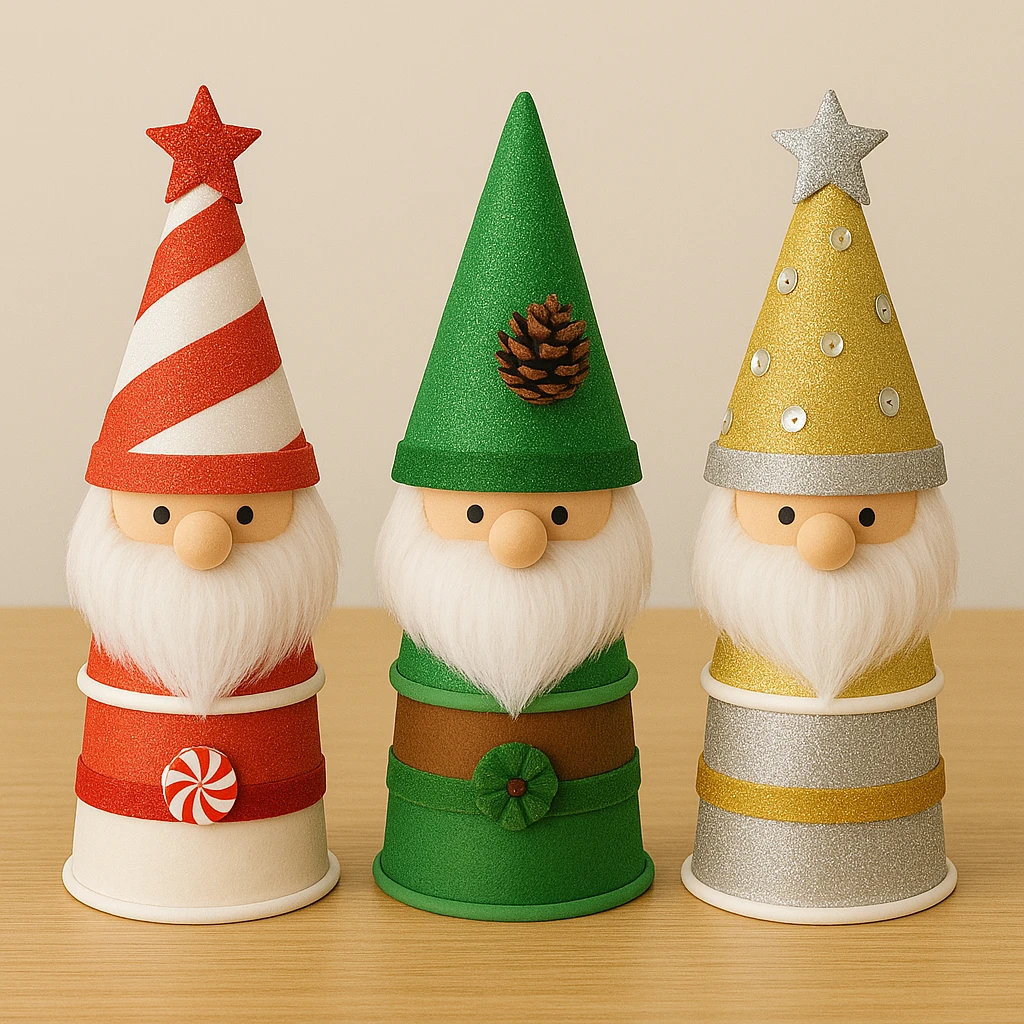
Customization Ideas
Candy Cane Gnome: Use red and white striped paper and peppermint-themed stickers. Swap the yellow star for a red-and-white bow.
Woodland Gnome: Use earthy tones like browns and greens. Add a pine cone or felt leaf to the hat instead of a star.
Sparkle Gnome: Go all-in with metallic papers, gold foil trim, and sparkly sequin accents. Use a glitter star topper for maximum shine.
Educational/Seasonal Uses
This craft makes a fantastic winter art project for classrooms. Kids can practice cutting, measuring, gluing, and assembling—a perfect blend of creativity and hands-on learning. It's also a great project to teach symmetry and design basics.
Gnome towers work wonderfully as holiday table decor, gift toppers, or even classroom competition entries. Set up a crafting station during a holiday party and let everyone design their own gnome character.
Printable Template Section
To make this project even easier for younger children or group settings, use our printable coloring template. It includes pre-sized hat shapes and cup wraps that you can print, color, cut, and glue directly onto your cups.
Let kids personalize their gnomes by coloring in hat patterns or drawing festive symbols before assembling. This turns the craft into both an art project and a fun, hands-on holiday activity that’s ready in under an hour.

Conclusion
These Whimsical Santa’s Workshop Gnome Towers are a delightful way to celebrate the season with creativity and charm. Whether you’re decorating your home, planning a classroom activity, or simply looking for a magical way to spend a winter afternoon, this DIY project is festive, fun, and totally customizable. Grab your paper cups and start crafting your own little gnome village today!
Whimsical Santa’s Workshop Gnome Towers From Stacked Paper Cups
Equipment
- Scissors
- Craft glue or glue stick
- Pencil and ruler
Materials
- 3 Standard 8 oz paper cups Per gnome
- Glitter foam sheets (assorted colors)
- Faux fur fabric or cotton For beard
- 1 Small wooden bead or pom-pom For nose
- Mini star toppers Foam or wooden
- Decorative tape or ribbon
- Holiday stickers, buttons, or embellishments
Instructions
- Start by choosing three sturdy paper cups for each gnome. Make sure they are clean and dry before decorating.
- Measure the height and circumference of each cup and cut strips of glitter foam or colored paper to wrap around them. Glue them securely and decorate with ribbons or buttons.
- Cut a 6-inch triangle from glitter foam, roll into a cone, and glue into a hat shape. Decorate the hat and top with a foam star.
- Trim faux fur into a beard shape and glue it below the top cup's rim. Add a wooden bead or pom-pom as a nose at the center.
- Stack the decorated cups using glue between each for stability. Top with the hat and let dry for 30 minutes before displaying.