
Halloween is the perfect time to dive into spooky, silly, and creative crafts with your little ones. This DIY Handprint Mummy Craft is a wonderfully simple project that brings big results with minimal mess. Whether you're crafting with toddlers, preschoolers, or early elementary kids, this fun Halloween activity is sure to delight.
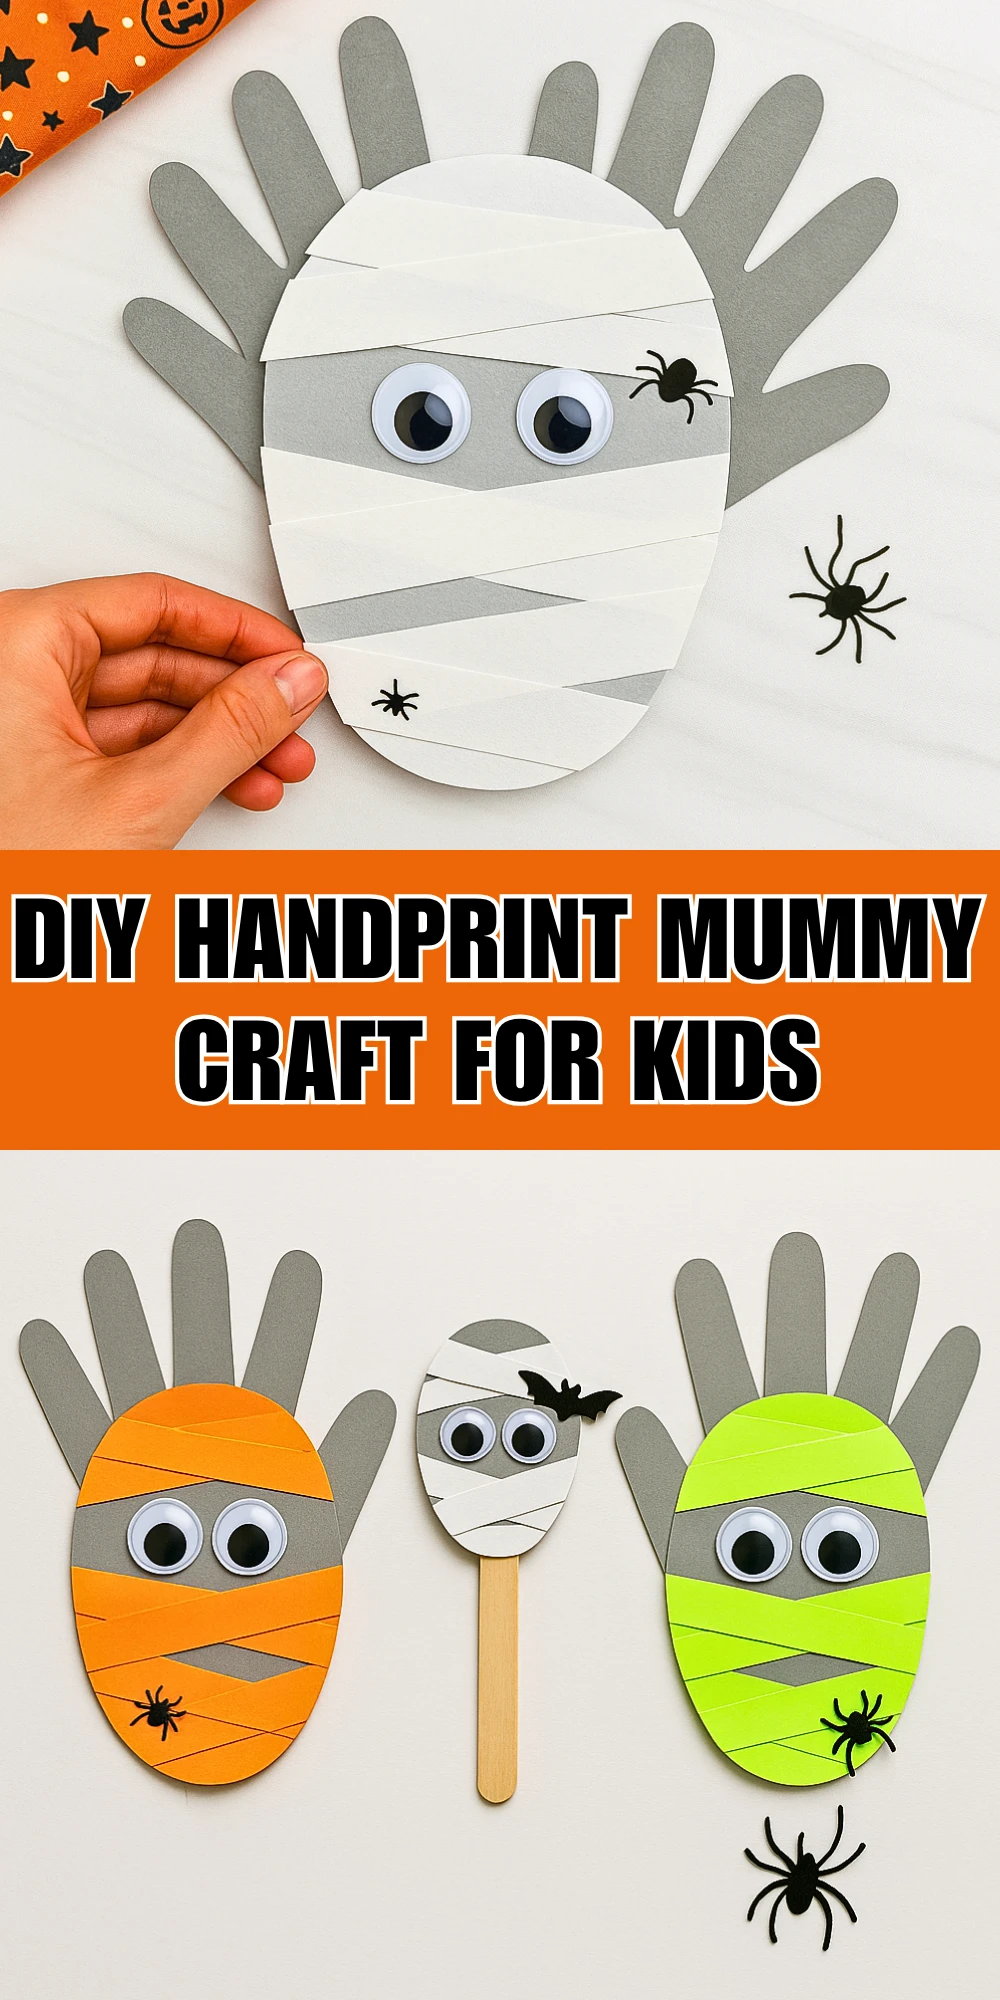
Using just paper, glue, and a bit of imagination, kids will transform their own handprints into a mummy that’s more cute than creepy. It's a fantastic opportunity to build fine motor skills, spark creativity, and add a fun handmade touch to your seasonal decorations. Plus, it’s budget-friendly and easy enough to prep in a classroom or at home.
Materials Needed
- Gray construction paper (1–2 sheets)
- White paper or white construction paper
- Googly eyes (2 per mummy)
- Glue stick
- Scissors (child-safe recommended)
- Pencil
- Optional: small black paper spiders or black marker for drawing spiders

Step 1: Trace and Cut the Handprints
Begin by tracing your child's hands on gray construction paper using a pencil. You'll need two handprints per mummy. Carefully cut out the handprints — these will form the mummy's "body background" and add a fun, personalized touch.
Step 2: Cut and Shape the Mummy’s Head
Using another piece of gray construction paper, cut out an oval shape roughly the size of your child’s palm. This oval will become the mummy’s head and face. Don’t worry if it’s not perfect — handmade charm is the goal here!
Step 3: Glue the Handprints as a Background
Position the handprints so that the fingers fan outward like spooky shadows behind the head. Glue them down first on your base (paper or table protector), then glue the oval head over them, centered at the bottom of the palms. The fingers should peek out like creepy wrappings!
Step 4: Add White Mummy Wrapping Strips
Cut several strips of white paper. These should be about half an inch wide and long enough to stretch across the mummy’s head. Glue the strips diagonally across the gray oval, leaving a gap in the middle for the eyes. Feel free to layer them at different angles for a more wrapped-up look.
Step 5: Attach Googly Eyes
Now it’s time to bring your mummy to life! Stick two googly eyes in the space you left between the white strips. This will give the mummy a playful, animated look that kids will love.
Step 6: Draw or Glue on Spiders for Extra Spookiness
For a spooky finishing touch, draw little black spiders with legs peeking out from the wrappings, or glue on paper spiders if you have some. This little detail adds extra Halloween flair and gives kids a chance to get creative.
Customization Ideas
- Switch up the colors! Use green or purple construction paper for a fun, colorful mummy.
- Make an entire mummy family using different-sized handprints from each family member.
- Attach a craft stick to the back and turn it into a puppet for imaginative Halloween play.

Educational or Seasonal Uses
This craft fits perfectly into Halloween lesson plans or weekend activity bins. Teachers can pair it with spooky storytime or a unit on Ancient Egypt for a thematic twist. Display them around the classroom or home to create a festive atmosphere that celebrates both creativity and the season.
Printable Template
Want to make this project even easier? Use our free printable template! It includes handprint outlines, mummy head shapes, and white strips all ready to be printed, colored, and cut. Perfect for teachers or group craft time — just print and pass them out.
With this template, there's no need to worry about sizing or tracing. Everything’s ready for your child to dive straight into the creative fun!
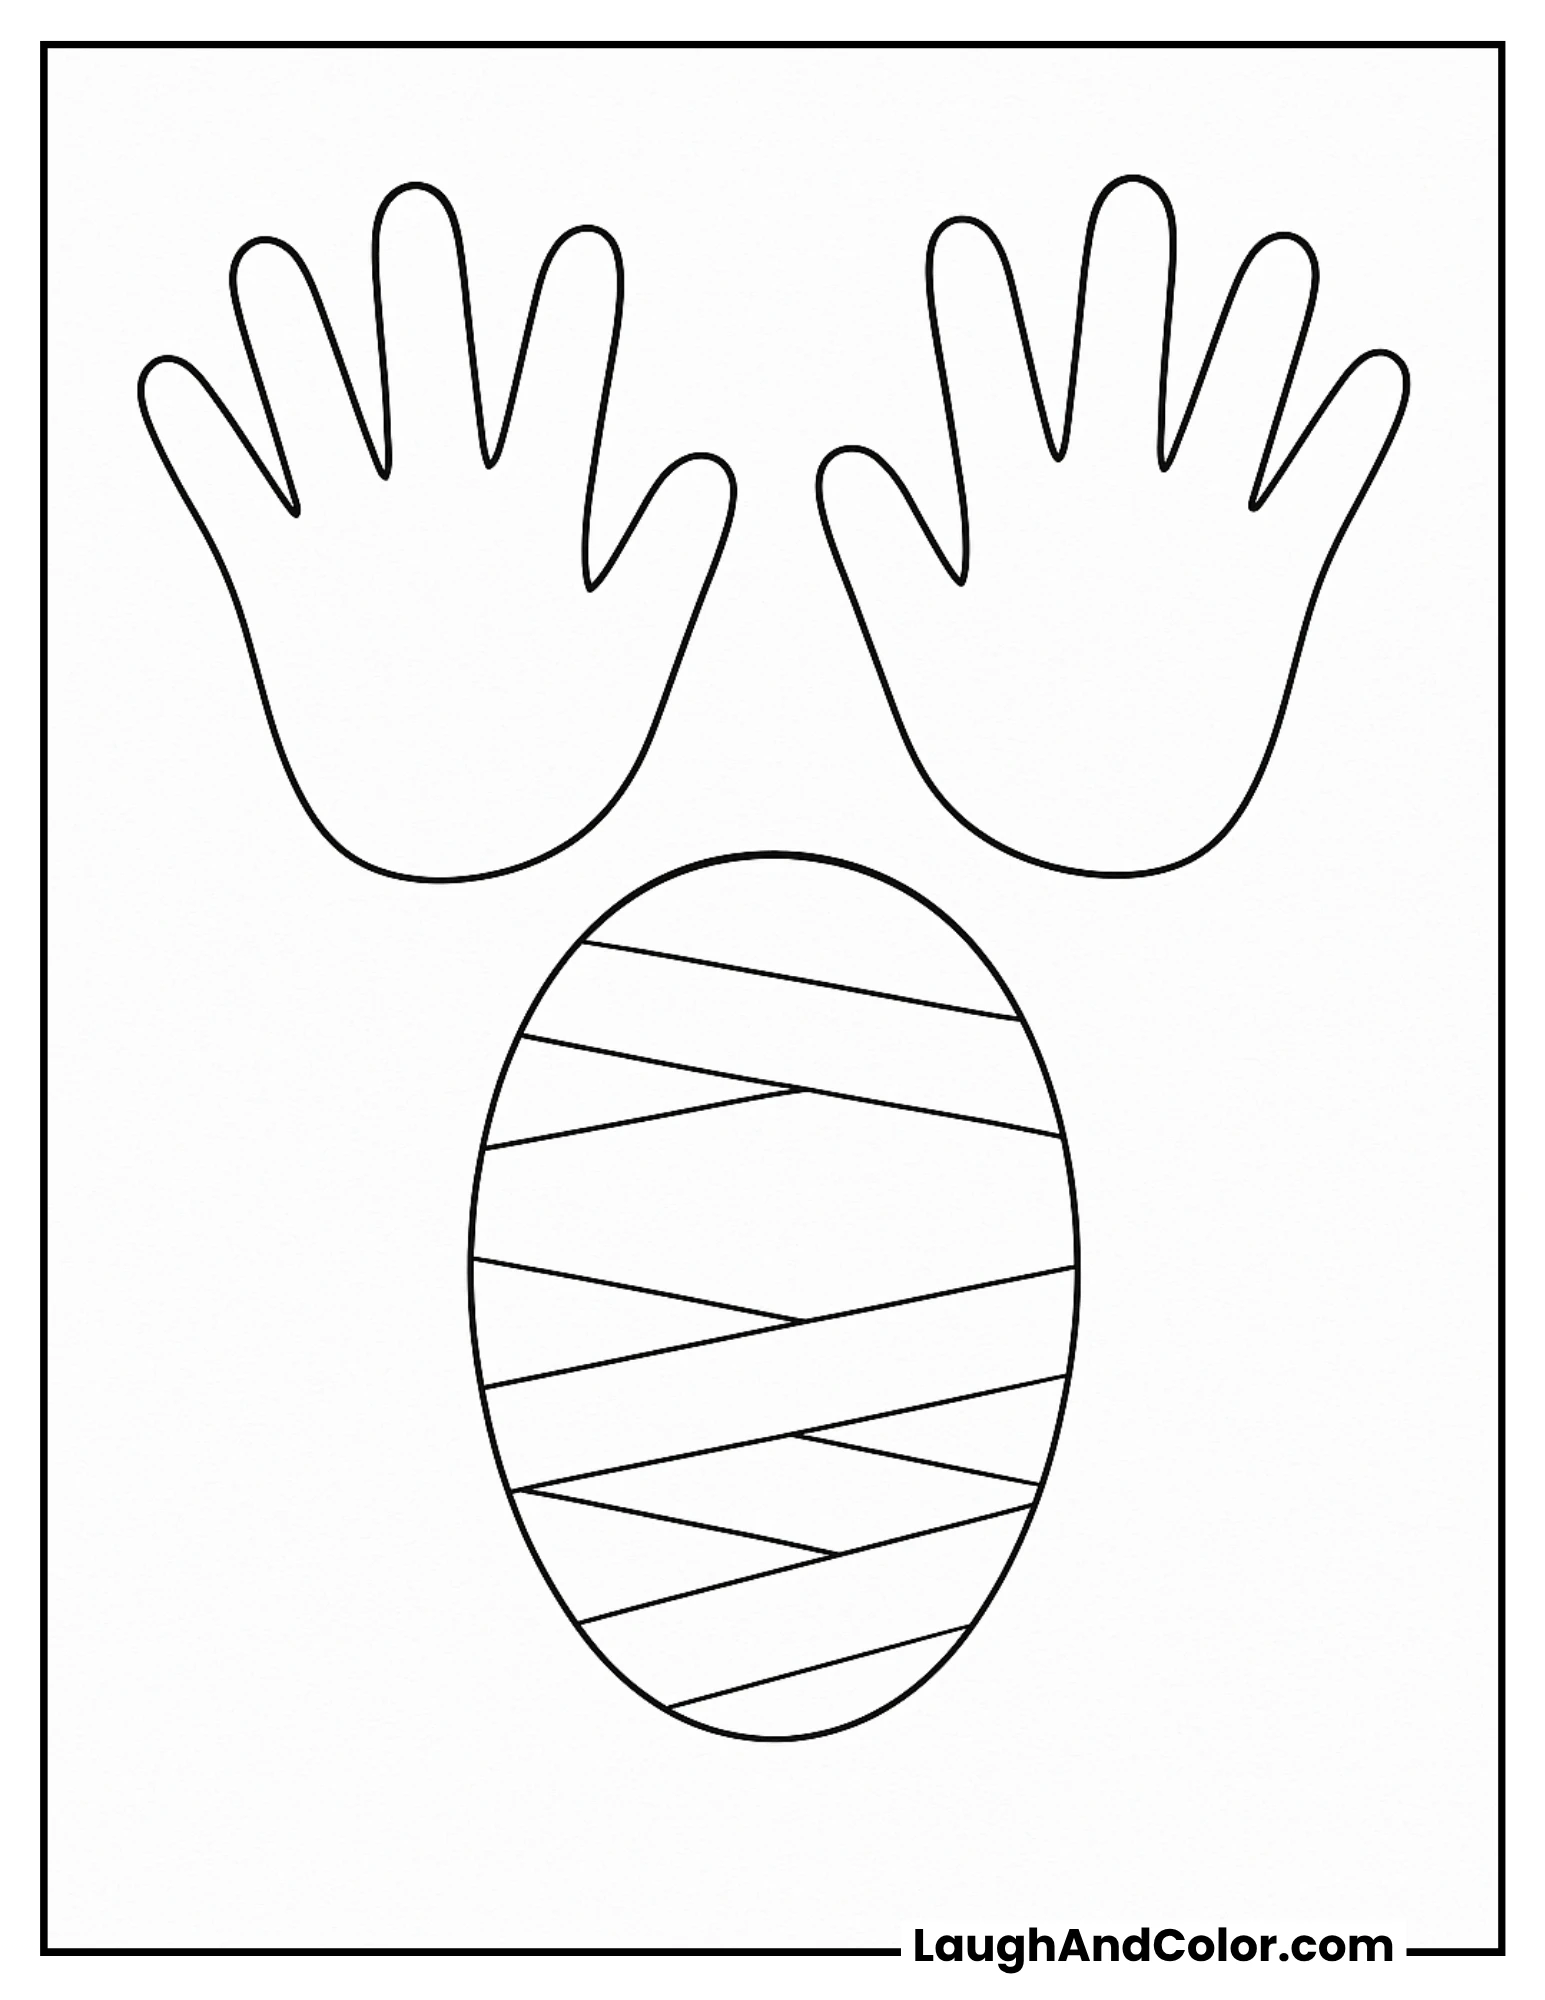
DIY Handprint Mummy Craft Coloring Page
Conclusion
This DIY Handprint Mummy Craft is the perfect mix of fun and fright for Halloween. It’s a simple and creative way to get kids involved in the holiday spirit while making something they’ll be proud to show off. Share your finished mummies with friends, family, or even your classroom wall — they’re too cute to keep hidden in the crypt!
DIY Handprint Mummy Craft for Kids – A Fun and Easy Halloween Project
Equipment
- Scissors
- Glue stick
- Pencil
Materials
- Gray construction paper 1–2 sheets
- White paper or white construction paper
- 2 Googly eyes Per mummy
- Small black paper spiders or black marker Optional for decoration
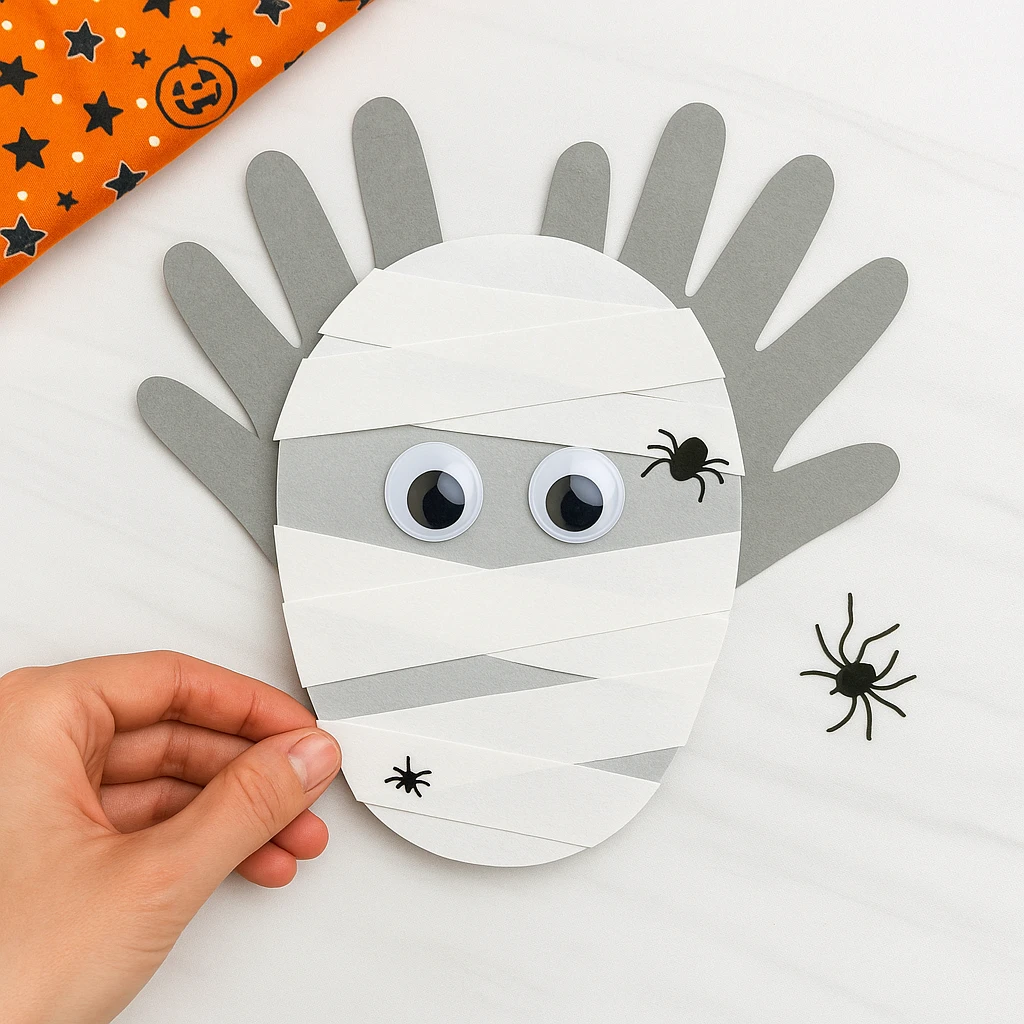
Instructions
- Trace your child's hands on gray construction paper and cut out two handprints.
- Cut an oval from gray construction paper to make the mummy’s head.
- Glue the handprints behind the oval so fingers stick out like a spooky background.
- Cut white paper into thin strips and glue them diagonally across the oval to look like mummy wrappings. Leave space for the eyes.
- Glue on two googly eyes in the open space left between the wrappings.
- Add spider decorations using stickers, paper cutouts, or by drawing them with a marker.