
The holiday season is the perfect time to get creative with kids, and this Woodland Reindeer Tube Craft is both festive and fun. It’s a simple project that uses recycled materials, making it a budget-friendly and eco-conscious way to keep children entertained during the colder months. Whether you're crafting at home, in a classroom, or for a holiday party, this cute reindeer is guaranteed to bring smiles.

This easy DIY project helps develop fine motor skills, encourages imaginative play, and introduces children to the concept of upcycling. Best of all, the final product makes a charming decoration or handmade gift. With just a few basic supplies and a cardboard tube, you can transform ordinary items into an adorable woodland friend ready to prance into the holiday spirit.
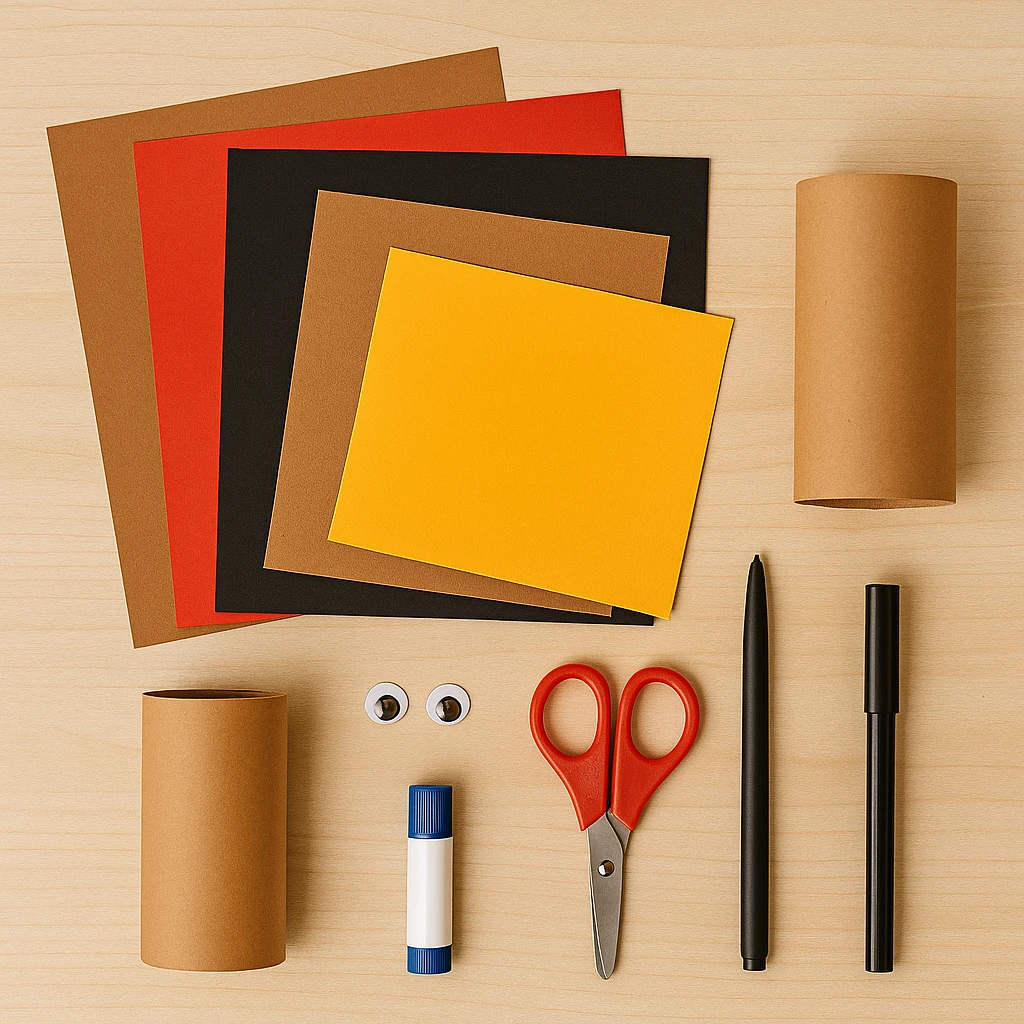
Materials Needed
- 1 toilet paper roll or cardboard tube (approx. 4 inches tall)
- Brown construction paper (to wrap the tube and for ears)
- Red, black, white, and yellow construction paper (for facial features and accessories)
- Googly eyes (optional if not using paper eyes)
- Scissors
- Glue stick or craft glue
- Pencil
- Black marker
Step 1: Wrap the Tube
Begin by cutting a piece of brown construction paper wide enough to cover the cardboard tube completely. Apply glue along one edge of the paper and wrap it around the tube until fully covered. Secure the edge with glue and smooth it down.
Tip: Pre-cut the paper to 4 inches high and about 6 inches wide to perfectly fit a standard toilet paper roll.
Step 2: Create and Attach the Reindeer Face
Cut two white circles (about 1 inch wide) for the eyes and two smaller black circles for the pupils. Glue them near the top center of the tube. Cut a red circle for the nose and glue it just below the eyes. Use a black marker to draw a simple smiling mouth underneath the nose.
Optional: Use googly eyes instead of paper for a 3D effect.
Step 3: Make and Add the Antlers and Ears
Draw and cut two antlers from brown construction paper, approximately 3–4 inches tall. Glue them to the inside rim of the top of the tube so they stick up like real antlers. Then cut two small oval shapes for ears and attach one on each side of the tube, just below the antlers.
Helpful Hint: Fold the base of the ears slightly to make them easier to glue on and give a more 3D look.
Step 4: Add the Collar and Bell
Cut a strip of red paper to create a collar around the bottom of the reindeer's face. Secure it with glue. Then cut a small bell shape out of yellow paper and glue it to the center of the collar.
Craft Tip: Add dimension by curling the bell edges slightly or outlining it with a black pen for definition.
Step 5: Final Touches and Display
Check to make sure all parts are secure and allow the glue to dry. Add any extra embellishments like glitter, stickers, or even a tiny bow if desired. Once dry, your woodland reindeer is ready to be displayed on a shelf, desk, or used as part of a festive table centerpiece.
Customization Ideas
1. Sparkly Holiday Reindeer: Use glittery gold or silver paper for the antlers and collar. Add a shiny foil nose and use star stickers for decoration.
2. Mini Reindeer Herd: Create a set of reindeer using slightly smaller or larger tubes. Use different colors for each nose—red, green, blue—to represent different characters.
3. Hanging Reindeer Ornaments: Punch a small hole on either side of the top of the tube and thread a ribbon through to hang the reindeer on the Christmas tree.

Educational or Seasonal Uses
This project fits wonderfully into a winter or holiday curriculum. It encourages recycling, teaches kids to follow multi-step instructions, and can be part of a lesson on woodland animals or Christmas traditions. Perfect for classrooms, homeschool activities, or community events.
Pair it with a read-aloud of "Rudolph the Red-Nosed Reindeer" or other festive books to build a holiday-themed educational experience. Teachers can even use this craft to open discussions about animals in the winter and their adaptations.
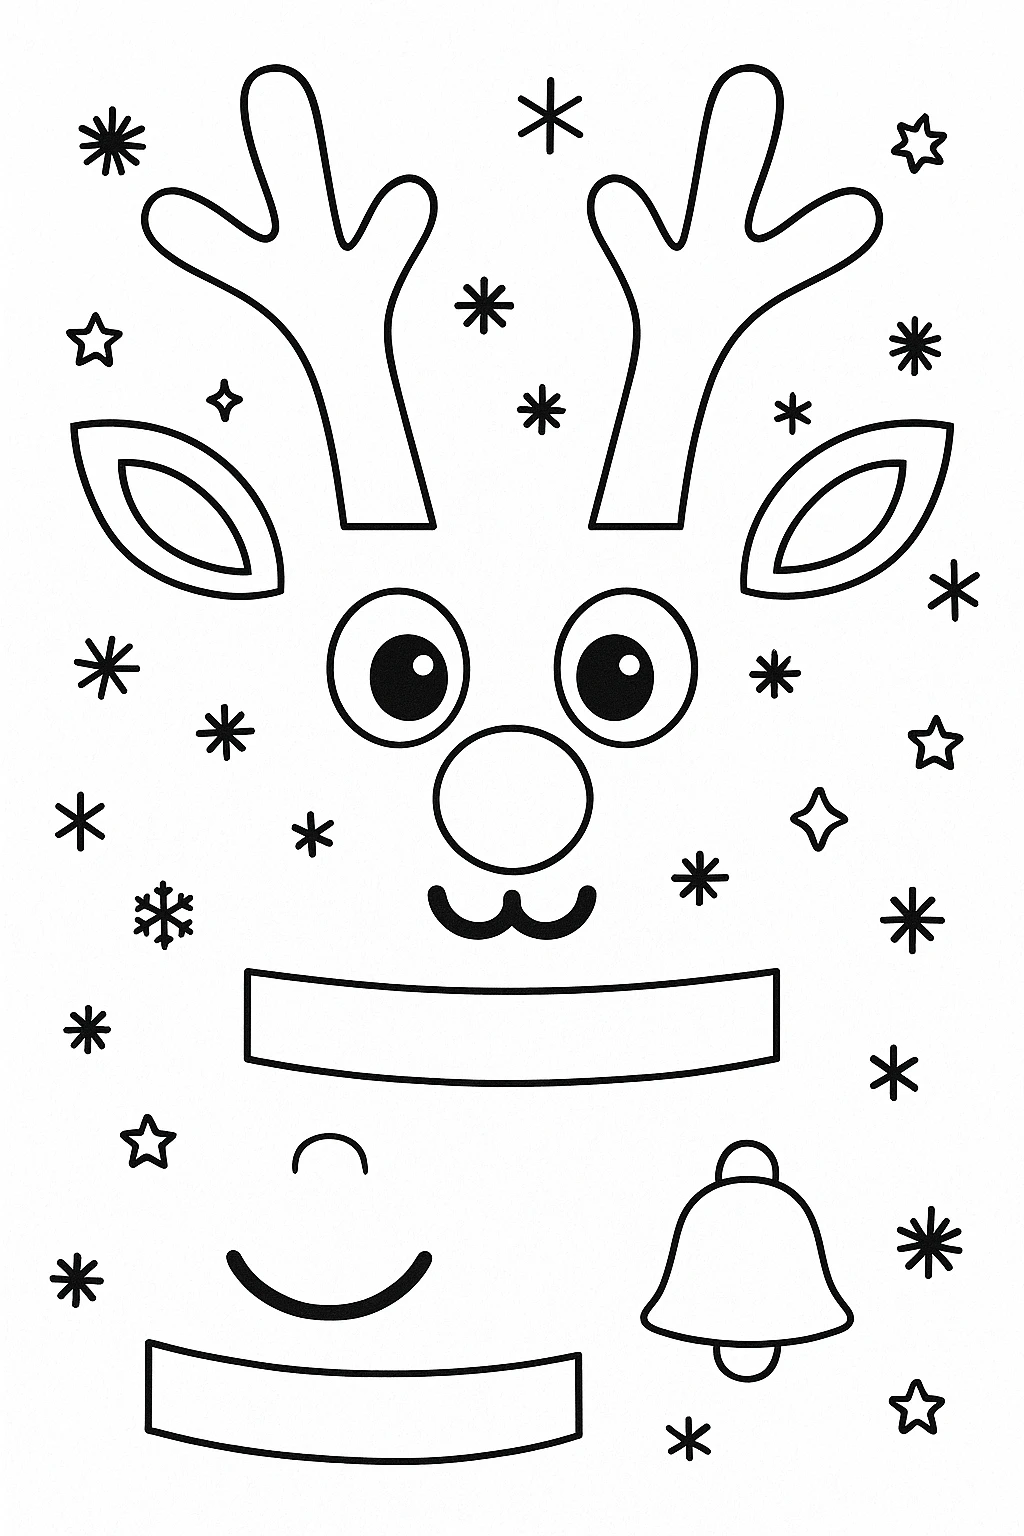
Printable Template
To make this project even easier, we’ve included a ready-to-use printable template. Simply print it out on cardstock or paper, and all the facial features, ears, antlers, and collar pieces are included.
Kids can color in the pieces before cutting and assembling for a more personalized approach. This printable saves time, especially when crafting with a group.
Conclusion
The Woodland Reindeer Tube Craft is a fun and festive way to get kids involved in holiday crafting. It’s easy to make, uses simple materials, and offers plenty of room for creative customization. Whether displayed at home or in the classroom, these little reindeer are sure to bring holiday cheer and a sense of accomplishment to every young crafter.
Get out your supplies, print the template, and let the magic of holiday crafting begin!

Woodland Reindeer Tube Craft for Kids
Equipment
- Scissors
- Glue stick or craft glue
- Pencil
- Black marker
Materials
- 1 Toilet paper roll or cardboard tube
- Brown construction paper To wrap the tube and for ears
- Red construction paper For the nose and collar
- Black construction paper For the pupils or mouth
- White construction paper For the eyes
- Yellow construction paper For the bell
- Googly eyes Optional
Instructions
- Step 1: Cut a piece of brown construction paper (4" x 6") and wrap it around the cardboard tube. Glue it securely in place.
- Step 2: Cut out two white circles for eyes, two black circles for pupils, and a red circle for the nose. Glue them onto the front of the tube. Draw a smiling mouth underneath with a black marker.
- Step 3: Cut out two antlers from brown paper and two ear shapes. Glue antlers inside the tube's top and ears to the sides under the antlers.
- Step 4: Cut a red paper strip for a collar and glue around the bottom of the reindeer’s face. Add a yellow paper bell to the center of the collar.
- Step 5: Let the glue dry completely. Add any embellishments you like. Display your woodland reindeer proudly!