
If you're searching for a fun and simple fall activity to do with kids, this Woodland Owl Craft is the perfect hands-on project. With its bold colors, adorable design, and easy-to-follow steps, it's a fantastic way to introduce children to basic paper crafting. Whether you're planning a weekend family activity or a seasonal school craft, this owl makes a wonderful addition to any autumn display.
This project is great for developing fine motor skills through cutting, gluing, and positioning paper pieces. It also offers a chance for kids to learn about woodland animals and the changing seasons in a fun, creative setting. Best of all, it's budget-friendly and requires only a few common materials — many of which you may already have at home or in the classroom.
Materials Needed
To make this woodland owl craft, you’ll need:
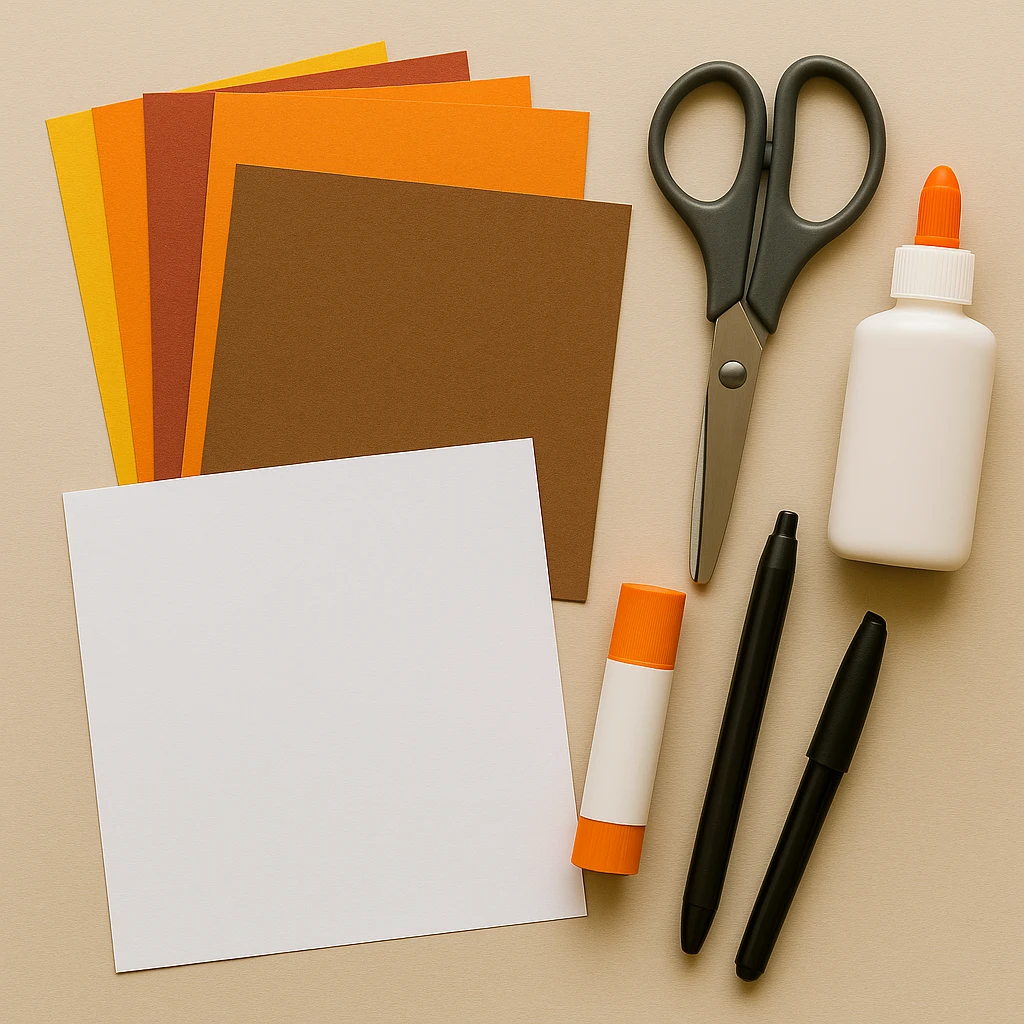
- Brown cardstock or construction paper (for the owl body and branch)
- Light brown or tan paper (for the owl belly and face accents)
- Orange paper (for beak and feet)
- Red, yellow, and orange paper (for fall leaves)
- White paper (for eyes)
- Black marker or black paper (for pupils)
- Scissors
- Glue stick or white glue
- Pencil (optional for tracing)
Tip: If crafting with a group, pre-cutting some pieces in advance can save time and help younger children focus on the assembling and decorating.
Step 1: Prepare Your Owl Template
Start by either drawing your own simple owl shape or using a printable owl template. The main body should be a rounded shape with two small ear points at the top. If you're using a template, print it on sturdy paper or cardstock to make tracing easier.
Step 2: Cut Out the Owl Body and Features
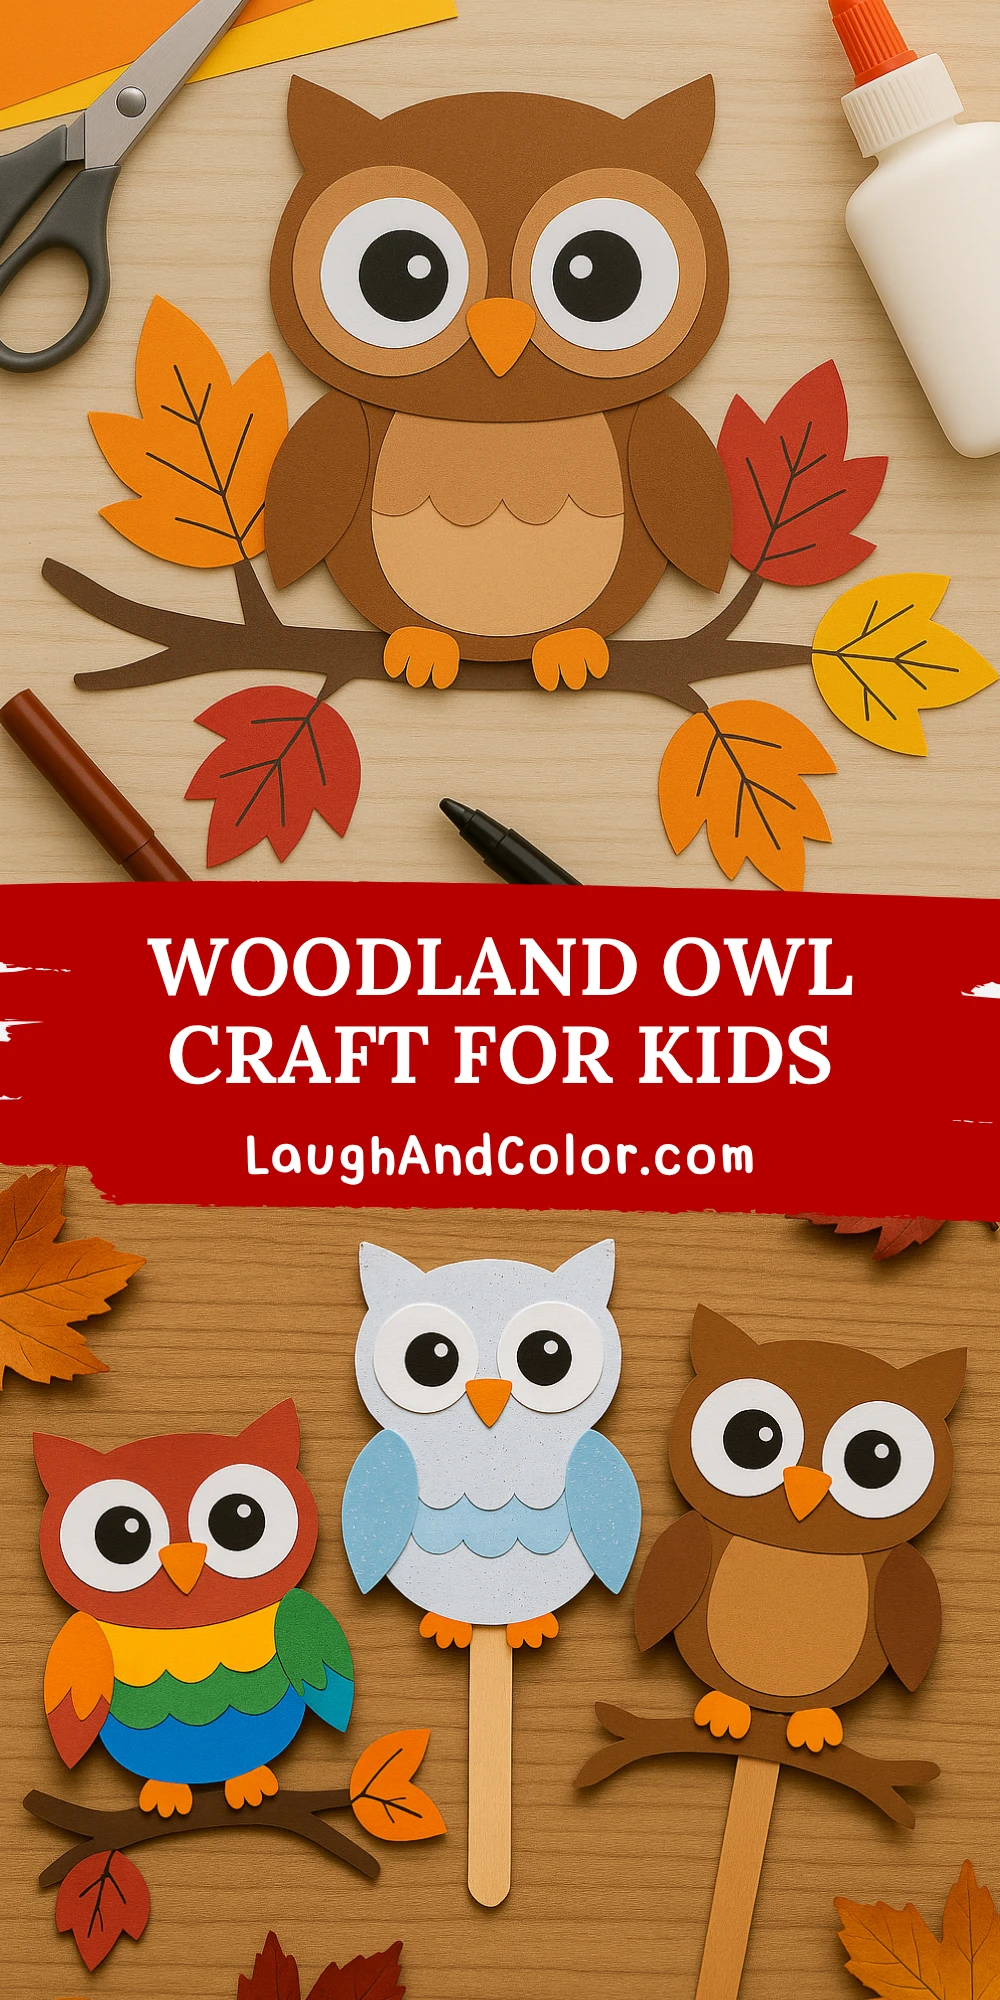
Trace the owl body onto brown paper and cut it out. Next, trace and cut out the belly, face circles, wings, beak, and feet using the suggested colors. For the eyes, cut two large white circles and two smaller black circles for the pupils.
Step 3: Assemble the Owl's Face and Wings
Glue the lighter face circles onto the upper part of the owl body. Add the white and black circles to form the eyes. Place the beak in the center between the eyes. Then, attach the wings to each side of the owl body, curving slightly outward to give it character.
Step 4: Make and Attach the Tree Branch
Cut a branch shape from brown paper. It should be wide enough for the owl to "sit" on it. Glue the owl's feet so they slightly overlap the branch, then glue the branch onto the bottom of the owl or the background paper if you're mounting it.
Step 5: Add Fall Leaves for Decoration
Cut out several leaves in fall colors like red, orange, and yellow. Add vein lines with a black marker for detail. Arrange and glue the leaves around the branch to complete the woodland scene. You can also let kids place them wherever they like for a personalized look.
Step 6: Final Touches and Display Ideas
Let the craft dry completely. Then, display the finished owl on a bulletin board, fridge, or window. You can also turn it into a greeting card or add a loop at the top to hang it as a fall decoration.
Customization Ideas
Rainbow Owl: Use bright rainbow colors for the owl body and wings instead of traditional browns. Great for non-seasonal crafting or party decor.
Winter Owl: Make a snowy owl using white, silver, and light blue papers. Add glitter or snowflake stickers for a wintery feel.
Owl Puppet: Glue your finished owl onto a wooden craft stick or paper bag to create a puppet. Kids can use it for storytelling or pretend play.

Educational and Seasonal Uses
This woodland owl craft is ideal for autumn themes and woodland animal studies. Teachers can use it alongside lessons about owls, their habitats, and seasonal changes. It's also a perfect fit for activities centered around the letter "O," fall festivals, or storybook tie-ins like Owl Babies.
Printable Template
To make this craft even easier, we've included a printable owl template. Just print the outline on cardstock or regular paper and use it to trace and cut out the shapes. The template includes the owl body, face pieces, feet, and leaves — ready to color or trace onto colored paper.
Kids can color directly on the template if preferred, which makes this a fantastic on-the-go craft or classroom-friendly project. Simply print, color, cut, and glue — no extra measuring required!

Conclusion
The Woodland Owl Craft is a charming and easy project that children will love making and sharing. It encourages creativity, enhances fine motor skills, and brings a little woodland magic to any fall activity plan. Whether you're at home or in the classroom, this project is sure to be a hoot!

Woodland Owl Craft for Kids
Equipment
- Scissors
- Glue stick or white glue
- Pencil (optional)
Materials
- Brown cardstock or construction paper for owl body and branch
- Light brown or tan paper for belly and face
- Orange paper for beak and feet
- Red, yellow, and orange paper for fall leaves
- White paper for eyes
- Black marker or black paper for pupils and leaf veins
Instructions
- Start by drawing or printing a simple owl shape template. Use cardstock for durability. Cut out the template for tracing.
- Trace the owl body onto brown paper and cut it out. Cut belly, face circles, wings, beak, feet, and eyes from the appropriate colored paper.
- Glue the face circles and eyes to the owl body. Attach the beak and wings in place.
- Cut a tree branch shape from brown paper. Glue the owl's feet overlapping the branch, and secure the branch under the owl or to the background paper.
- Cut leaves from red, orange, and yellow paper. Use a black marker to draw veins. Glue the leaves around the branch.
- Let dry completely, then display on a wall, door, or window. Add a loop of string if you'd like to hang it.