
Bring a dash of mischief and a whole lot of holiday cheer to your desk with this Whoville Grinch Standing Ornament Craft! Inspired by the iconic green character we all love to loathe, this festive project is an easy and fun way to get into the Christmas spirit. Whether you're crafting with kids, decorating your workspace, or looking for a playful addition to your holiday décor, this Grinchy ornament will steal the spotlight—without stealing Christmas!
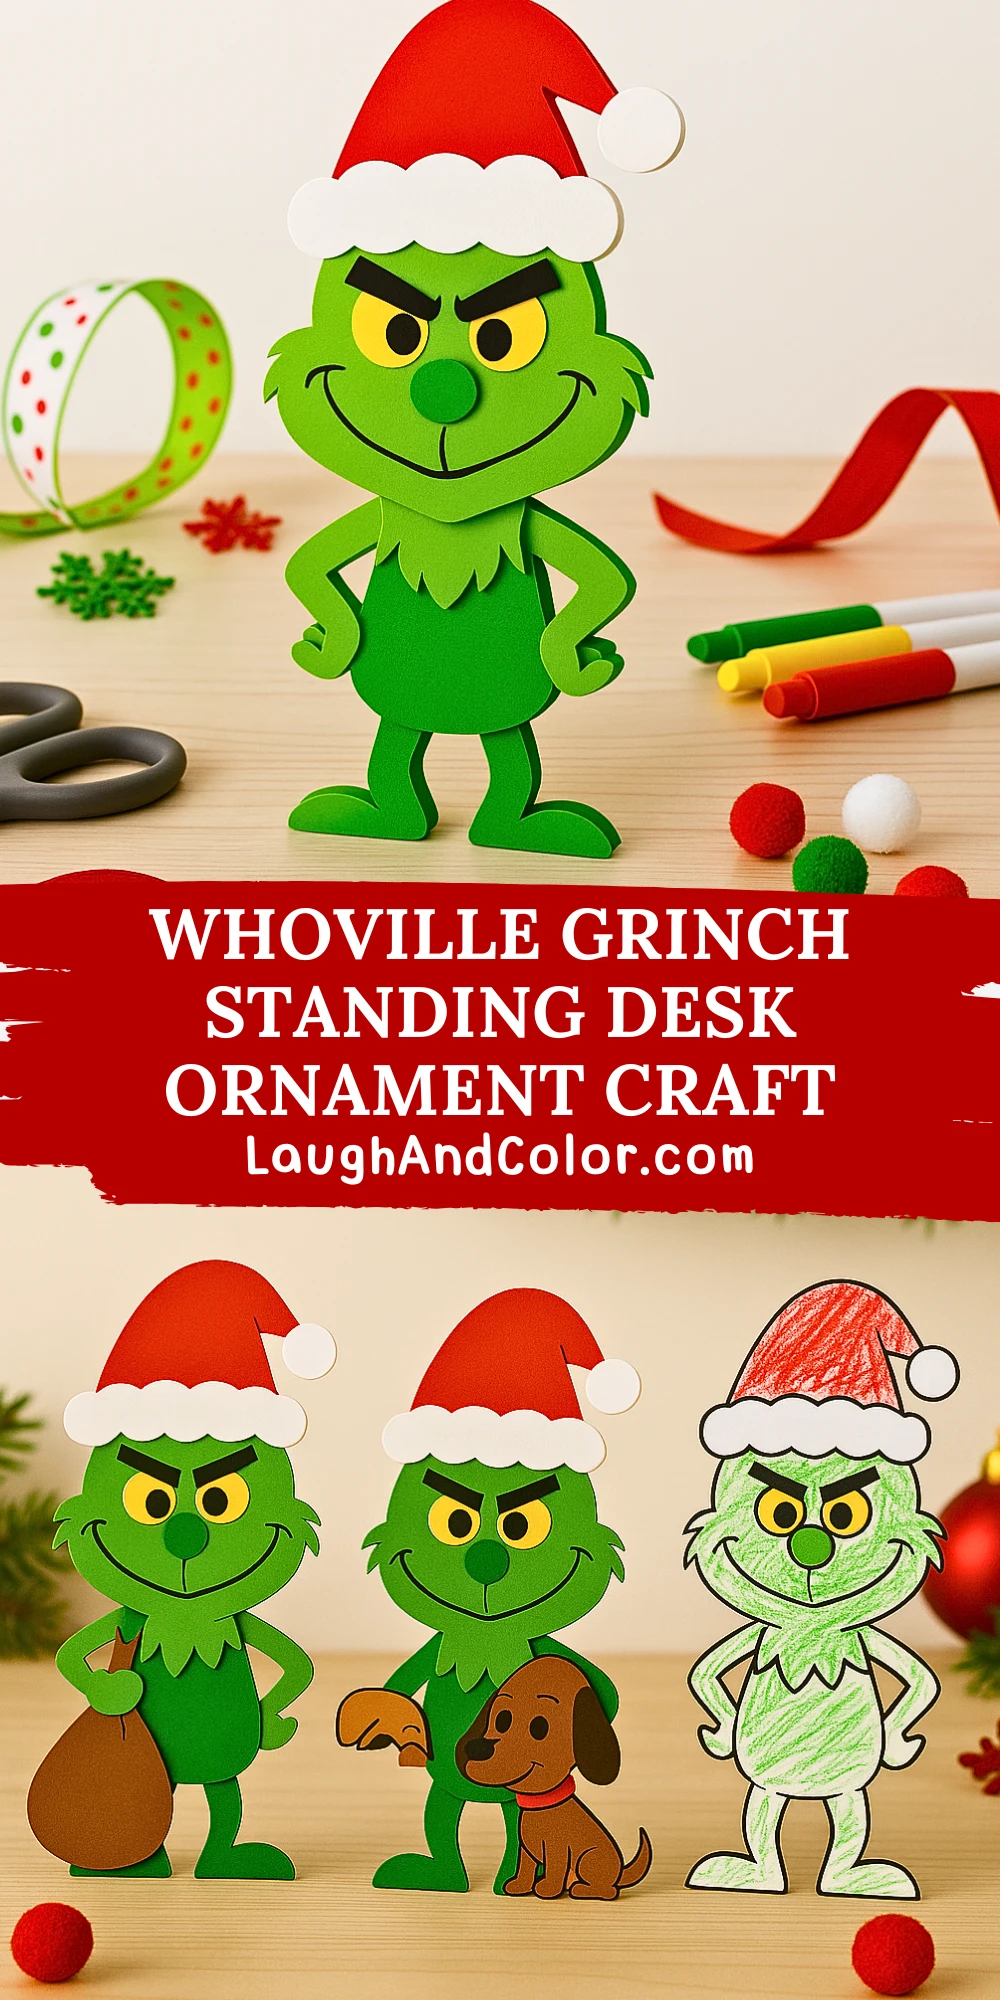
This standing ornament is made using simple materials like colored cardstock, glue, and scissors, and includes a printable template that makes it a breeze to assemble. Kids will enjoy putting their favorite grumpy character together, while adults will appreciate how adorable (and just a bit naughty) it looks standing tall on any shelf or desk. Let’s dive into this creative Whoville-inspired activity!
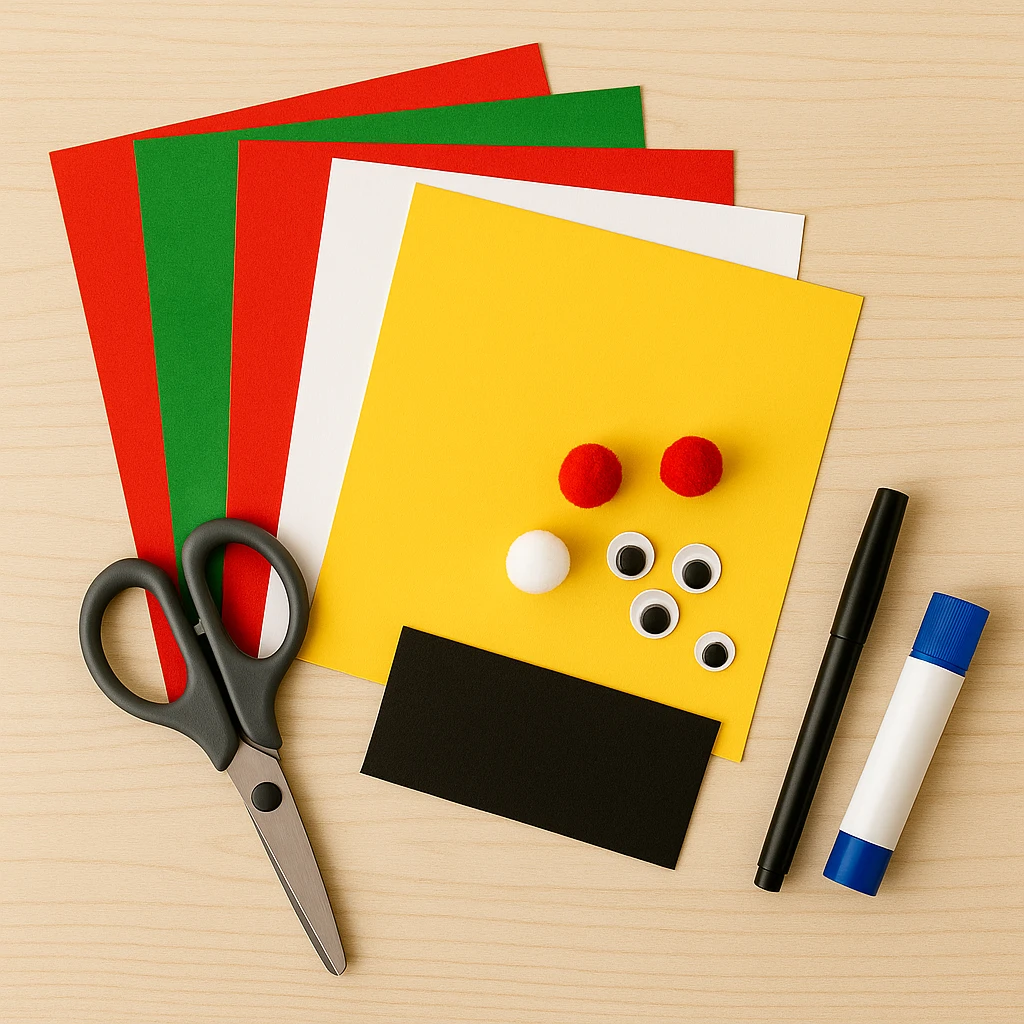
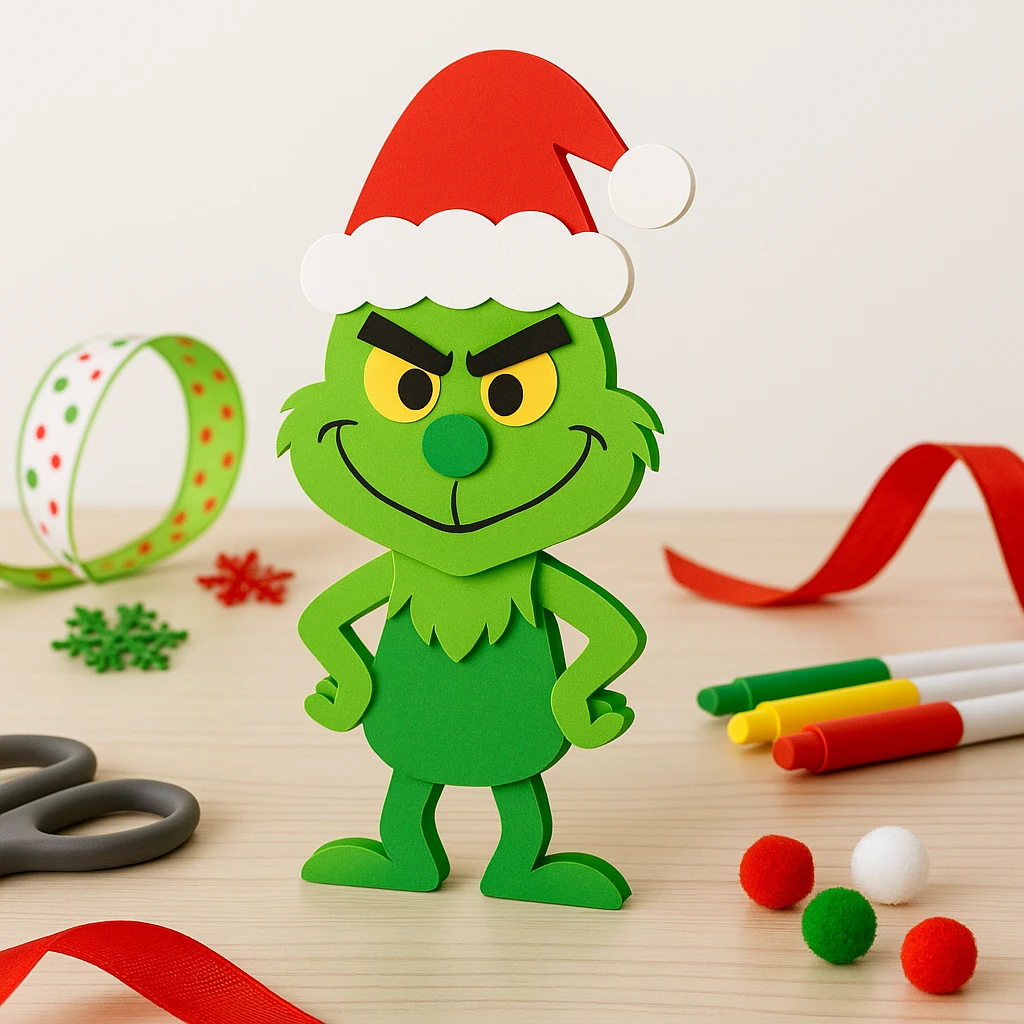
Materials Needed
- Green cardstock (for body and face)
- Red cardstock (for Santa hat)
- White cardstock (for hat trim)
- Yellow cardstock (for eyes)
- Black cardstock (for eyebrows)
- Red and white pom-poms (optional, for added 3D effect)
- Black marker
- Scissors
- Glue stick
- Printable Grinch template (see Part 4)
- Optional: googly eyes
Step-by-Step Instructions
Step 1: Print and Cut Out the Template
Download and print the Grinch ornament template on standard printer paper. Carefully cut out each piece—these will be your guides for tracing onto colored cardstock.
Step 2: Trace and Cut Cardstock Pieces
Using the template pieces, trace each shape onto the corresponding cardstock color. Cut out all parts, including the Grinch's head, body, eyes, facial features, and Santa hat. For the best result, use clean, sharp scissors for smooth edges.
Step 3: Assemble the Grinch’s Face
Start with the Grinch’s head. Glue the yellow eye shapes in place, then add the black eyebrows and nose. Use a black marker to draw his signature mischievous smile. If you prefer, use googly eyes for a fun 3D look!
Step 4: Add Facial Details and Hat
Glue the red Santa hat onto the top of the Grinch’s head. Add the white trim and a white pom-pom to the tip of the hat. You can substitute the pom-pom with a white cardstock circle if needed. Let the face and hat dry completely.
Step 5: Attach Body and Arms
Glue the head to the green body cutout. Then, attach the arms on either side, angled to show the Grinch’s iconic smug posture. Make sure everything is aligned properly before pressing down.
Step 6: Stand Him Up!
To make the Grinch stand, fold a strip of cardstock into a triangle or box shape and glue it to the back of the ornament as a support stand. Allow the glue to dry thoroughly before placing it upright on a desk or shelf.
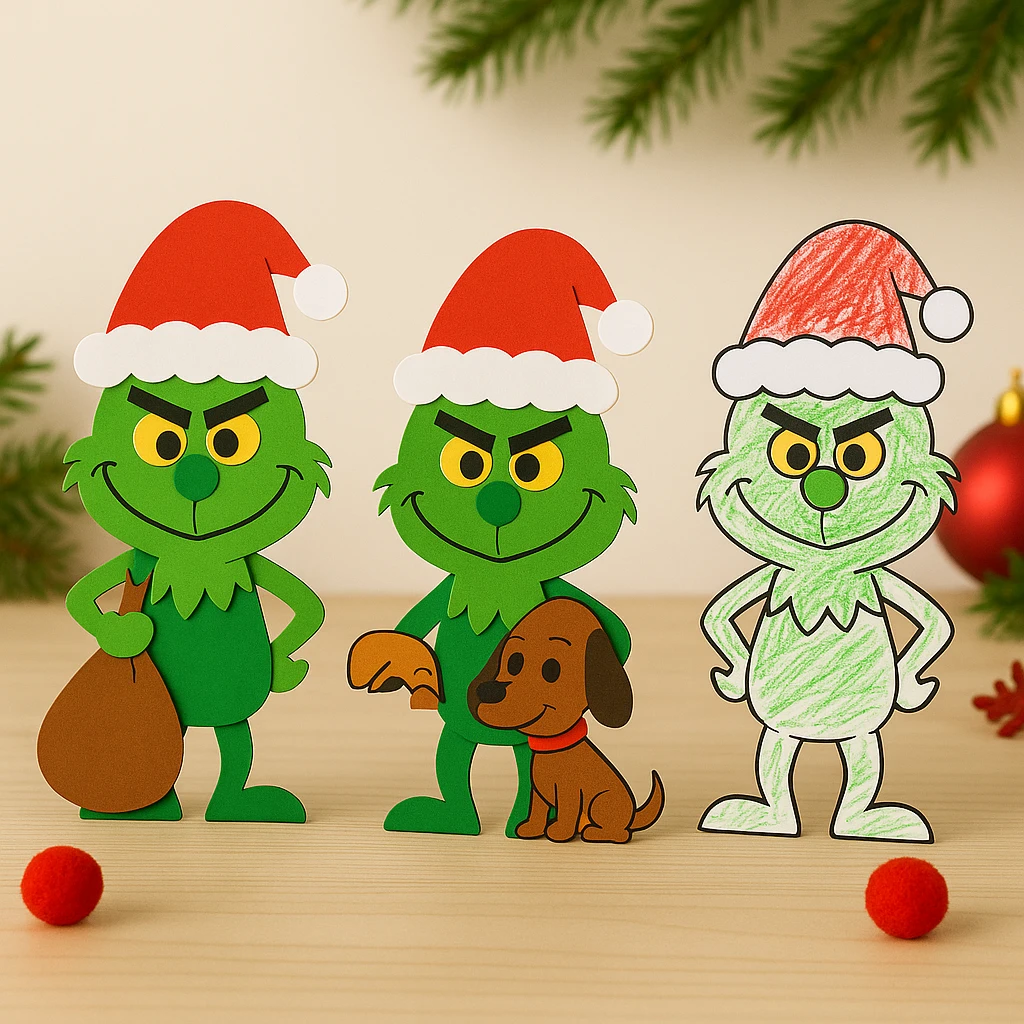
Customization Ideas
1. Santa Grinch with Gifts
Create a mini sack of gifts using scraps of paper or felt. Place it next to the Grinch to make it look like he's delivering presents—or stealing them!
2. Grinch with Max
Add a small cutout of Max, the Grinch’s loyal dog, using brown cardstock and attach him to the side of the ornament.
3. Color-Me Grinch
Print the template on plain white cardstock and let kids color in the Grinch using markers, crayons, or colored pencils. This is a great option for classrooms or group crafting.
Educational and Seasonal Uses
This Grinch ornament craft is perfect for holiday classroom activities, especially when paired with a reading of "How the Grinch Stole Christmas" by Dr. Seuss. It’s a great way to encourage story comprehension and creativity. It also helps younger children develop fine motor skills through cutting, tracing, and gluing. Whether used as a fun winter break project or a part of a festive celebration, this DIY adds a joyful (and slightly naughty) twist to traditional holiday crafts.
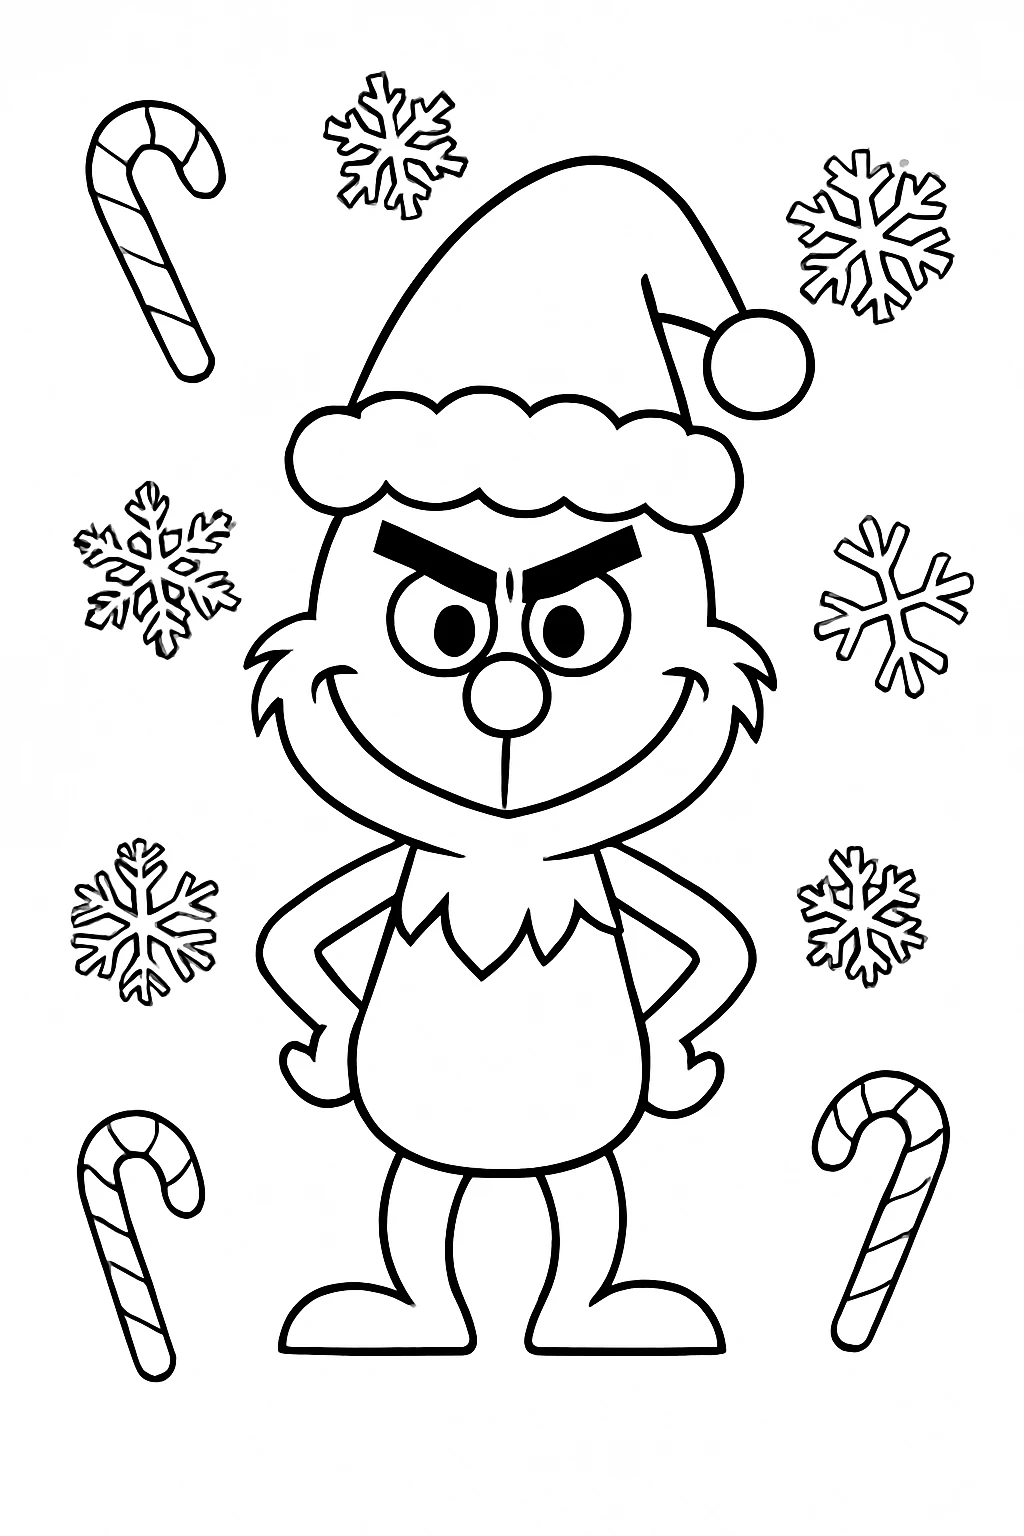
Printable Template
To make this craft even easier, we've provided a printable template with all the necessary shapes. Just print, trace, and go! For added creativity, try the coloring page version—kids can personalize their Grinch with wild colors or stick to the classic green-and-red palette. All you need is a printer and a few craft supplies, and you're ready to start crafting.
Conclusion
Crafting your own Whoville Grinch Standing Desk Ornament is a cheerful way to bring the holiday story to life. Whether you're decorating a child’s room, your office space, or a classroom, this fun little project captures the spirit of Christmas with a touch of Grinchy attitude. It’s simple, customizable, and perfect for all ages. Don’t be surprised if your Grinch ends up becoming the highlight of your holiday décor!
Whoville Grinch Standing Desk Ornament Craft
Equipment
- Scissors
- Glue stick
- Black marker
- Printer (for template)
Materials
- Green cardstock for body and face
- Red cardstock for Santa hat
- White cardstock for hat trim
- Yellow cardstock for eyes
- Black cardstock for eyebrows
- Red and white pom-poms optional for 3D hat detail
- Googly eyes optional
- Printable Grinch template
Instructions
- Print and cut out the Grinch template on standard printer paper. Cut out each piece to use as a tracing guide.
- Trace each shape onto the matching colored cardstock and cut them out using sharp scissors.
- Assemble the Grinch’s face by gluing on the eyes, eyebrows, and nose. Draw the smile with a black marker. Add googly eyes if desired.
- Glue the Santa hat to the top of the head. Add white trim and a pom-pom to the tip of the hat.
- Attach the head to the body cutout, then glue on the arms at the sides with the classic Grinch pose.
- Create a stand using folded cardstock and glue it to the back of the ornament so it can stand upright.