
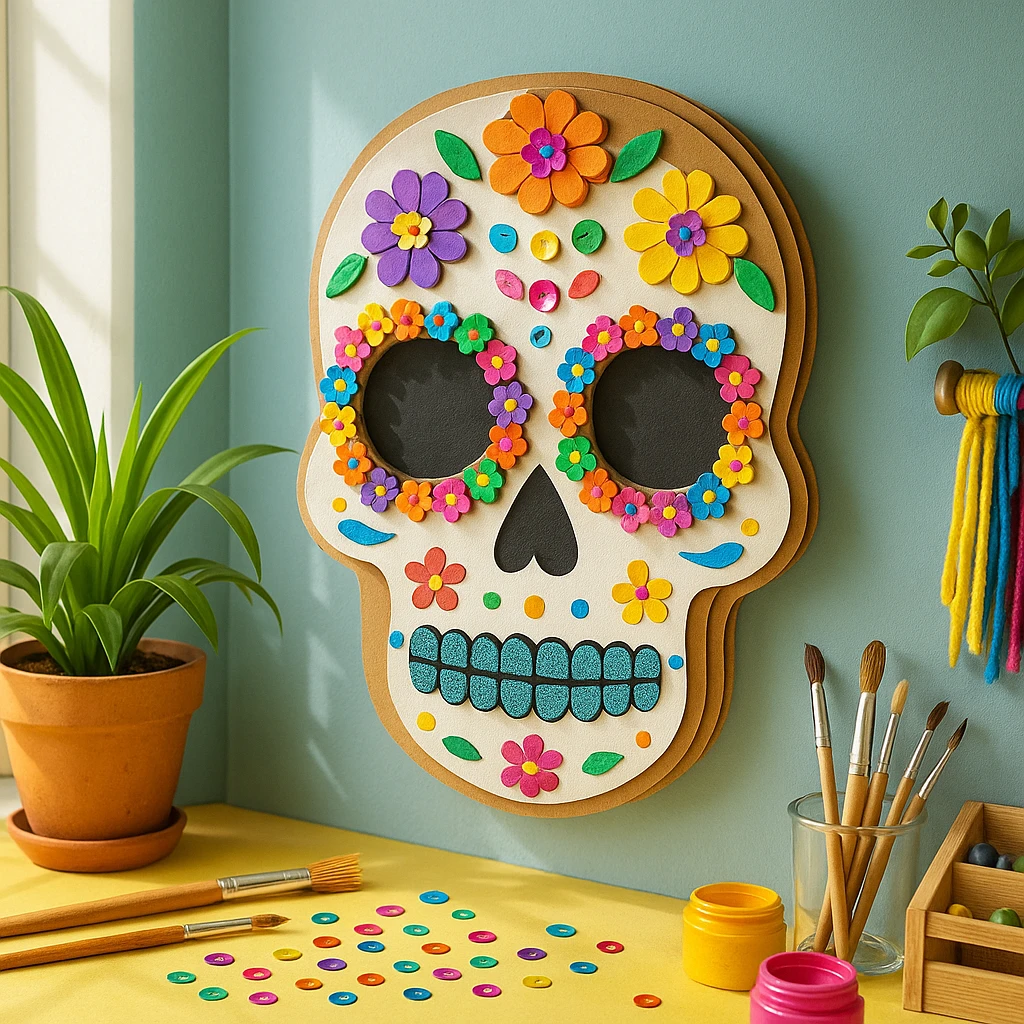
Celebrate cultural heritage with a bold and creative craft that brings color, meaning, and fun into your home or classroom. This Vibrant 3D Floral Sugar Skull Wall Decor project is inspired by the beautiful traditions of Dia de los Muertos. With its layered cardboard base and brightly colored floral decorations, this project transforms a classic symbol into a vivid piece of DIY wall art.

This sugar skull design encourages not only creativity but also an opportunity to teach and talk about Mexican traditions. Whether you're crafting with children, decorating for a seasonal event, or simply adding a festive touch to your home, this project is equal parts artistic and educational. Plus, it's easy to customize with your own flair.
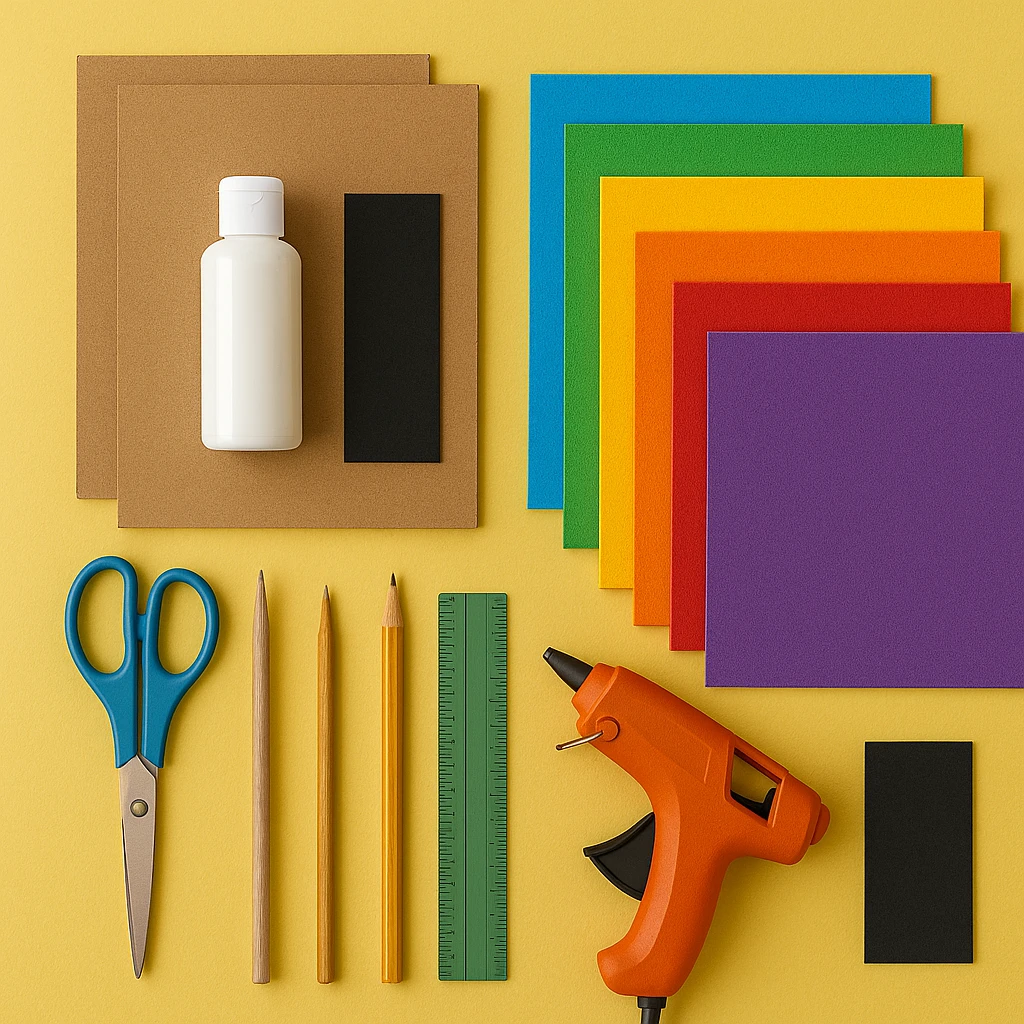
Materials Needed
- 2–3 pieces of sturdy cardboard (at least 12" x 16")
- White acrylic paint (or cream for a rustic look)
- Black craft foam or black paper
- Brightly colored foam sheets (assorted colors)
- Scissors and craft knife
- Hot glue gun and glue sticks
- Pencil
- Ruler
- Paintbrushes (1" flat and fine tip)
- Hole punch or circle sticker embellishments
- Hanging hardware (optional: adhesive hooks or string)
Step 1: Create the Skull Base
Using a pencil, sketch a large sugar skull outline on one piece of cardboard. The average size should be around 12 inches tall and 9 inches wide. Once satisfied with your shape, cut it out carefully using scissors or a craft knife.
Step 2: Add Depth with Layered Cardboard
Trace the skull outline onto a second piece of cardboard and cut it out. Repeat one more time to create a third layer. Stack and glue all three skull cutouts together with hot glue to give your skull a thick, 3D appearance. Let dry for 5–10 minutes.
Step 3: Paint and Prepare Background
Paint the front and sides of your skull base using white acrylic paint. Apply two coats for an even finish. Let dry completely. If you're using black craft foam for the eye sockets and nose, cut out two large circles (about 2.5 inches across) and one heart or triangle shape for the nose. Glue these in place.
Step 4: Attach 3D Floral Decorations
Punch out or cut small flowers from foam sheets in bright colors like orange, pink, green, purple, and yellow. Arrange and glue flowers around the eyes, forehead, and chin. Overlapping layers and varying sizes create a more natural and rich design.
Step 5: Add Facial Features and Details
Use colored foam or paint to create teeth shapes, cheek swirls, teardrops, or leaves. Glue them around the mouth and edges of the skull. Add round foam dots or stickers to mimic the sugar dot patterns typically seen on traditional skulls.
Step 6: Final Assembly and Hanging Setup
If you want to hang the sugar skull, glue a loop of string to the back or attach adhesive hanging strips. You can also prop it against a wall for shelf or tabletop display. Make sure all glue is dry and secure before hanging.
Customization Ideas
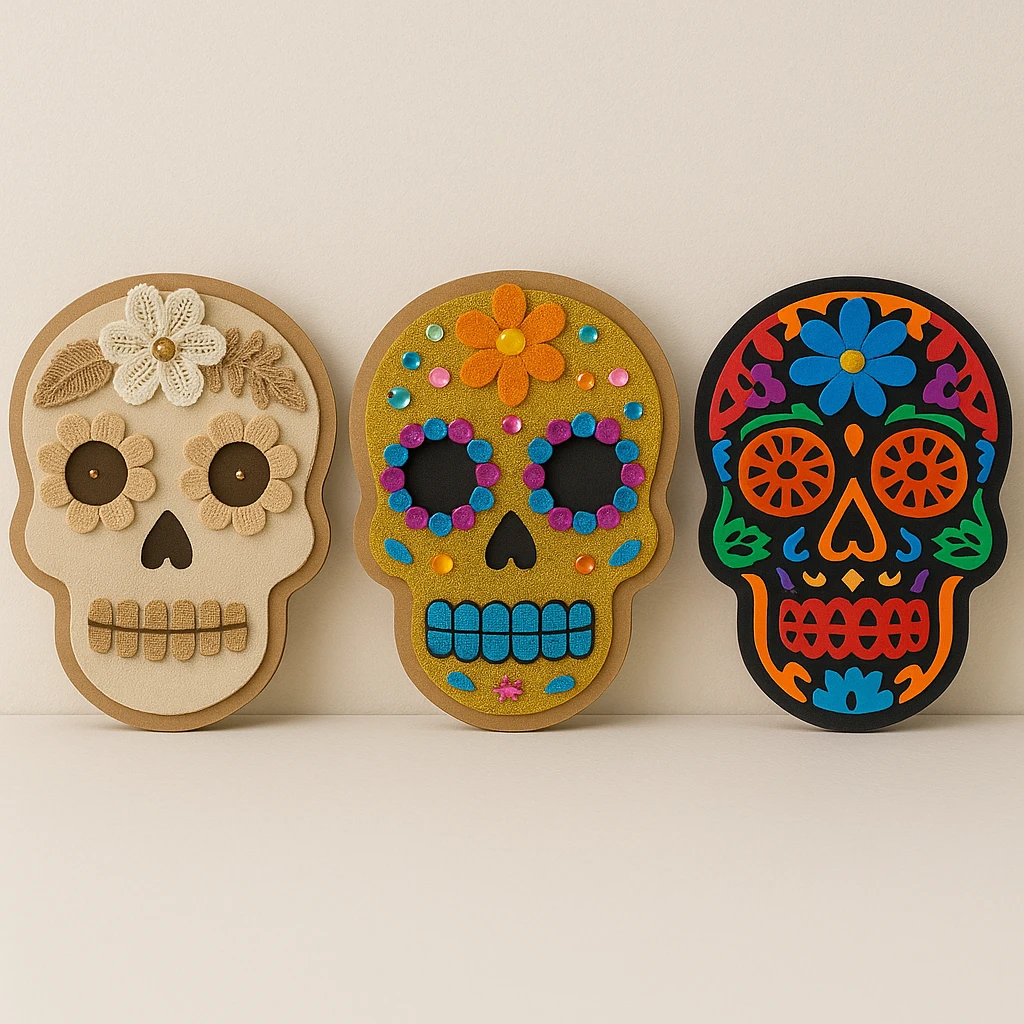
Boho Skull Style: Use soft neutral tones like ivory, sage, and blush. Add lace trim, burlap leaves, or wooden flowers for a delicate, vintage aesthetic.
Sparkle Skull: Go glam with glitter foam sheets, metallic paint, and rhinestones. Use gold, turquoise, and fuchsia for a stunning pop.
Traditional Papel Picado Look: Incorporate layers of intricately cut paper or use scissors to mimic papel picado patterns. Bright primary colors work best for this version.
Educational and Seasonal Uses
This craft is an excellent tool for classrooms teaching cultural diversity or celebrating Dia de los Muertos. Pair it with books or lessons about the significance of sugar skulls and altars. It's also great for libraries, museums, or home celebrations during the fall season.
You can simplify the design for younger kids by reducing the number of pieces and using pre-cut foam stickers. For teens or adults, encourage more intricate decorations and creative interpretations.
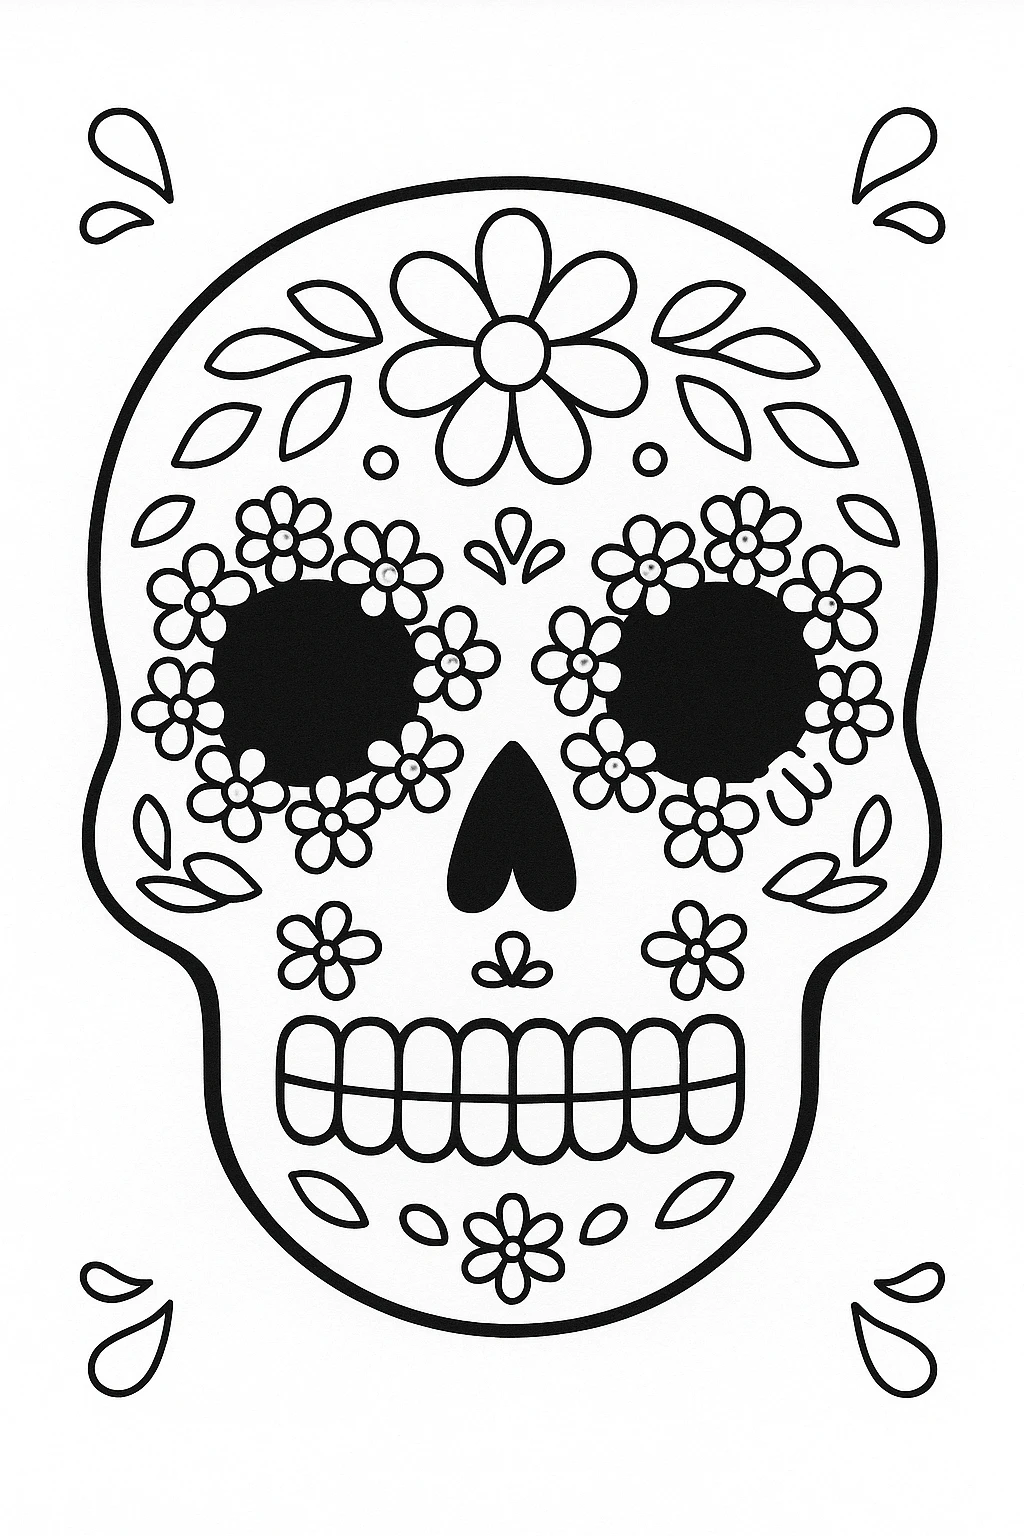
Printable Template
If you're short on time or want a cleaner version for group crafting, we’ve prepared a printable skull template that you can download and print. Just color it in with crayons, markers, or colored pencils, then cut and decorate with paper or foam embellishments.
The template is perfect for younger kids or classroom groups where pre-cutting is necessary. It still offers room for creativity without the need for sharp tools or paint, making it both safe and fun.
Conclusion
Making your own 3D Floral Sugar Skull Wall Decor is more than just a colorful project—it’s a chance to celebrate tradition, express creativity, and bring people together. With simple materials and a bit of imagination, you can create something meaningful and vibrant that lasts beyond the season.
Display it proudly, gift it to a friend, or use it to teach others about the beauty and symbolism behind Dia de los Muertos.
Vibrant 3D Floral Sugar Skull Wall Decor
Equipment
- Scissors
- Craft knife
- Hot glue gun
- Paintbrushes
- Hole punch
Materials
- 2–3 pieces Cardboard (12" x 16")
- White acrylic paint or cream for rustic finish
- Black craft foam or paper
- Colored foam sheets (assorted)
- Glue sticks for hot glue gun
- Pencil and ruler
- Circle sticker embellishments optional
- Hanging hardware string or adhesive hooks
Instructions
- Sketch a large sugar skull (about 12" tall) on cardboard and cut it out carefully with scissors or a craft knife.
- Trace and cut the skull shape on 2 more cardboard pieces. Stack and glue all three together to create a thick 3D base. Let dry.
- Paint the front and sides of the skull base white. Let dry. Cut out black eye sockets and a nose shape from foam, and glue in place.
- Cut or punch flowers from colored foam sheets. Glue around eyes, forehead, and jaw. Use overlapping layers for depth.
- Create teeth and decorative features using foam shapes or paint. Add colorful dot patterns and swirls around the skull.
- Attach hanging hardware or a loop of string on the back. Display on a wall or prop against a surface once glue is dry.