
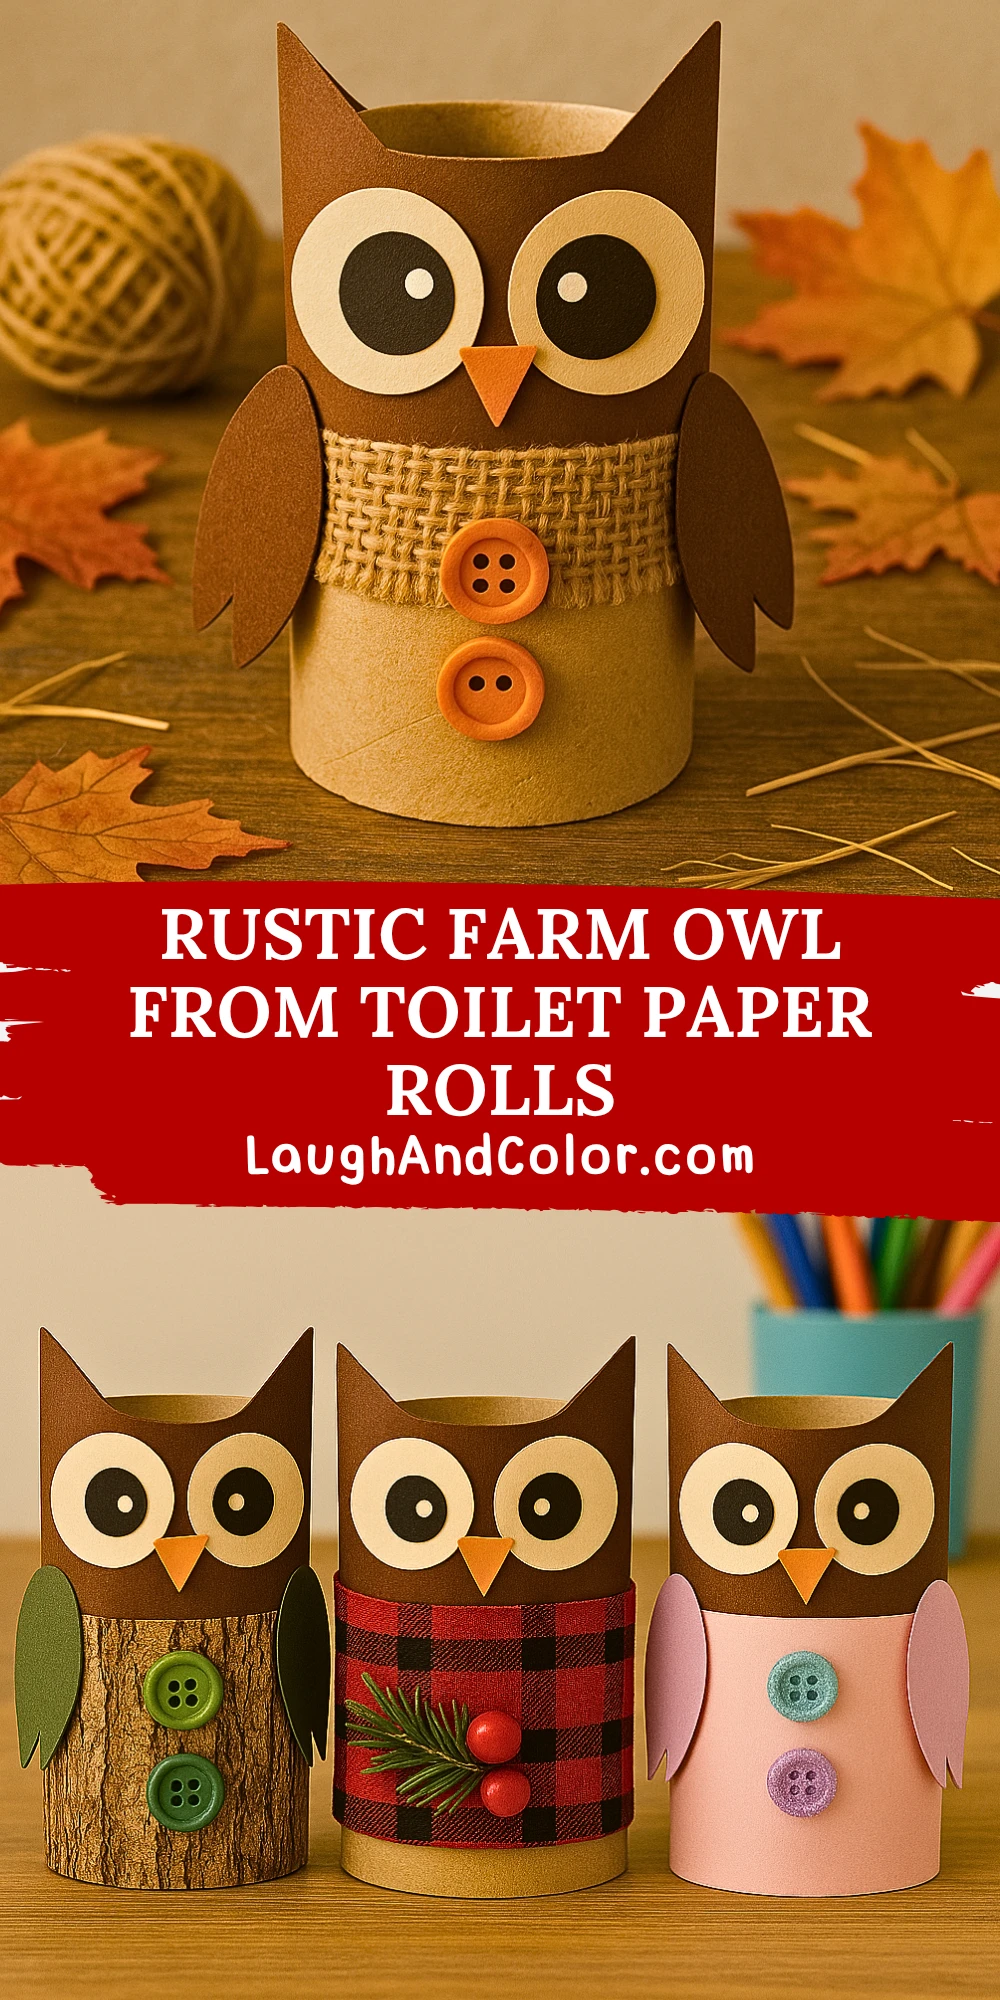
Transform ordinary toilet paper rolls into a charming rustic owl with this fun and eco-friendly DIY craft. This adorable owl brings the perfect touch of woodland whimsy to your home or classroom, especially during the fall season. Crafted with everyday supplies like burlap, buttons, and construction paper, this project is both budget-friendly and ideal for beginner crafters of all ages. Whether you're looking for a simple weekend activity or a classroom art project, this rustic owl is sure to be a hoot!
Kids will enjoy assembling and decorating their own owls, and adults will appreciate the farmhouse charm it brings to seasonal decor. Plus, it’s a creative way to reuse cardboard tubes and introduce sustainability through crafting. With just a few easy steps, you can turn recyclables into something beautiful and festive.
Materials Needed
- 1 empty toilet paper roll (approximately 4 inches tall)
- Dark brown, cream, and orange construction paper
- Burlap ribbon or fabric (approx. 1.5 x 6 inches)
- 2 orange buttons (0.75 inch wide)
- Scissors
- Craft glue or hot glue gun (adult supervision recommended)
- Black marker (optional, for extra detail)
- Pencil for tracing

Step-by-Step Instructions
Step 1: Prep the Toilet Paper Roll
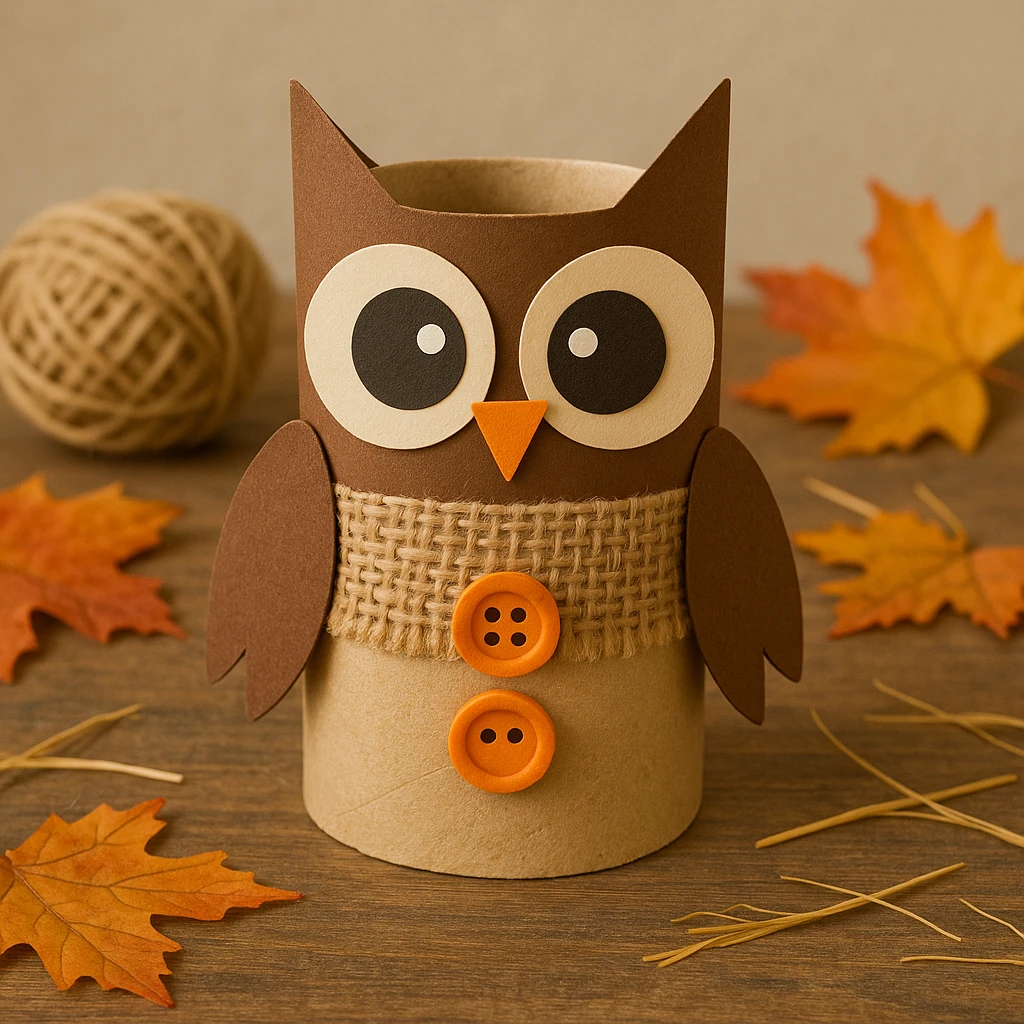
Start with a clean and dry toilet paper roll. If the edges are uneven or frayed, trim them with scissors to make a neat cylinder. Gently press the top rim inward from opposite sides to create two pointed “ears” at the top of your owl.
Step 2: Create the Owl’s Head and Ears
Cut a piece of dark brown construction paper large enough to wrap around the top half of the roll. Glue it in place, aligning the top corners with the ear folds to form the owl’s head. Let the paper stick out slightly at the top for a more dimensional look.
Step 3: Add the Eyes and Beak
Cut two cream-colored circles about 1.5 inches wide for the eye bases. Then, cut two smaller black circles for pupils and glue them on top of the cream circles. Center both eyes near the top of the roll. Next, cut a small orange triangle and glue it between and slightly below the eyes to form the beak.
Step 4: Wrap the Burlap Body
Cut a strip of burlap approximately 1.5 inches wide and long enough to wrap around the middle of the roll. Apply a line of glue around the roll and carefully press the burlap into place. Hold for a few seconds to ensure it sticks evenly. This step gives the owl a lovely farmhouse texture.
Step 5: Add the Wings
Cut two wing shapes from the dark brown paper, each around 3 inches tall. Curve them slightly to give the owl a more natural shape. Attach one wing to each side of the roll, just below the head section, so they gently wrap around the body.
Step 6: Finish with Buttons and Final Touches
Glue two orange buttons vertically down the center of the burlap section to represent the owl’s belly feathers. Let the glue dry completely before displaying your owl. You can also add small details with a black marker like feather lines or outlines on the wings if desired.
Customization Ideas
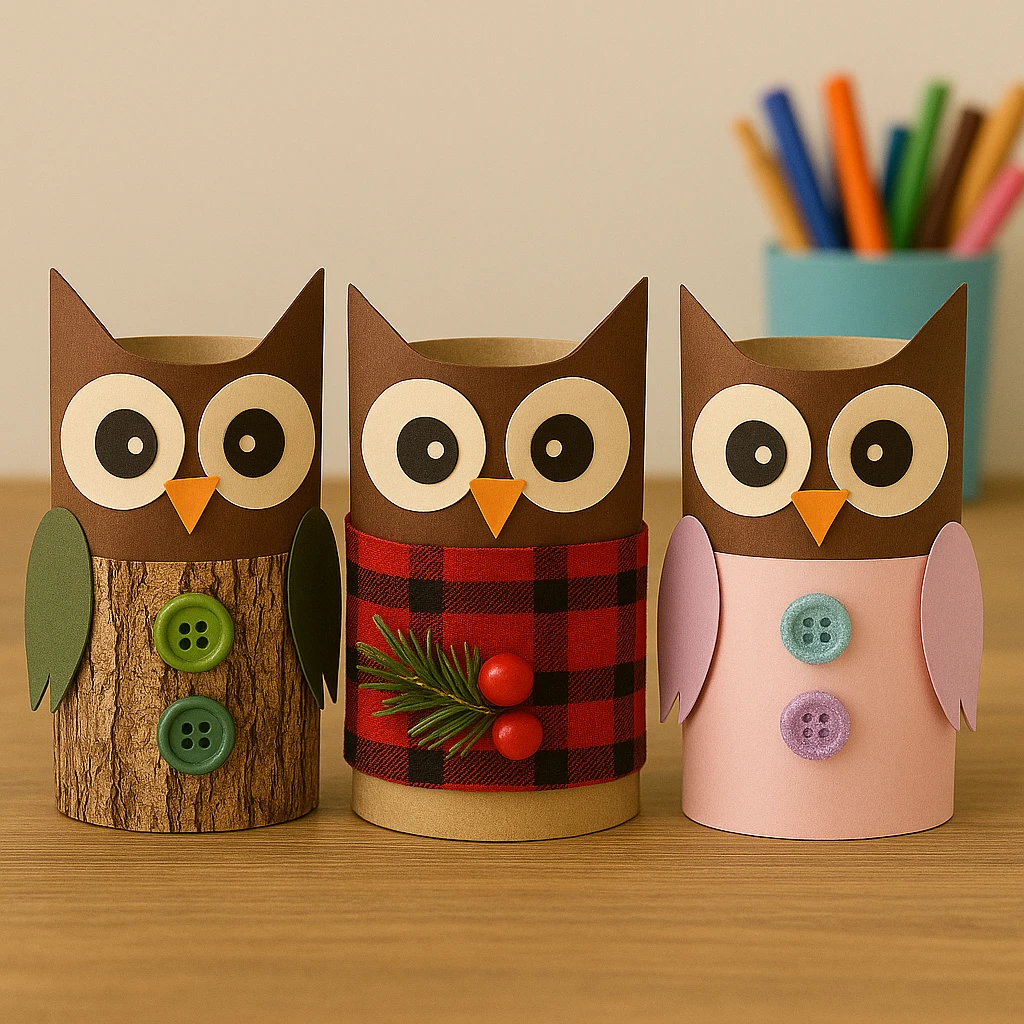
1. Forest Animal Series: Make a collection of forest friends using toilet paper rolls! Try creating a fox, raccoon, or bear using similar materials with simple shape changes.
2. Farmhouse Christmas Owl: Swap out the brown tones for red flannel or plaid paper, add white buttons, and tuck in a small pine sprig to give your owl a cozy winter feel.
3. Woodland Birthday Party Theme: Customize owls in different colors like pastel pink, mint green, or soft yellow. Use sparkly buttons or mini paper hats for a festive touch.
Educational & Seasonal Uses
This rustic owl is perfect for teaching kids about wildlife and habitats, especially in fall-themed lessons or nature studies. It also encourages recycling and creativity through hands-on crafting. Display these owls during autumn, Thanksgiving, or use them in classroom bulletin boards for a woodland vibe. They make great conversation starters about conservation and art.
Printable Template
To make this craft even easier, download the printable owl template which includes pre-measured eyes, wings, beak, and body shapes. Simply print, color if desired, cut out the pieces, and glue them onto your toilet paper roll.
This printable is perfect for group activities or younger kids who may need help cutting shapes. Just print and go—no tracing required!

Conclusion
This rustic farm owl craft is a delightful blend of creativity and sustainability. Whether you're using it as a fall decoration, classroom activity, or just a fun afternoon project, it's sure to bring smiles. Don’t be surprised if you end up making an entire parliament of owls! All you need are a few simple materials, a bit of glue, and your imagination.
Rustic Farm Owl from Toilet Paper Rolls
Equipment
- Scissors
- Craft glue or hot glue gun
- Pencil
- Black marker
Materials
- 1 Empty toilet paper roll (approximately 4 inches tall)
- Dark brown, cream, and orange construction paper
- 1.5 x 6 inches Burlap ribbon or fabric
- 2 Orange buttons (0.75 inch wide)
Instructions
- Start with a clean and dry toilet paper roll. Trim the edges if needed and press the top inward from two sides to create owl ears.
- Wrap the top half of the roll with dark brown paper and glue in place to form the owl’s head and ears.
- Cut out cream and black circles for the eyes, and an orange triangle for the beak. Glue them onto the top half of the roll.
- Wrap the burlap around the middle of the roll and glue in place for a rustic body texture.
- Cut two wings from dark brown paper and glue them to each side of the roll just below the head.
- Glue two orange buttons vertically down the burlap section. Add extra details with a black marker if desired. Let everything dry before displaying.