

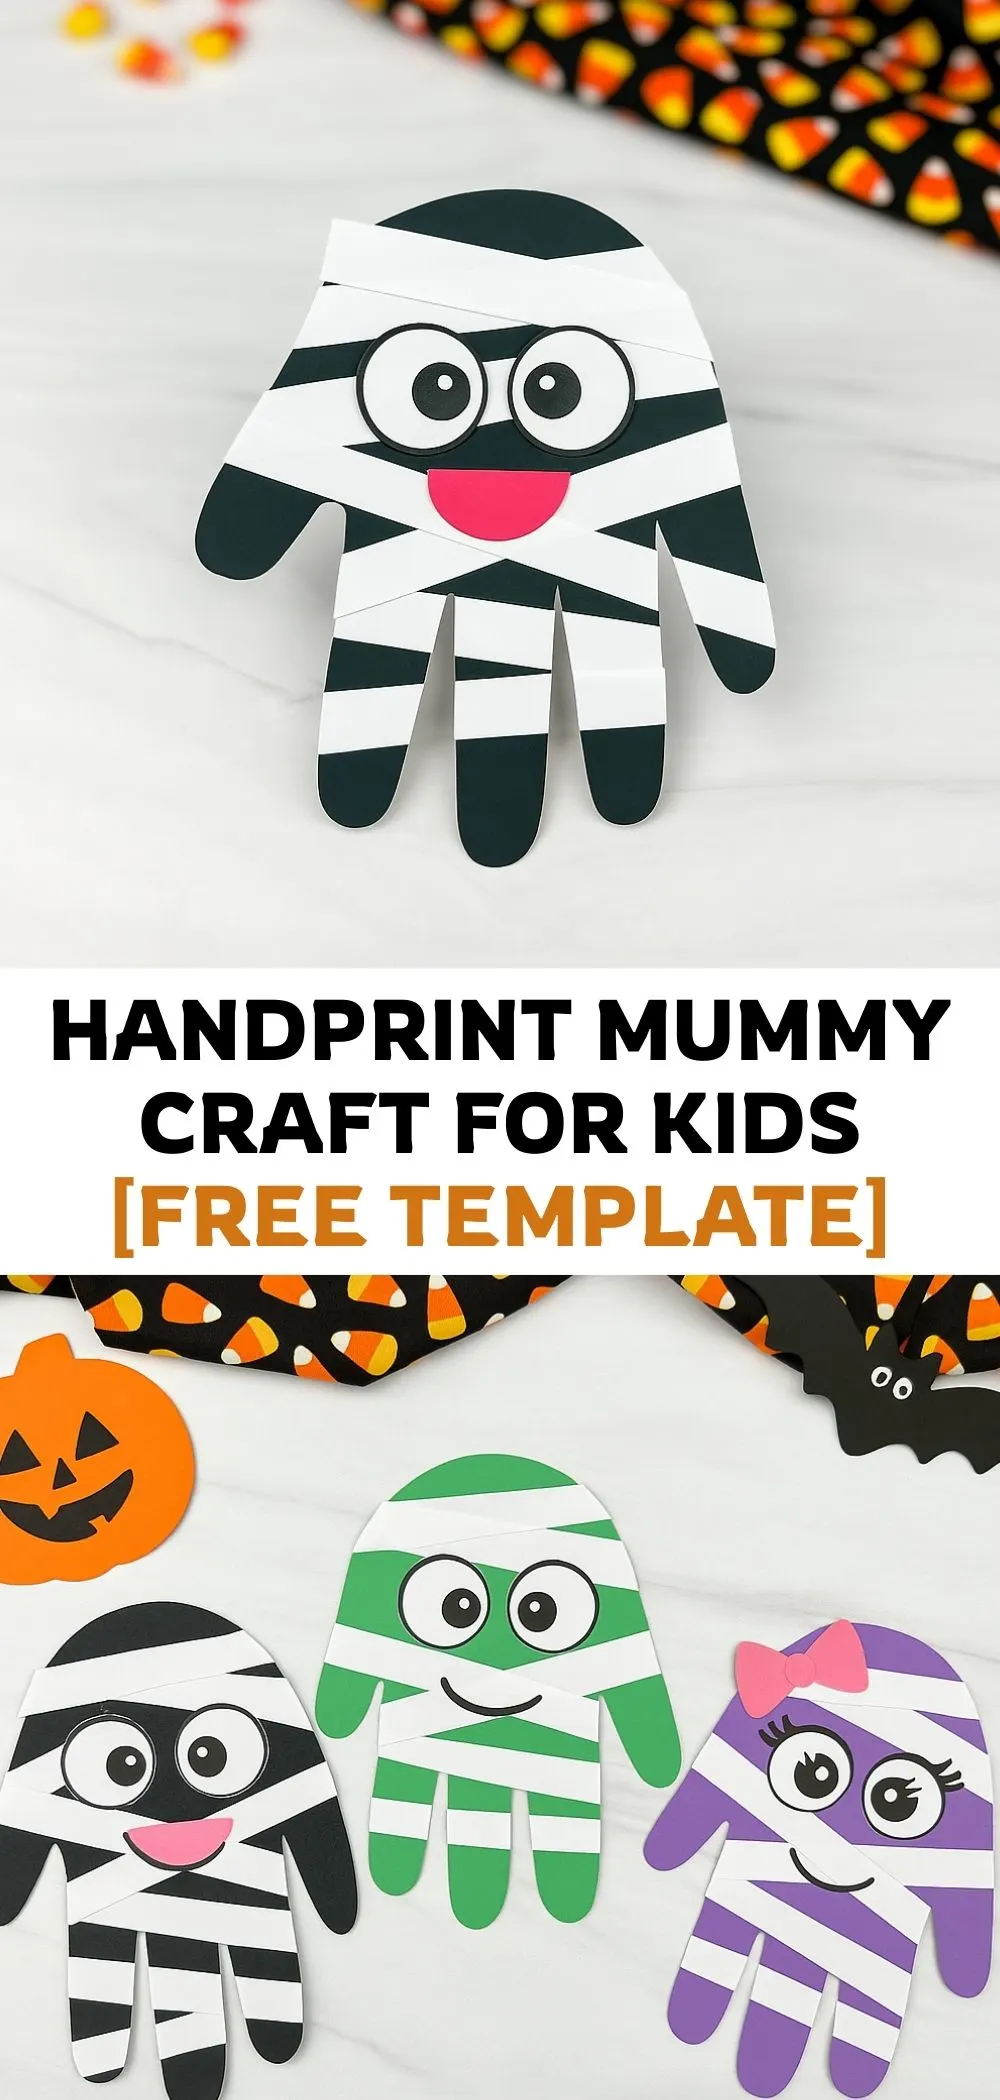
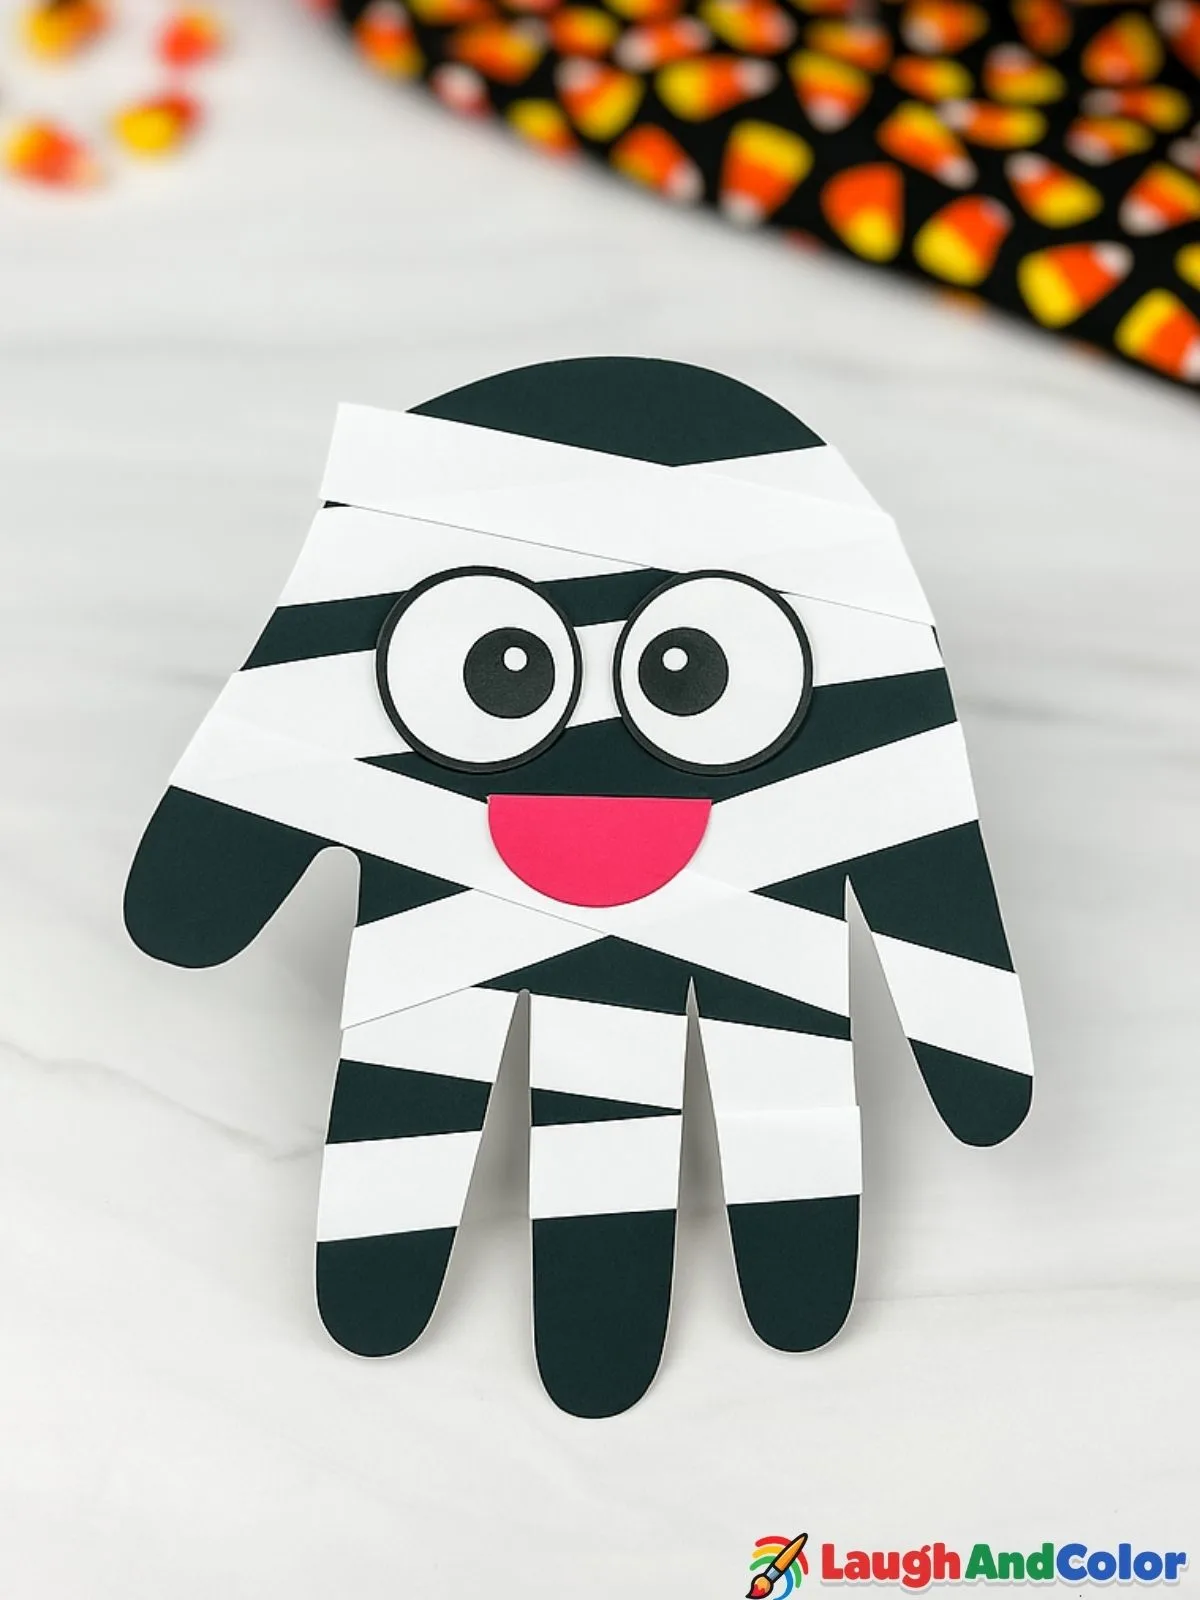
Looking for a fun and spooky Halloween craft that’s easy enough for preschoolers yet fun for older kids too? This Handprint Mummy Craft is the perfect mix of cute and creepy! Kids will love tracing their own handprints and turning them into adorable little mummies using simple materials. It’s a great way to build fine motor skills and creativity while celebrating the spooky season.

Whether you’re a teacher planning a classroom activity, a parent hosting a Halloween playdate, or simply want a fun afternoon project, this craft is a guaranteed hit. And the best part? It makes a great keepsake too!
Materials Needed

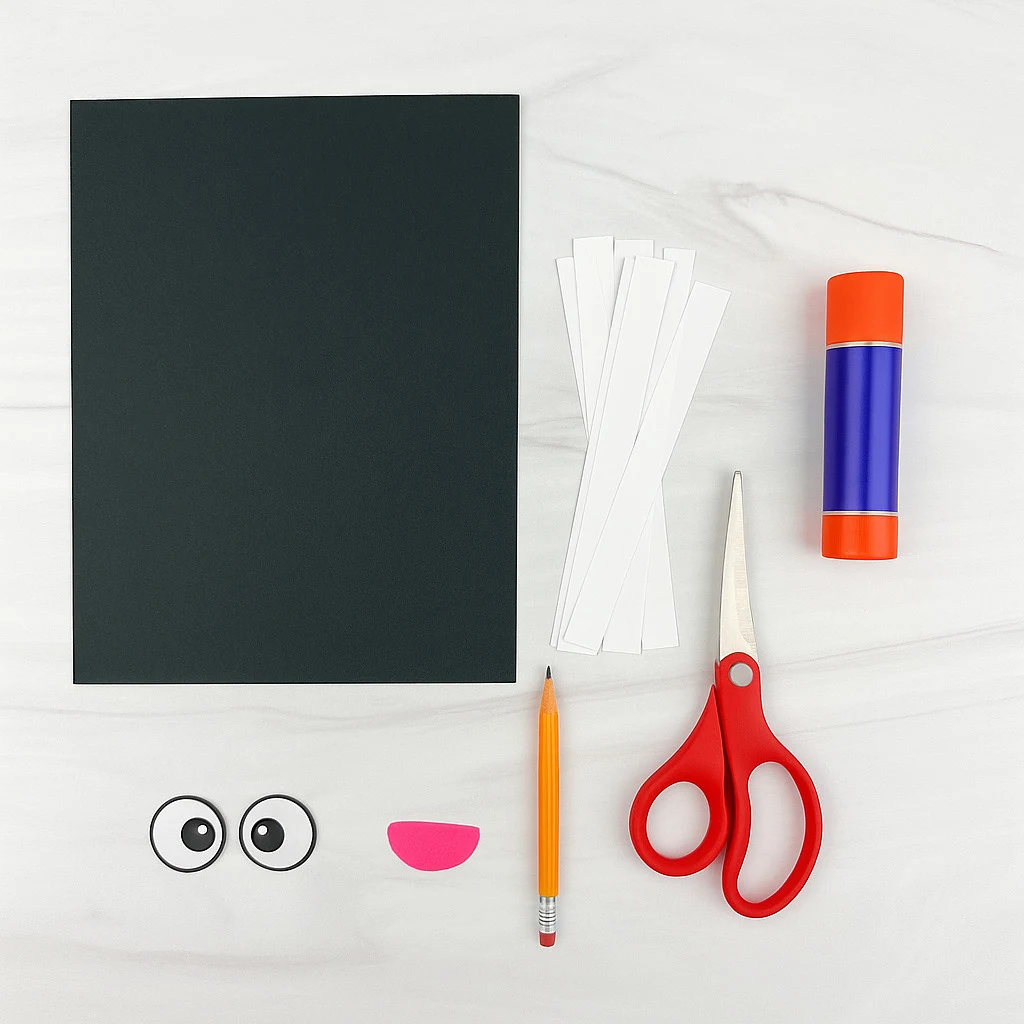
To make your own handprint mummy, gather the following supplies:
- Black cardstock or construction paper (for the base handprint)
- White paper strips (about 0.5 inch wide)
- Googly eyes or printable cartoon eyes
- Pink or red paper (for the mouth)
- Scissors (kid-safe if necessary)
- Glue stick or liquid glue
- Pencil (for tracing the hand)
Optional:
- Bows, hats, or stickers to personalize your mummy
- A free printable face template (if not hand-drawing eyes/mouth)
Step-by-Step Instructions
Step 1: Trace and Cut the Handprint

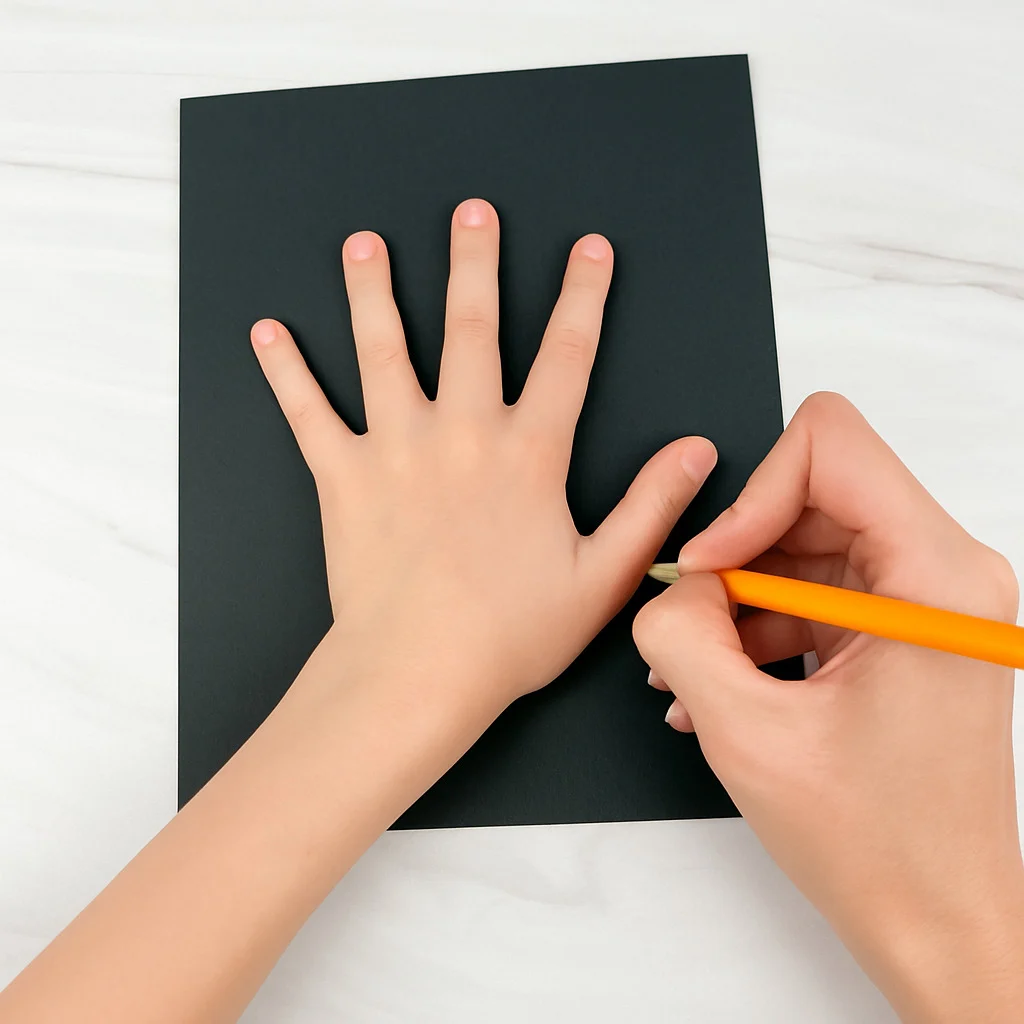
Place a sheet of black paper on a flat surface and have your child spread their fingers. Use a pencil to trace around their hand. Carefully cut out the handprint shape.
Step 2: Prepare the Wrapping Strips
Cut several thin strips of white paper, about half an inch wide. These will serve as the mummy’s wrappings.
Step 3: Wrap the Mummy

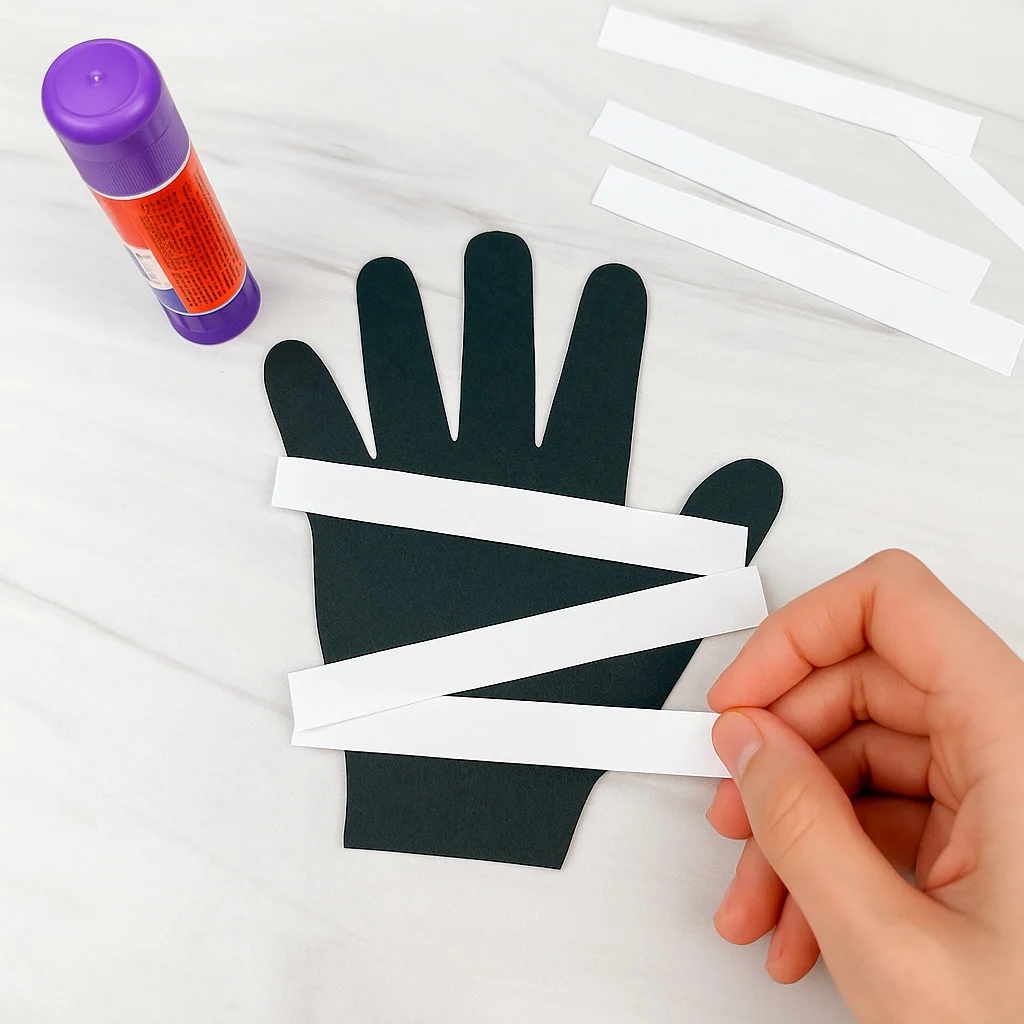
Glue the white strips across the handprint in random crisscross patterns, leaving a small space in the palm area for the face.
Step 4: Trim the Extras
Once the strips are glued, trim any excess paper hanging off the handprint edges for a clean look.
Step 5: Add the Mummy Face

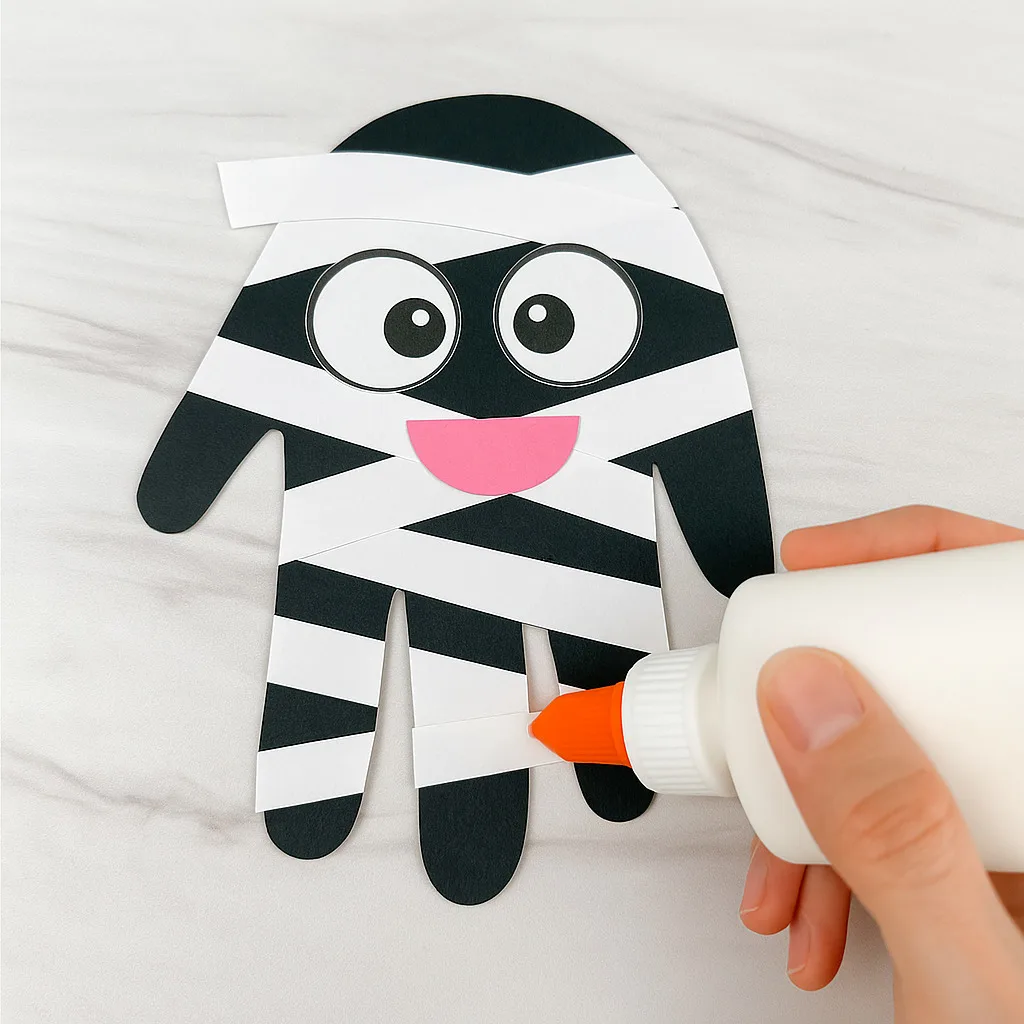
Glue on two googly eyes or paper eyes in the face area. Then cut out a small pink or red paper oval for a mouth and glue it on below the eyes.
Step 6 (Optional): Personalize It!
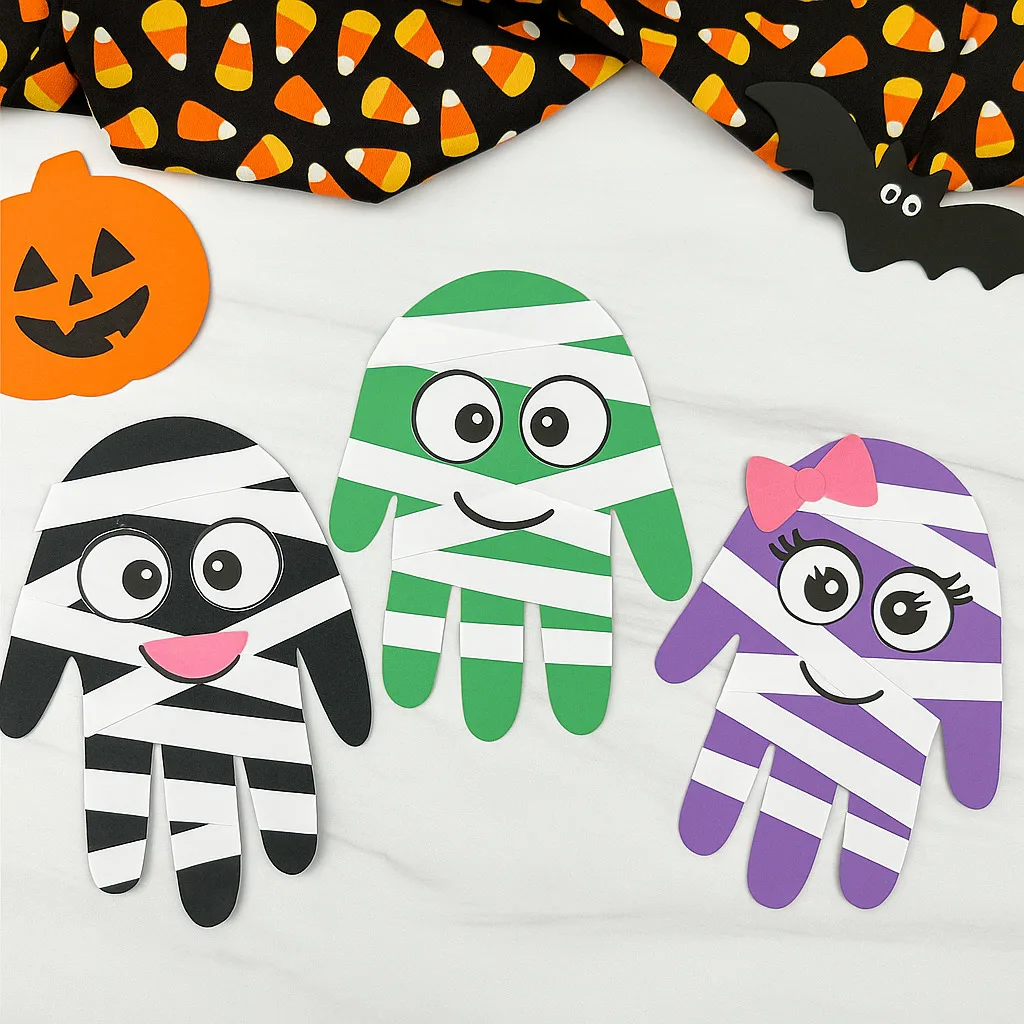
Let kids add their own flair with bows, mini hats, or stickers to give their mummy some character.
Craft Variations & Customizations

Want to make your mummy even more fun? Try these creative ideas:
- Use different colored paper for your handprints—purple, green, even glow-in-the-dark!
- Add glitter or metallic pens for spooky sparkle.
- Make a whole mummy family using handprints of different sizes (mom, dad, baby mummy).
- Add mini accessories like hats, glasses, or a cape.
Encourage kids to give their mummy a name and personality—it’s a great way to promote storytelling and creativity.
Educational & Seasonal Uses


This mummy craft is more than just fun—it’s also educational!
Teachers:
- Use it during a Halloween or fall unit to integrate art with seasonal learning.
- Display mummies on a classroom bulletin board with student names.
Parents:
- Add it to a rainy day or Halloween party activity list.
- Use it to practice scissor skills and glue control.
Bonus Idea: Ask kids to write a short story or comic about their mummy character to turn this craft into a literacy activity!
Optional Printable Template
If you're short on time or want to simplify things for a large group, consider using a free printable handprint template and cut-out cartoon eyes/mouth. This can be especially helpful for very young children who need extra guidance.
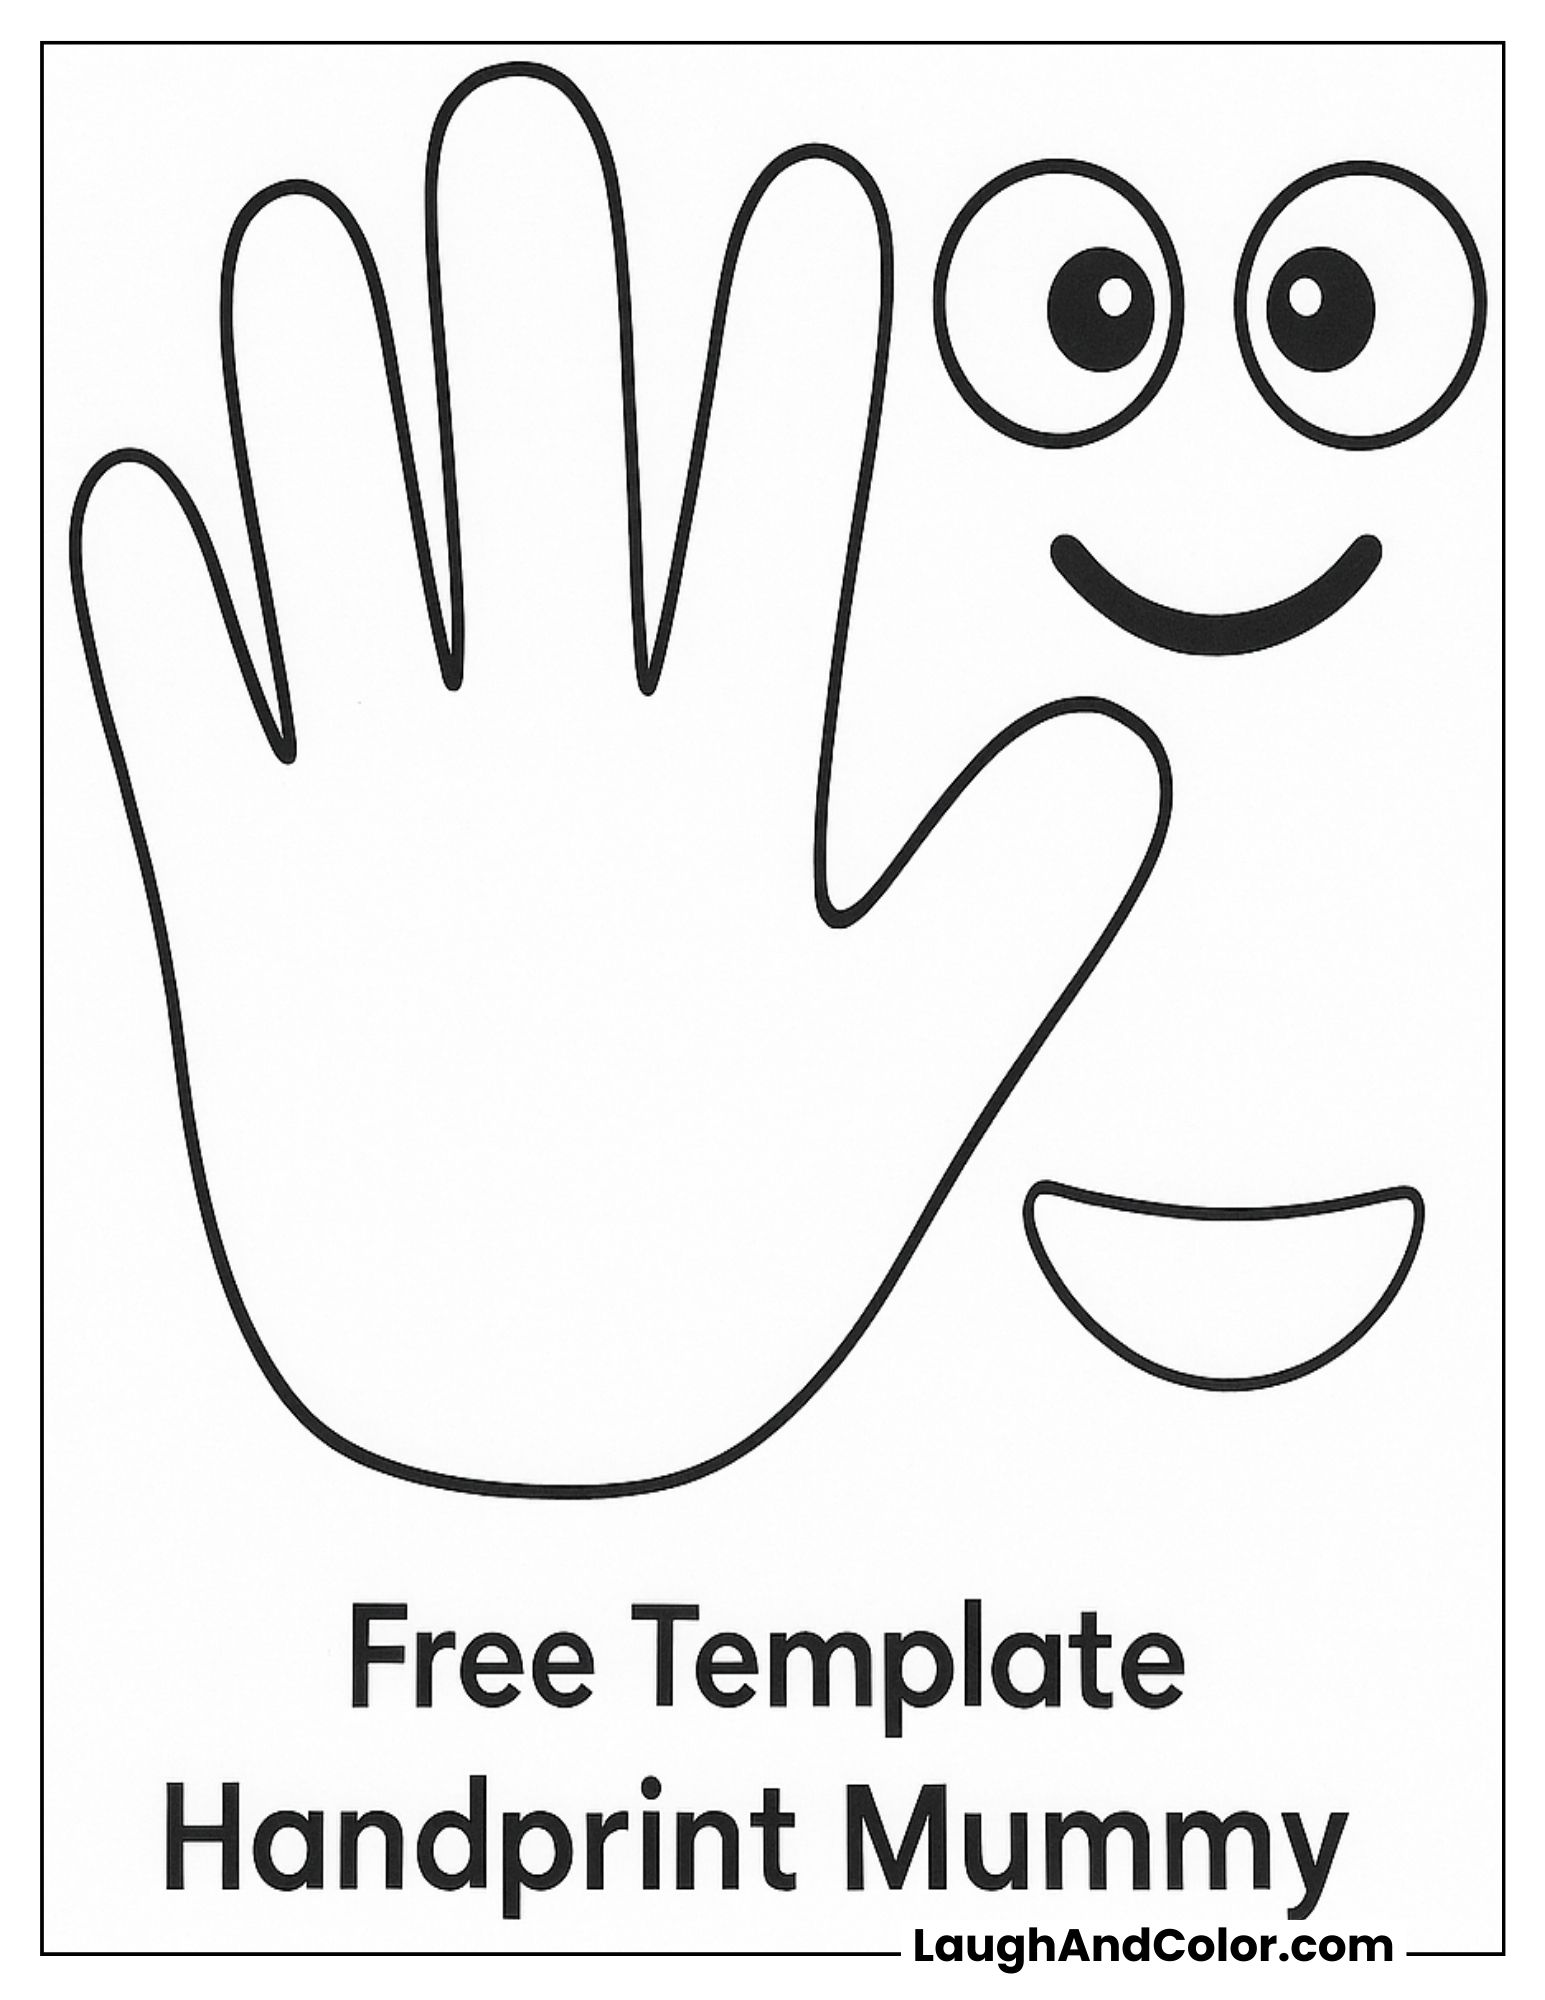

Handprint Mummy Craft For Kids [Free Template]
Conclusion
This Handprint Mummy Craft is a wonderfully simple and festive way to celebrate Halloween with kids. It blends creativity, hands-on activity, and spooky fun all in one easy project.
Whether you're using it in the classroom, at home, or at a Halloween party, kids of all ages will love making and showing off their unique mummy creations. Plus, you’ll love the keepsake handprints that will bring back memories for years to come.
Happy crafting—and have a spooky Halloween!