
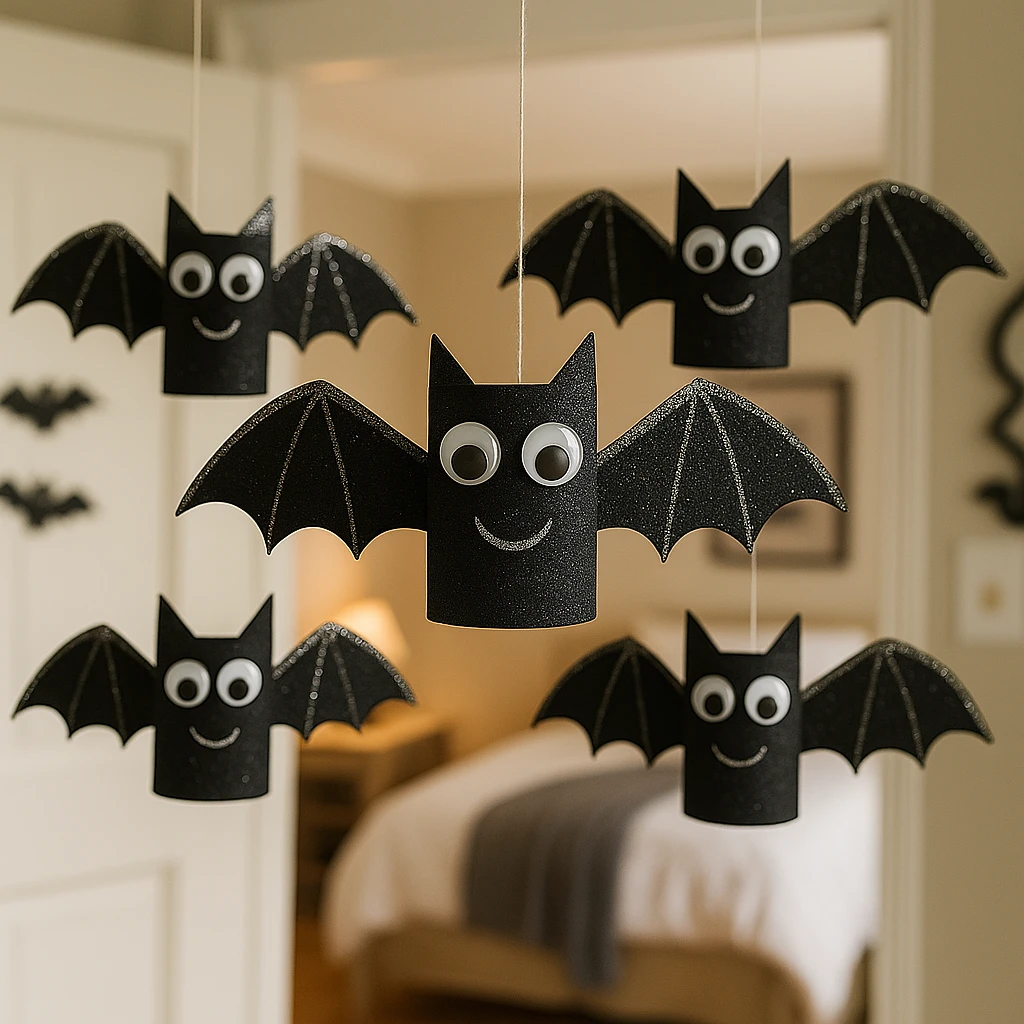
Transform your home into a spooky yet sparkly space with these DIY Glitter Bat Decorations! This charming Halloween craft is perfect for kids, classrooms, and anyone who loves hands-on seasonal décor. Using simple materials and just a bit of glitter, you can make a whole colony of friendly bats to hang around your room, doorway, or party table.
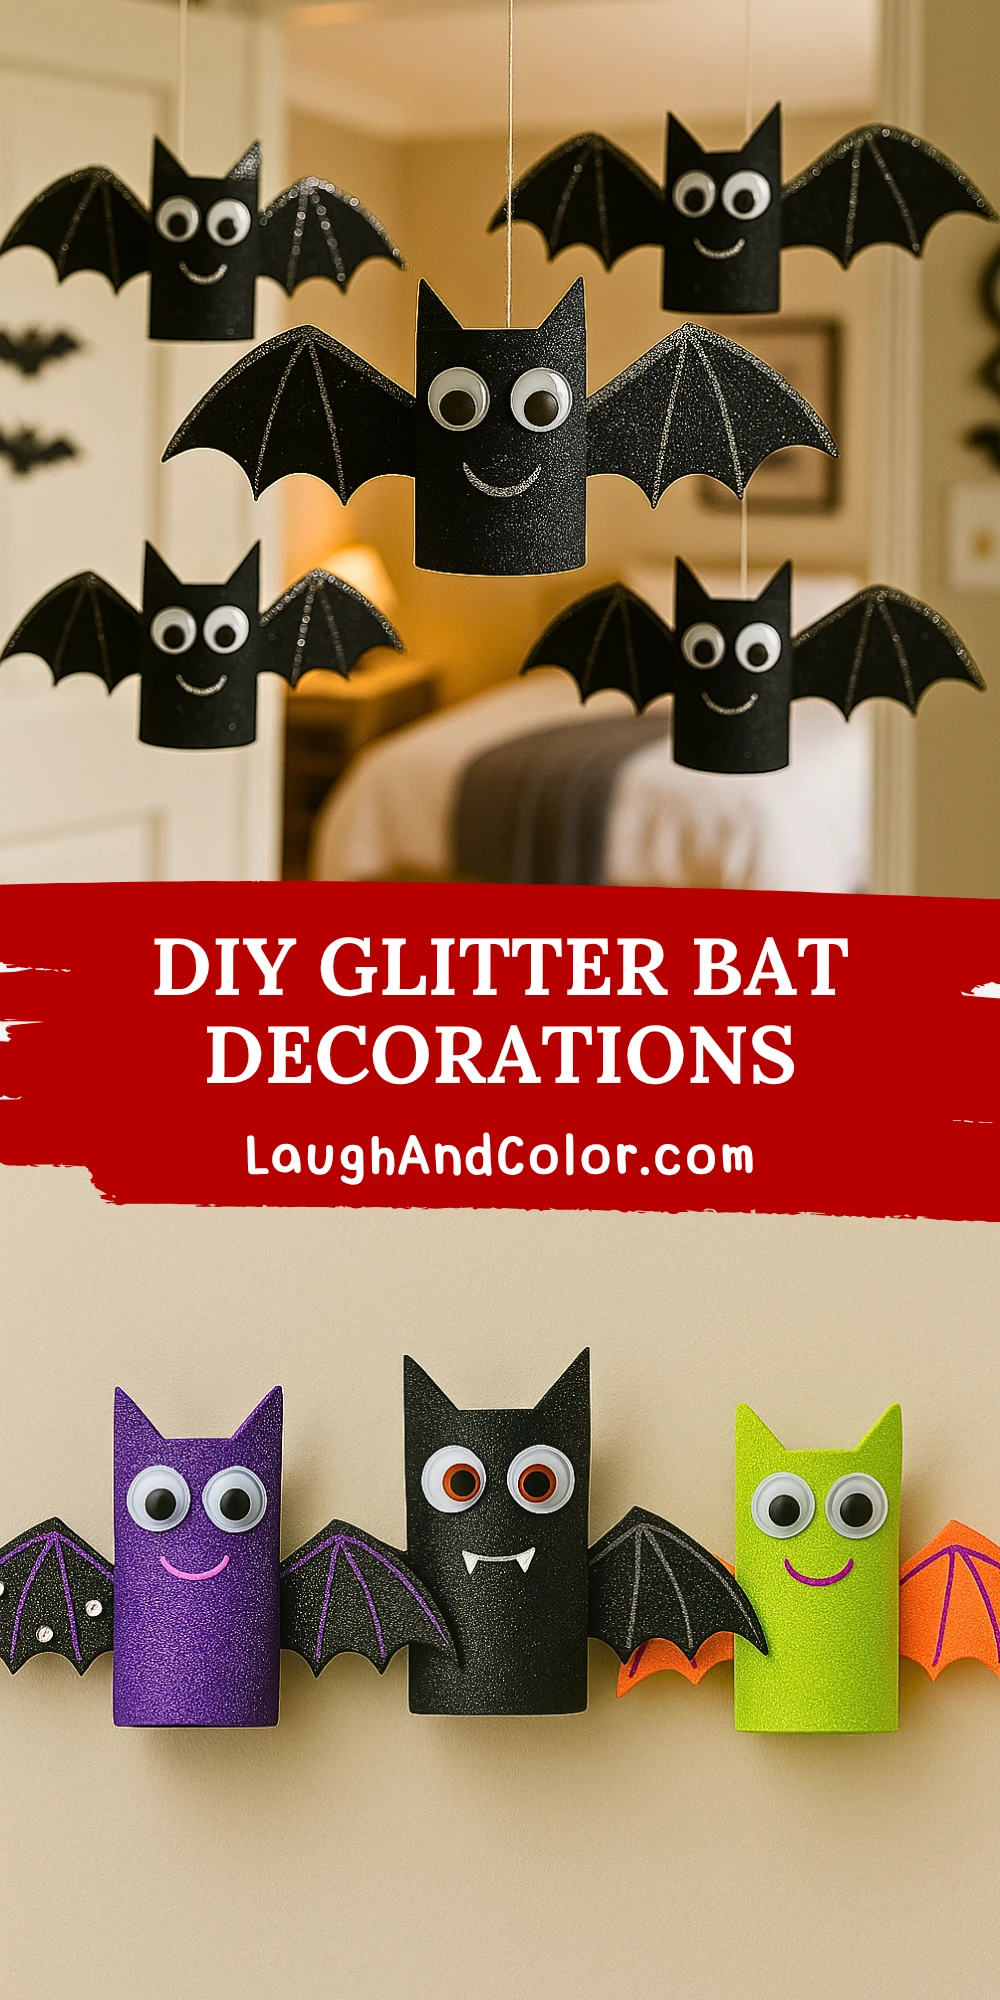
Whether you're throwing a Halloween bash or looking for a rainy-day activity with the kids, these bats are a hit. They’re budget-friendly, beginner-level, and can be customized in fun, colorful ways. Plus, their lightweight design means they’re easy to hang anywhere for an instant festive touch.
Materials Needed
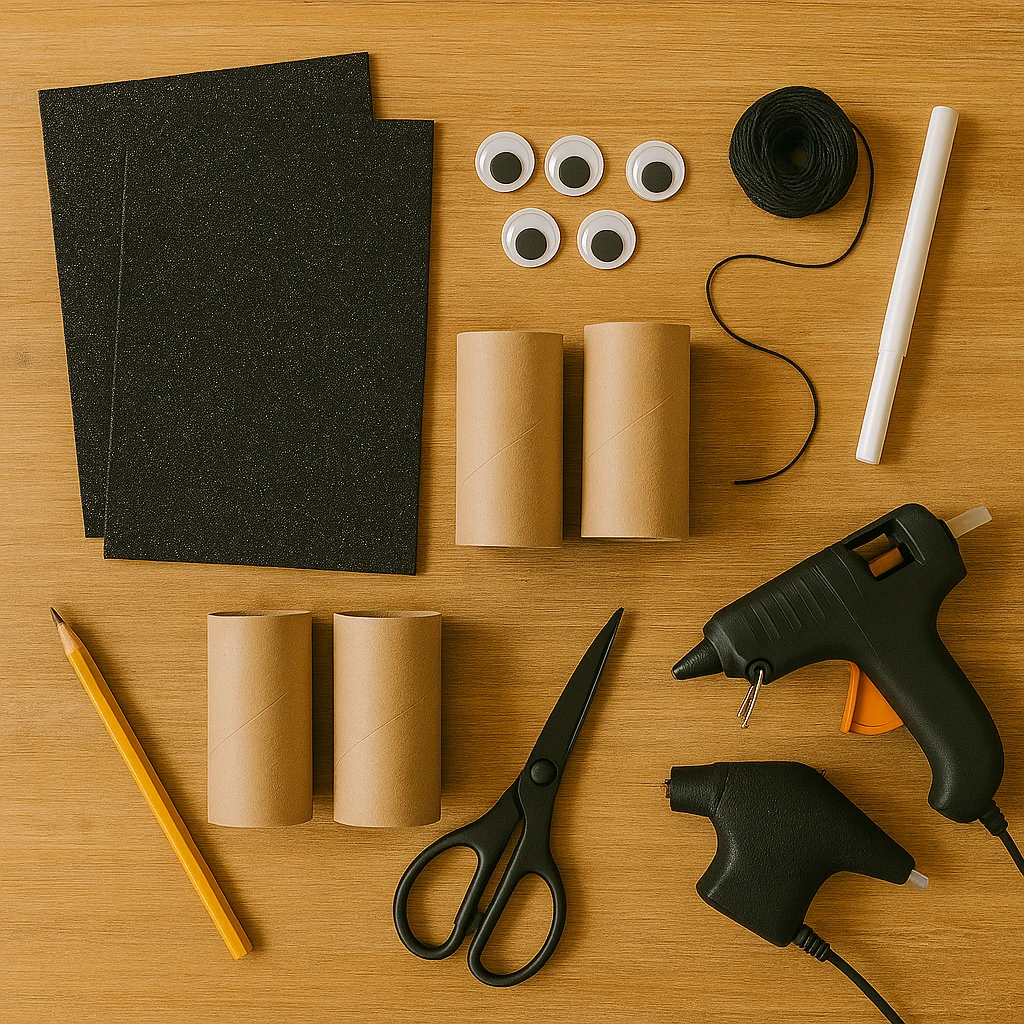
To get started, gather the following supplies:
- Empty toilet paper rolls or cardboard tubes
- Black glitter foam sheets (1 sheet makes approx. 2–3 bats)
- Googly eyes (medium size)
- Black string or thread for hanging
- Scissors
- Hot glue gun or strong craft glue
- White chalk or metallic marker (optional for wing details)
- Pencil
- Printable bat wing and ear template (available in the printable section)
Step-by-Step Instructions
Step 1: Prepare the Bat Body
Start by taking an empty toilet paper roll and trimming it down to about 3 inches if needed. Wrap the entire roll in black glitter foam, trimming the excess. Secure the foam in place using hot glue or craft glue. Gently press until the adhesive sets.
Step 2: Cut Out the Wings
Using the printable bat wing template, trace the shape onto your black glitter foam sheet. Cut out the wings carefully. If you’d like extra sparkle, outline the wings using a white chalk pencil or metallic marker to give them added definition.
Step 3: Add Eyes and Smile
Glue two googly eyes onto the top section of the tube to give your bat a playful look. Then, draw or glue on a small smile using a white or silver pen. If you want more character, consider adding tiny fangs!
Step 4: Attach the Wings
Apply a small line of glue to the center of the wings, then press them onto the back of the bat body. Hold them in place for a few seconds to secure. Position the wings so they stick out evenly on both sides.
Step 5: String It Up
Using a pencil or sharp object, poke a small hole at the top of the bat. Thread a piece of black string through and tie a knot. Now your bat is ready to fly! Hang it from the ceiling, in a window, or even on a Halloween tree.
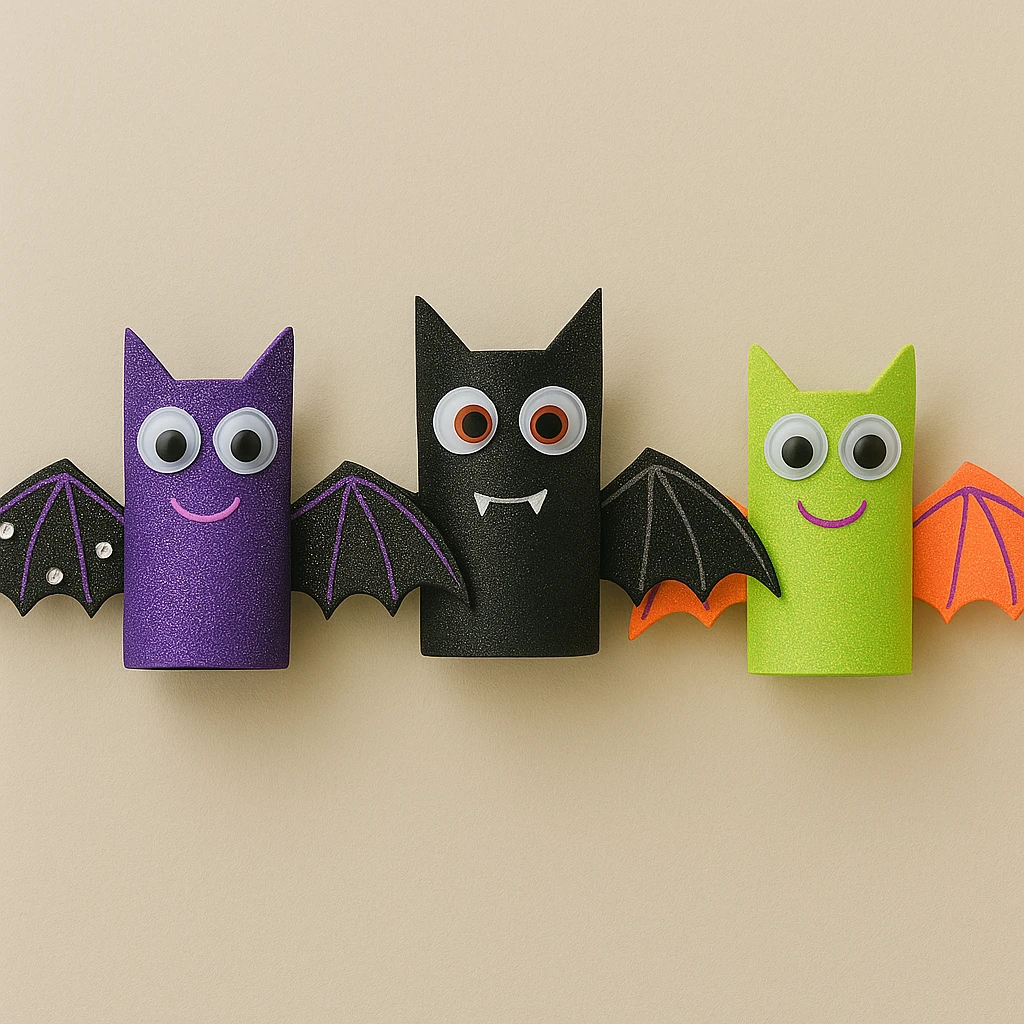
Customization Ideas
Glam Bats: Swap out black foam for glittery purple or gold to make glammed-up bats. Add rhinestones or tiny bows for a whimsical finish.
Spooky Bats: Use red glitter foam for the eyes and add mini fangs made from white paper or felt. These work great for older kids who want a more “scary” version.
Daytime Bats: Try using neon foam or bright markers to decorate wings. These bats are perfect for younger kids or daylight events.
Educational & Seasonal Uses
These bats aren’t just for fun—they're a clever way to tie into educational themes. Use them in lessons about nocturnal animals, bat habitats, or Halloween traditions. In classrooms, they double as festive décor and interactive learning tools. Around the house, they make perfect hanging decorations for windows, porches, or party rooms.
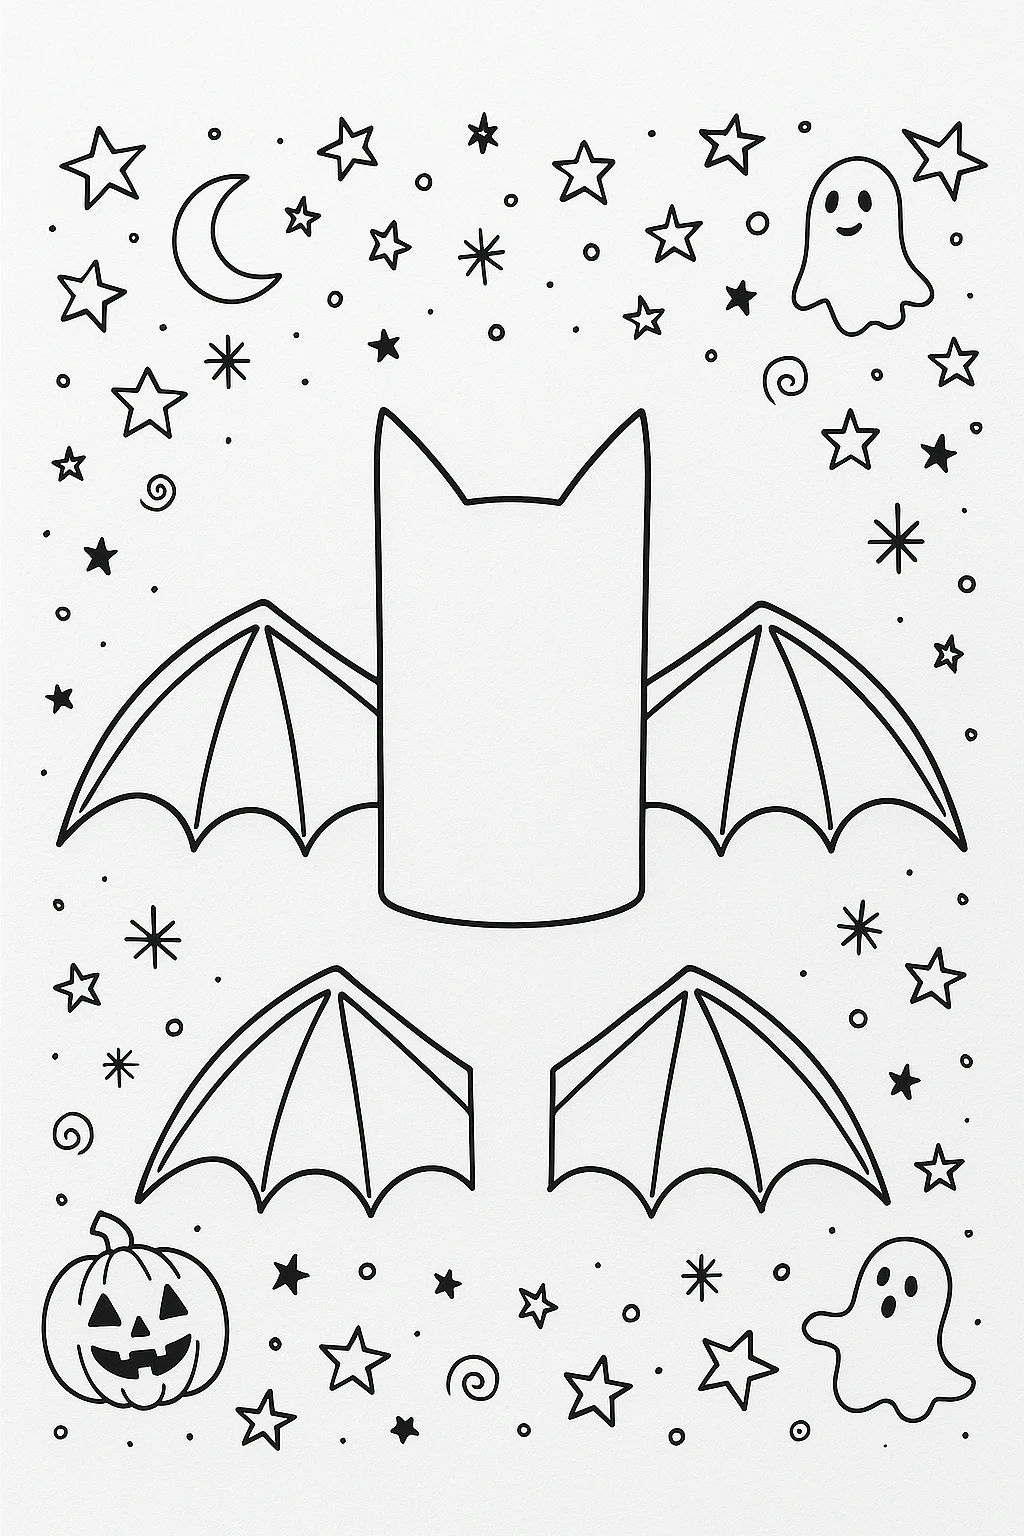
Printable Template Section
We’ve included a black-and-white printable template that includes the bat wings and ear shapes. Just print it out, cut along the dotted lines, and trace onto your foam sheets. This is especially helpful for young crafters who need guidance on shape sizing.
You can also use the template as a coloring page. Kids can color their wings before gluing them to the bat body. It’s a fun way to personalize each bat and adds a creative layer to the craft process.
Conclusion
This simple and sparkly bat project is the perfect way to celebrate Halloween or learn about bats with a hands-on twist. It’s quick to assemble, mess-free, and easily customizable for any age group. Hang your glitter bats in bunches for an eye-catching, fluttering effect that brings festive fun to any space.
DIY Glitter Bat Decorations
Equipment
- Scissors
- Hot glue gun or craft glue
- Pencil
Materials
- Empty toilet paper rolls or cardboard tubes
- Black glitter foam sheets (1 sheet makes approx. 2–3 bats)
- Googly eyes (medium size)
- Black string or thread for hanging
- White chalk or metallic marker (optional for wing details)
- Printable bat wing and ear template available in the printable section
Instructions
- Start by taking an empty toilet paper roll and trimming it to about 3 inches. Wrap the entire roll in black glitter foam, trimming the excess, and secure with glue.
- Trace the printable bat wing shape onto black glitter foam and cut out. Add details with white chalk or metallic marker if desired.
- Glue two googly eyes near the top of the bat body. Draw or glue on a small smile and optional fangs.
- Apply glue to the center of the wings and attach to the back of the bat body. Press to secure evenly.
- Poke a small hole at the top of the bat and thread a piece of string through. Tie a knot and hang your bat.