
Halloween is the perfect time for little hands to get crafty, and this Girl Frankenstein paper plate project is a frightfully fun way to spark creativity. Whether you’re preparing for a classroom activity, a rainy-day project at home, or a festive Halloween party, this craft is a cute and simple option that kids will love. With bright colors, playful shapes, and just the right touch of spooky, it turns basic materials into something delightfully memorable.

This craft is especially great for preschool and early elementary kids. It helps build fine motor skills through cutting, gluing, and painting—all while having a blast. Plus, it’s a creative way to explore Halloween themes in a non-scary, friendly way that appeals to younger children.
Let’s dive into everything you’ll need and how to create your own Girl Frankenstein masterpiece!
Materials Needed
- 1 white paper plate (9-inch size)
- Bright green acrylic or tempera paint
- Black construction paper (for hair and details)
- Purple construction paper (for bow)
- White and black cardstock (for eyes)
- Glue stick or school glue
- Scissors (safety scissors for younger children)
- Black marker or crayon (for face details)
- Optional: tape or popsicle stick if using as a puppet

Step-by-Step Instructions
Step 1: Paint the Paper Plate
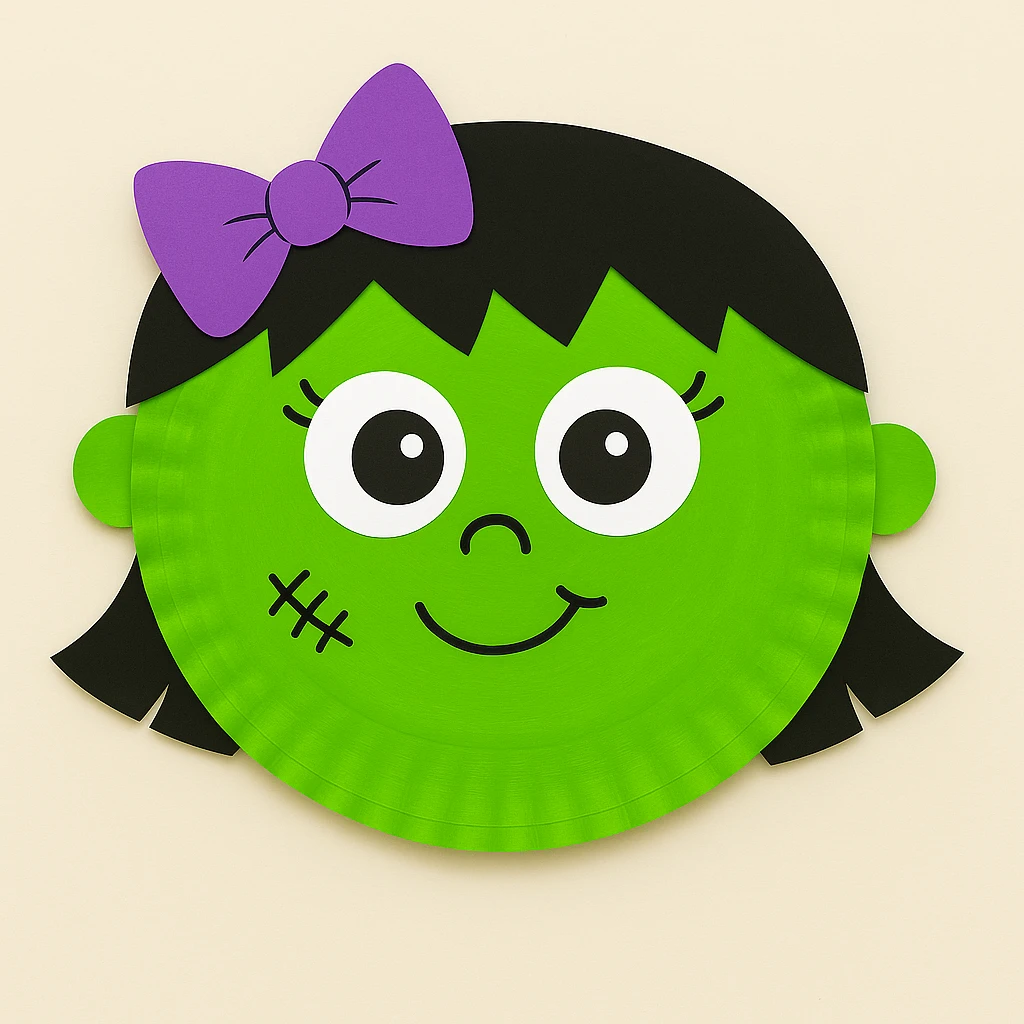
Start by laying down newspaper or a plastic tablecloth to protect your surface. Paint the entire front of the paper plate with bright green paint. Allow it to dry completely—this usually takes about 20–30 minutes depending on the paint type.
Step 2: Cut and Attach the Hair
While the plate dries, cut out Frankenstein-style hair using black construction paper. Cut jagged triangle shapes across one edge to mimic cartoon-style hair. Glue this to the top back side of the paper plate so the jagged edge peeks over the front.
Step 3: Add Ears and Bow
Cut two small green circles for the ears and glue one to each side of the plate. Then, cut out a simple purple bow shape and glue it above the hairline on one side for a fun, girly touch.
Step 4: Create the Eyes
Cut two large white circles and two smaller black circles to form the eyes. Glue the black circles onto the white ones, and then glue the completed eyes near the center of the plate. Add a small white dot to each eye using white paper or paint for extra charm.
Step 5: Draw the Face Details
Using a black marker or crayon, draw on a friendly smile, a little nose, eyelashes, and a stitched scar to give her that Frankenstein flair. Let kids get creative here and add freckles or eyebrows too!
Step 6: Assemble and Final Touches
Check to make sure all elements are glued securely. You can reinforce with tape on the back if needed. If you'd like to turn this into a puppet, tape a popsicle stick to the back. Your Girl Frankenstein is now ready to spook and delight!
Customization Ideas

1. Frankenstein Boy Version:
Switch the bow out for silver paper bolts on each side, and cut shorter, spiky hair instead of long jagged hair. Use the same face structure to keep it simple.
2. Monster Mash Characters:
Transform the base craft into other classic Halloween monsters. Try making a Dracula with pointy hair and a cape, a Mummy by gluing on strips of white paper, or a Witch with a tall black hat.
3. Sparkle & Glam Version:
Add glitter glue to the bow, use metallic paper for accents, or even give her sparkly lashes with glitter paint. Perfect for kids who love sparkle!
Educational and Seasonal Uses
This craft makes a fantastic classroom activity for Halloween week. Teachers can tie it into lessons about emotions by exploring different facial expressions or connect it with Halloween storybooks. It also encourages storytelling—kids can put on their own monster puppet shows once their crafts are done. Great for developing imagination and communication skills!
Printable Template

To make crafting even easier, we’ve included a printable version of this Girl Frankenstein craft. Simply download the template, print it on white paper, and let kids color it in. They can cut out the shapes and glue them together following the same steps above. It’s perfect for quick-prep classroom use or for sending home as a no-mess craft kit.
With just a few crayons or markers and some glue, this printable version delivers the same creative joy without the need for paint or scissors—great for younger children or short time frames.
Conclusion
Crafting this Girl Frankenstein paper plate is a fun, simple way to bring Halloween to life with your kids. With basic supplies and easy steps, it's a creative project that leaves lots of room for personalization. Whether you're decorating your classroom or keeping little hands busy during spooky season, this DIY is sure to be a hit!
Girl Frankenstein Paper Plate Craft for Kids
Equipment
- Glue stick or school glue
- Scissors
- Paintbrush
- Black marker or crayon
Materials
Main Supplies
- 1 White paper plate (9-inch)
- Bright green acrylic or tempera paint
- Black construction paper for hair and details
- Purple construction paper for bow
- White and black cardstock for eyes
- Optional: Popsicle stick or tape to turn into a puppet
Instructions
- Step 1: Paint the paper plate green and allow it to dry completely (about 20–30 minutes).
- Step 2: Cut jagged hair from black construction paper and glue it to the top of the plate.
- Step 3: Cut out green circles for ears and a purple bow. Glue them onto the sides and top.
- Step 4: Create eyes using white and black cardstock, glue them in place near the center.
- Step 5: Draw facial details such as a smile, scar, nose, and eyelashes using a black marker.
- Step 6: Reinforce glued parts if needed and optionally attach a stick to make it a puppet.