
Thanksgiving is a time to gather, reflect, and celebrate with family, and what better way to capture those warm moments than with a handmade turkey photo frame? This festive turkey wall hanger is more than just a fun and colorful craft—it's a keepsake that displays a cherished photo, adding a personal touch to your seasonal decor. Whether you're crafting with your kids, in a classroom, or making thoughtful gifts, this easy project is perfect for all ages.
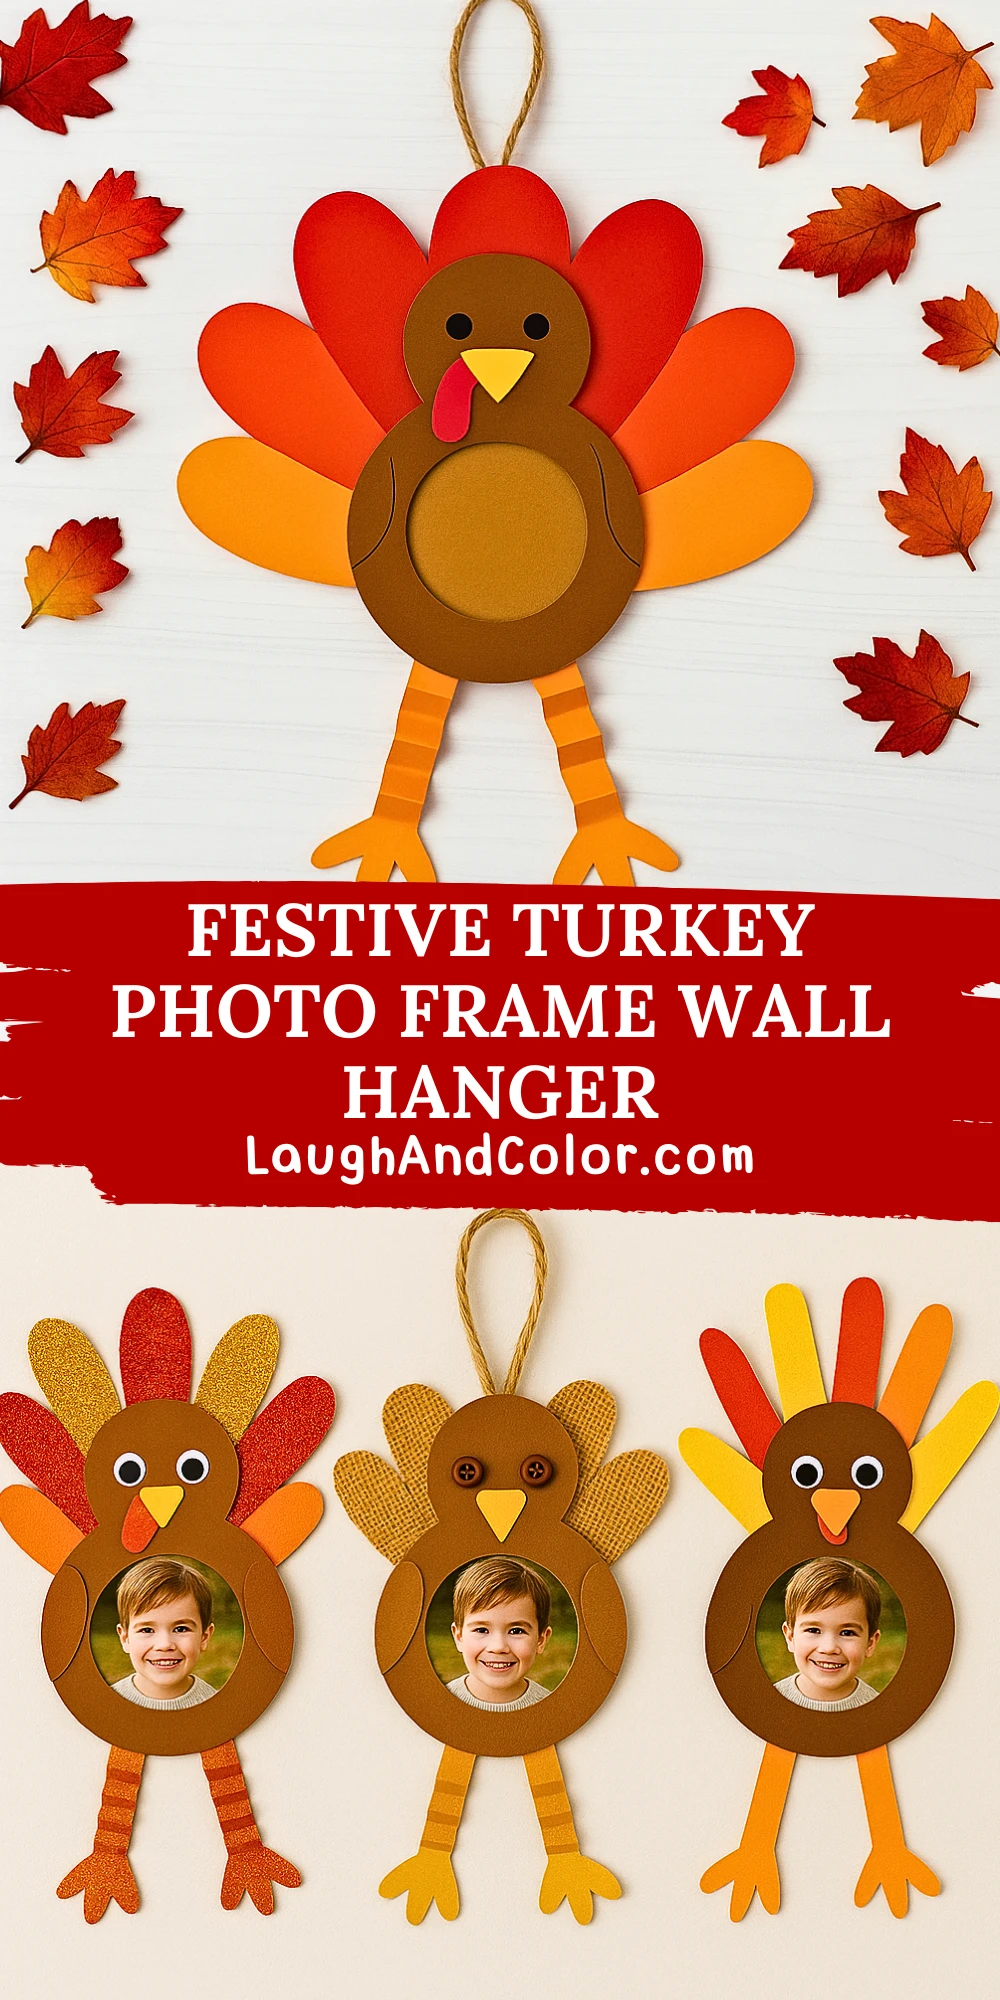
Designed with vibrant fall colors and simple shapes, this turkey frame is a delightful addition to any home during the autumn months. Hang it on a door, in the hallway, or use it as part of your Thanksgiving dinner display. The best part? You can use the printable template to make the crafting process even easier. Let’s dive into how you can create this charming turkey photo frame step by step.
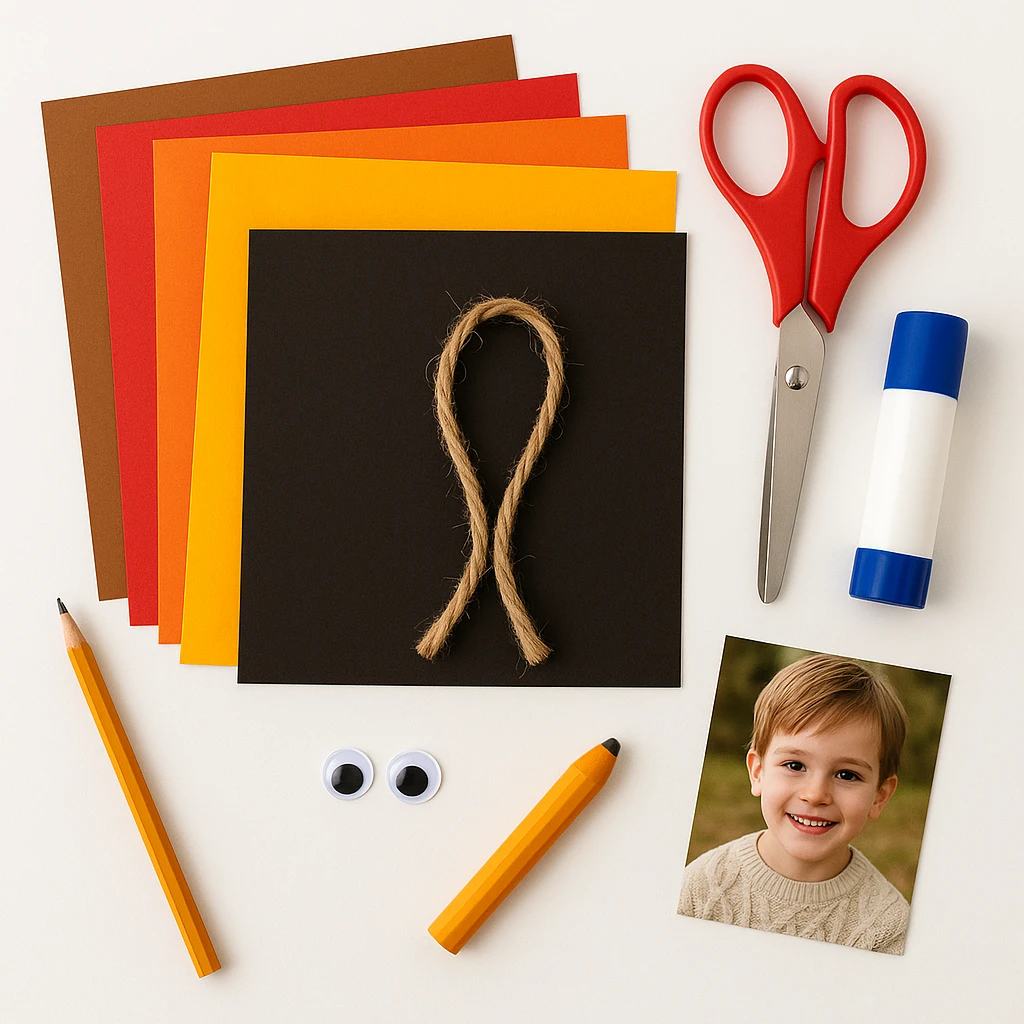
Materials Needed
To make your Festive Turkey Photo Frame Wall Hanger, you’ll need:
- Colored cardstock or construction paper (brown, red, orange, yellow, and black)
- Scissors
- Glue stick or craft glue
- Pencil
- String or twine for hanging
- Googly eyes or black paper circles for the eyes
- A photo for the center frame (or leave empty until ready)
- Optional: glitter, buttons, or stickers for extra flair
Step-by-Step Instructions
Step 1: Cut Out the Turkey Body
Start by cutting a large oval or circle from brown cardstock for the turkey's body. This will be the base of your frame. Then, cut a smaller circle in the center of the body piece—this is where your photo will go. Make sure the inner circle is large enough to showcase a face clearly.
Step 2: Create and Attach the Feathers
Cut out six to eight feather shapes using red, orange, and yellow cardstock. Each feather should be about 5 inches long. Arrange the feathers in a fan shape behind the turkey's body and glue them in place, alternating colors for a vibrant look.
Step 3: Make the Legs and Beak
For the legs, cut two strips of orange paper about 6 inches long. You can accordion fold them to make the legs dangle playfully. Add foot shapes at the bottom. Next, cut a small yellow triangle for the beak and a red wattle shape. Glue both just below where the eyes will go.
Step 4: Add the Face and Details
Glue googly eyes or black paper circles above the beak. Add any other facial details like eyebrows or cheeks using markers or small cutouts. You can even personalize the body with a name or the year using stickers or pens.
Step 5: Create the Photo Frame Circle
Behind the center cut-out, glue a backing piece of paper around the edges, leaving the top open. This will create a pocket to slide your photo into. Make sure it’s secure but easy to insert and remove the photo as needed.
Step 6: Attach Hanger and Final Assembly
Cut a small piece of twine or string (around 6 inches), loop it, and glue or tape it securely to the back of the turkey. This will be your hanger. Once everything is dry, insert your photo, and your festive turkey frame is ready to display!
Customization Ideas
1. Rustic Country-Style Turkey
Swap out the cardstock for burlap and kraft paper. Add buttons for eyes and wooden beads on the legs. Use twine or raffia instead of ribbon for a cozy farmhouse vibe.
2. Glitter Glam Turkey
Add sparkle to each feather with glitter or metallic cardstock. Use jewel stickers for eyes and a glittery gold beak. Perfect for kids who love sparkle and shine.
3. Handprint Feather Turkey
Use children’s traced and cut-out handprints as the feathers. This adds a personal, sentimental touch—especially cute for toddlers or preschoolers.

Educational and Seasonal Uses
This turkey craft can be used to teach children about the Thanksgiving holiday, including history, gratitude, and family traditions. In classrooms, it’s a wonderful group project that allows each child to contribute a photo for a bulletin board display. It’s also great for practicing fine motor skills, color recognition, and learning how to follow step-by-step instructions.
Printable Template
For an easier crafting experience, especially with younger kids or larger groups, use the printable turkey frame template. It includes all the basic shapes—feathers, body, face, and legs—ready to cut, color, and assemble. Simply print the template on white or colored paper, let kids color or decorate the pieces, and then follow the assembly steps above.
This not only speeds up prep time but also ensures consistency when making multiple turkeys for classrooms, parties, or family gatherings.

Conclusion
Crafting this Festive Turkey Photo Frame Wall Hanger is a joyful way to welcome the season of gratitude. Whether you hang it on your wall, gift it to grandparents, or use it as a classroom activity, it’s sure to bring smiles and warm memories. Grab your materials, print your template, and enjoy making a turkey that’s as unique and special as the photo it holds.
Happy Thanksgiving crafting!

Festive Turkey Photo Frame Wall Hanger
Equipment
- Scissors
- Glue stick or craft glue
- Pencil
Materials
- Colored cardstock (brown, red, orange, yellow, black)
- String or twine for hanging
- Googly eyes or black paper circles for the eyes
- Photo to place in the frame
- Optional decorations like glitter, buttons, stickers
Instructions
- Cut a large oval or circle from brown cardstock for the body. Then cut a smaller circle in the center for the photo window.
- Cut 6–8 feather shapes in red, orange, and yellow. Glue them behind the body in a fanned arrangement.
- Cut two 6-inch strips of orange paper for legs, and accordion fold them. Add foot shapes and glue in place. Cut and glue the beak and wattle.
- Glue googly eyes above the beak. Add any other face or decorative details you like.
- Glue a backing paper behind the body, leaving the top open to create a photo pocket. Insert your photo.
- Glue or tape a loop of twine to the back for hanging. Let dry and display your festive turkey frame!