
Create a magical moment this fall with an enchanting twist on the classic turkey craft. The Enchanted Forest Fairy Turkey Craft combines the whimsy of fairies with the traditional charm of Thanksgiving turkeys. This project is perfect for sparking kids' imaginations while also helping them practice cutting, gluing, and assembling with care. Whether you're crafting at home, in a classroom, or with a community group, this project will be a delightful addition to any festive day.

With soft colors, sparkling wings, and a cheerful forest backdrop, this paper craft allows kids to blend storytelling with creativity. The floral crown and glittery details take it beyond the typical turkey, making it a charming decoration or classroom display item. It’s also ideal for anyone who loves woodland themes or fantasy characters. Best of all, the printable template makes the prep work simple and stress-free.
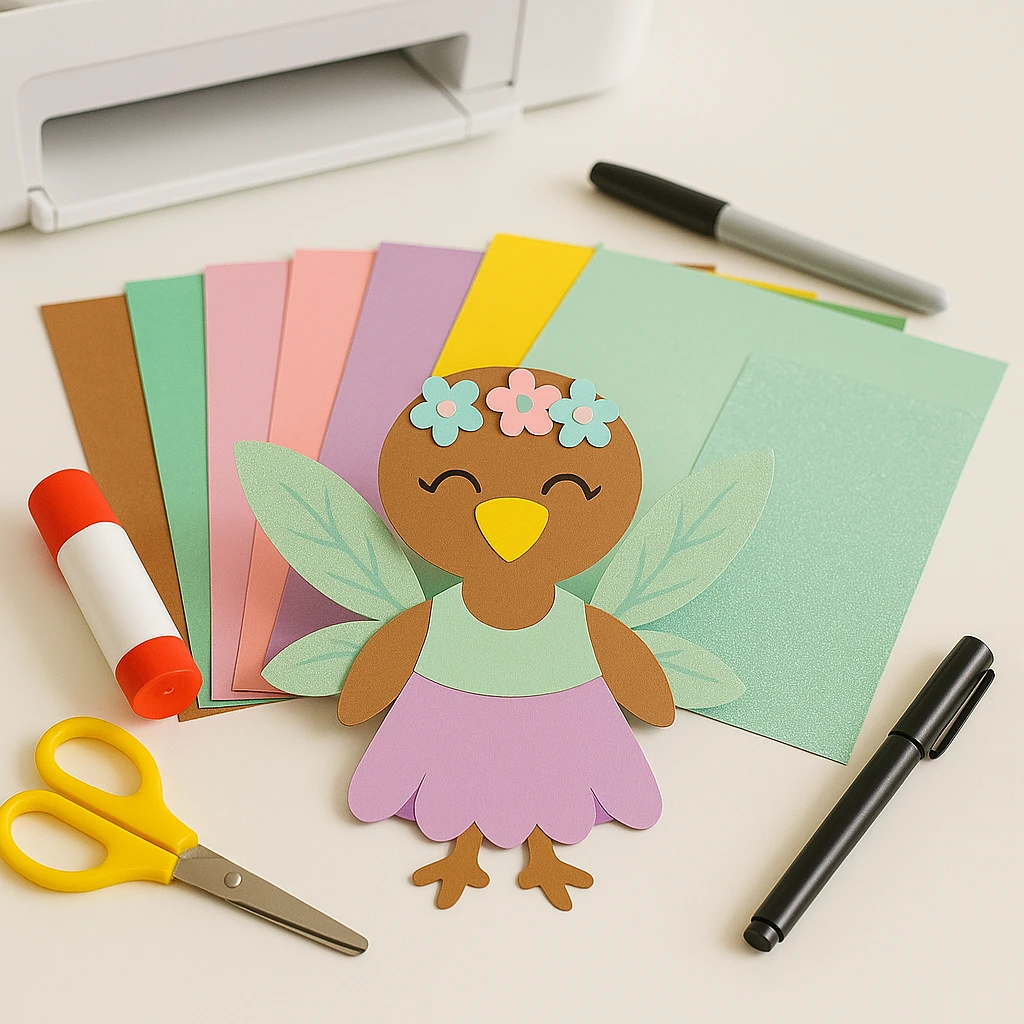
Materials Needed
- Colored cardstock or construction paper (brown, yellow, lavender, mint green, pink, blue, red, green)
- Glitter cardstock for fairy wings
- Scissors
- Glue stick or craft glue
- Black marker for facial features
- Optional: flower stickers or embellishments
- Printable Fairy Turkey Template (available below)
Step-by-Step Instructions
Step 1: Prepare Your Fairy Turkey Template
Print the template on sturdy white cardstock for best results. If you're using colored paper instead, trace the template onto the correct colors before cutting.
Step 2: Cut Out the Pieces
Carefully cut out each piece from the template. You should have the turkey's body, wings, beak, feet, dress, arms, head, and flower crown pieces. Organize each piece by color and shape to make assembly easier.
Step 3: Assemble the Fairy Turkey Body
Start by gluing the brown head and body together. Attach the feet at the bottom of the body and arms on each side. Let each layer dry before moving to the next for best results.
Step 4: Attach Wings and Dress
Glue the glittery fairy wings to the back of the body so they peek out behind the arms. Then glue the lavender dress piece over the lower portion of the body. Press gently to secure it in place.
Step 5: Add Face, Beak, and Floral Crown
Use a black marker to draw two curved lines for eyes and a smiling mouth. Glue on the yellow beak in the center of the face. Arrange and glue the small flowers to form a crown on top of the head. You can use pre-made flower stickers or cut flowers from paper.
Step 6: Decorate and Display
Feel free to add extra sparkle with glitter glue or stickers. Once complete, your fairy turkey can be displayed on a bulletin board, fridge, or classroom wall. You can also tape it to a craft stick for a puppet or scene display.
Customization Ideas
Style 1: Autumn Leaf Fairy Turkey
Swap out the glitter wings for cut-out paper leaves in fall colors like red, orange, and yellow. Add acorns or mini pinecones for a nature-inspired fairy.
Style 2: Glitter Princess Turkey
Use sparkly paper for the dress and wings and add a crown instead of a floral headband. Incorporate gems or rhinestones for extra shine.
Style 3: Woodland Elf Turkey
Create a rustic look with brown, green, and tan tones. Replace the flower crown with a mini felt cap and give the turkey pointy elf ears.

Educational and Seasonal Uses
This craft is excellent for teaching about the changing seasons, gratitude, and imaginative storytelling. Incorporate it into a fall or Thanksgiving unit, or use it to discuss fairy tales and forest animals. Teachers can pair the activity with writing prompts like "If My Turkey Were a Forest Fairy..."
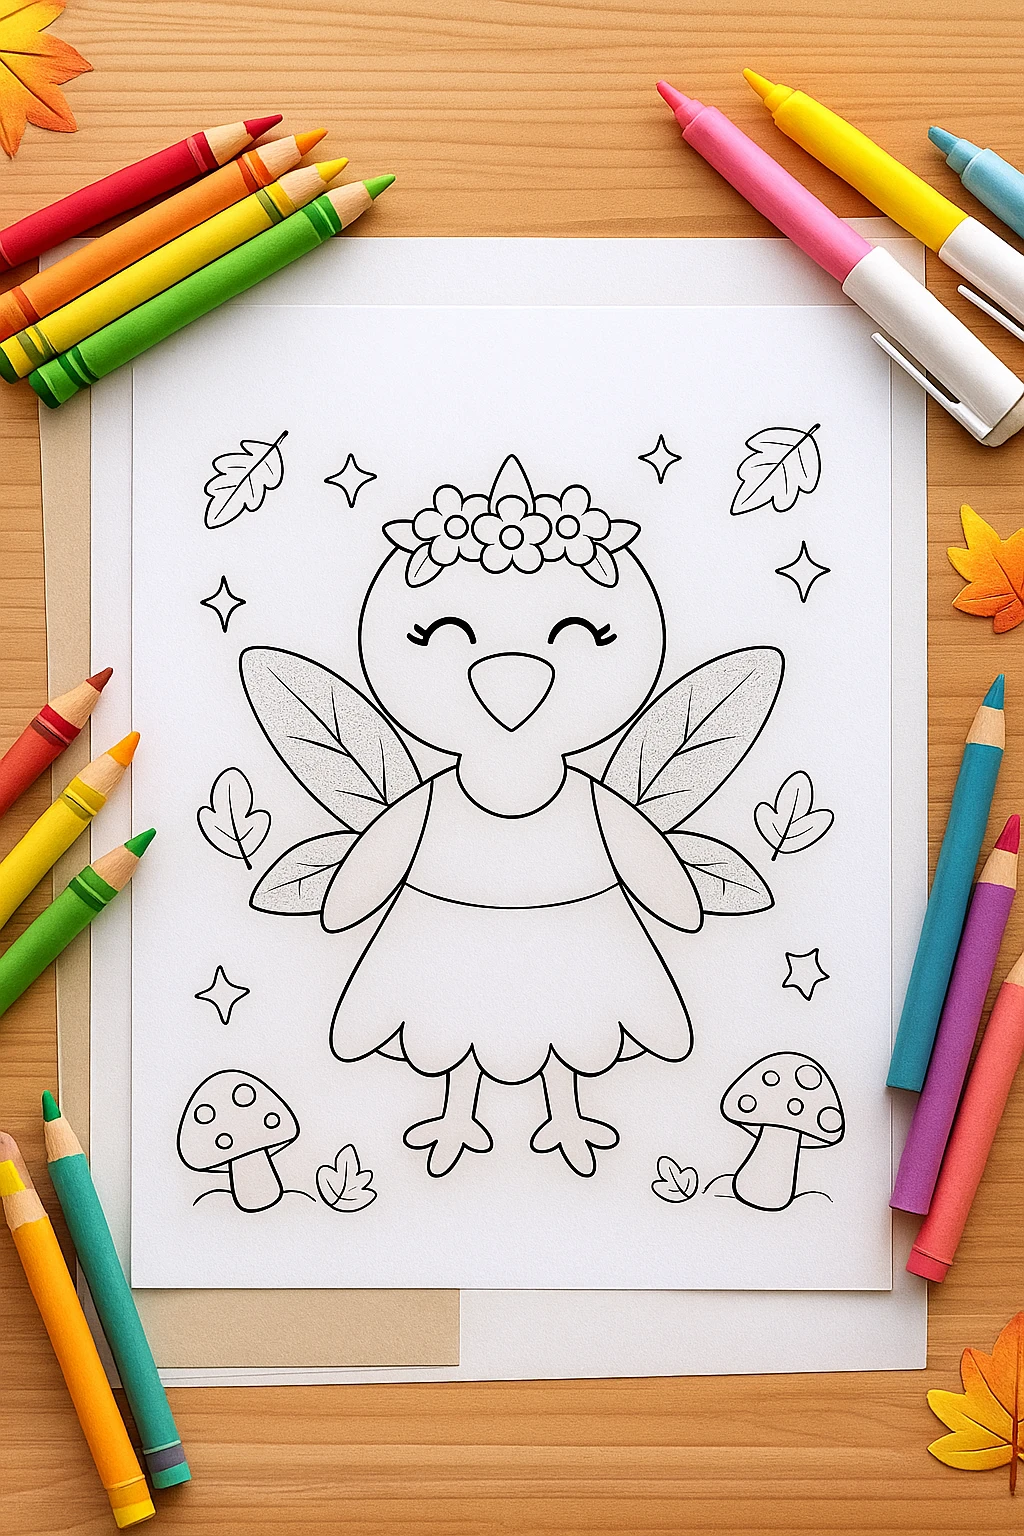
Printable Template
To make crafting easier, download and print the ready-to-use Fairy Turkey Template. All major pieces are included and sized for young hands to cut and glue with ease. Printing on white cardstock is recommended, especially if your child wants to color the pieces themselves.
You can also pre-print on colored paper for quick group activities. The template allows for both customization and convenience—just print, cut, and create your fairy turkey in minutes!
Conclusion
The Enchanted Forest Fairy Turkey Craft offers a charming and imaginative alternative to the usual Thanksgiving crafts. With its whimsical design and hands-on assembly, it brings joy, fantasy, and festivity into any setting. Let your kids' creativity shine as they create their own magical turkey friend this season. Close the scissors, grab the glitter, and watch the forest fairy come to life!

Enchanted Forest Fairy Turkey Craft
Equipment
- Scissors
- Glue stick or craft glue
- Black marker
- Printer
Materials
- Colored cardstock or construction paper (brown, yellow, lavender, mint green, pink, blue, red, green)
- Glitter cardstock for wings
- Flower stickers or embellishments (optional)
- Printable Fairy Turkey Template
Instructions
- Step 1: Prepare Your Fairy Turkey Template — Print the template on white cardstock. If using colored paper, trace pieces onto the desired colors.
- Step 2: Cut Out the Pieces — Cut out all template pieces: body, wings, beak, feet, dress, arms, head, and floral crown.
- Step 3: Assemble the Fairy Turkey Body — Glue the head and body together. Add arms and feet to complete the body base.
- Step 4: Attach Wings and Dress — Glue the glitter wings behind the body and place the dress on the front.
- Step 5: Add Face, Beak, and Floral Crown — Use marker for eyes and smile. Glue the beak and arrange flower crown pieces on the head.
- Step 6: Decorate and Display — Add glitter or stickers for flair. Display on a bulletin board or craft stick as a puppet.