
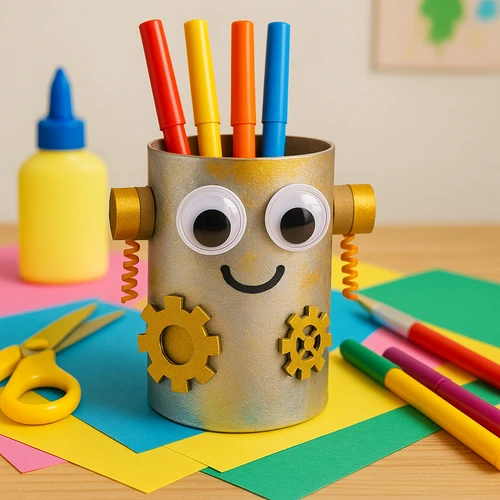
Bring a touch of whimsy and industrial charm to your desk or classroom with this DIY Steampunk Robot Pencil Holder. It's not only a fun craft project but also a functional accessory that keeps your pencils and markers organized. Designed to spark imagination, this project is ideal for kids, teachers, or anyone who loves robots, gears, and recycling.

Crafting this pencil holder is a fantastic way to reuse tin cans and leftover craft supplies. With just a few simple materials—like googly eyes, pipe cleaners, and paint—you can transform an ordinary can into a cheerful robot with steampunk flair. Whether you're looking for a weekend activity, a school project, or something to brighten up your workspace, this DIY delivers creativity and practicality in one.
Let’s dive into the step-by-step guide to make your own steampunk robot pencil buddy.
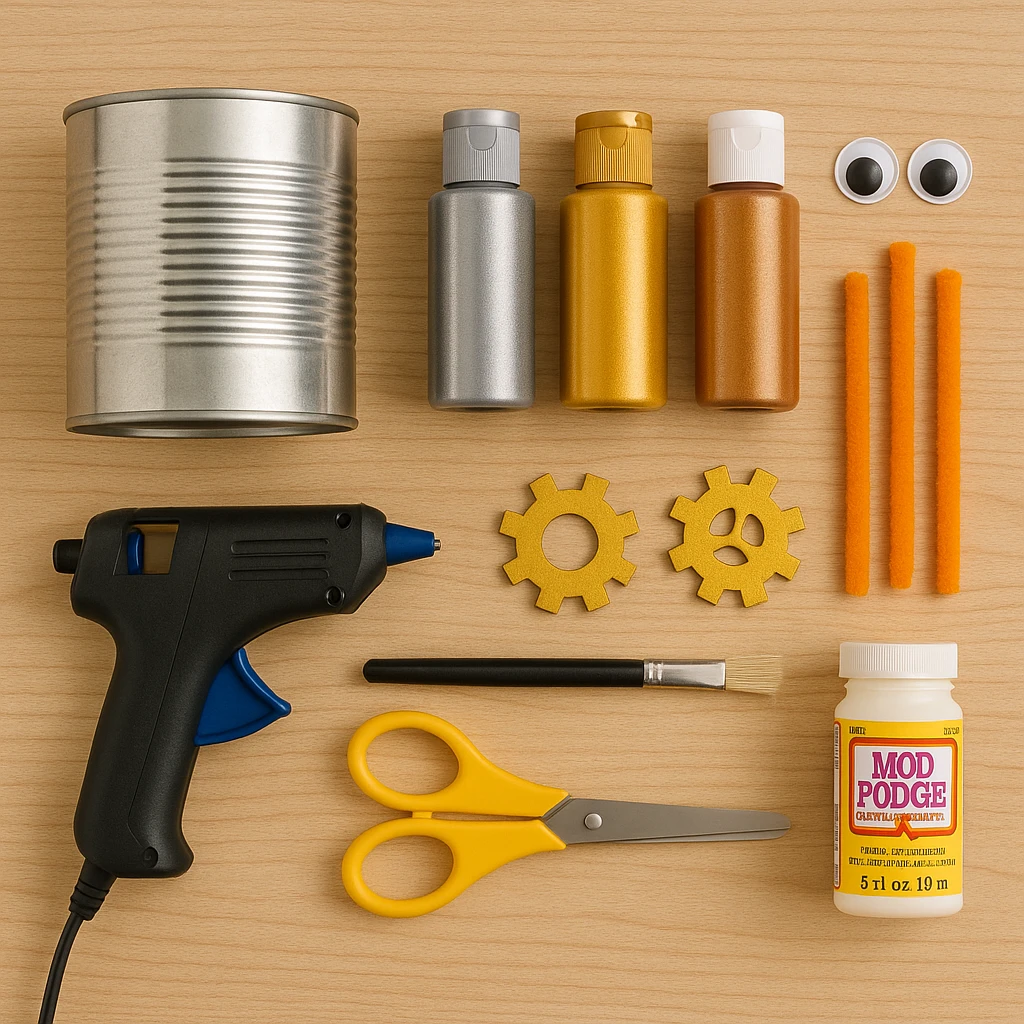
Materials Needed
- 1 recycled tin can (cleaned and label removed)
- Metallic acrylic paints (gold, silver, bronze)
- Paintbrush or sponge
- Hot glue gun and glue sticks
- Large googly eyes
- Black marker or adhesive vinyl for mouth
- Foam gears or cardstock gear cutouts
- 2 bottle caps or foam pieces for ears
- 2 short pieces of orange pipe cleaners (spiraled for robot wires)
- Scissors
- Optional: sealer spray or Mod Podge for finish
Step-by-Step Instructions
Step 1: Prepare the Base Can
Make sure the tin can is completely clean and dry. Remove any sharp edges using pliers or duct tape to ensure it's safe for children to handle.
Step 2: Paint the Can in Steampunk Colors
Using a mix of metallic paints, cover the entire surface of the can. You can sponge silver and bronze together for a distressed, vintage metal look. Let it dry for at least 30 minutes or until fully set.
Step 3: Attach Googly Eyes and Face
Glue on two large googly eyes near the top of the can. Below them, draw or stick a smiling mouth using a black marker or a strip of adhesive vinyl. Let the personality of your robot shine through here!
Step 4: Add Steampunk Features (Gears and Bolts)
Use foam or cardstock gear cutouts to decorate the front of the can. Position them around the cheeks or on the body for a mechanical look. Use hot glue to secure them firmly.
Step 5: Create and Attach Robot Ears
Glue one bottle cap or foam piece to each side of the can to mimic robot ears. Attach a short piece of orange pipe cleaner from each ear to the body to act as whimsical "wires"—this adds a fun, industrial detail.
Step 6: Final Assembly and Dry Time
Once all pieces are in place, check that everything is secure. Allow the glue and paint to dry completely—this may take another 20–30 minutes. Optionally, spray with a sealer or apply Mod Podge for extra durability and shine.
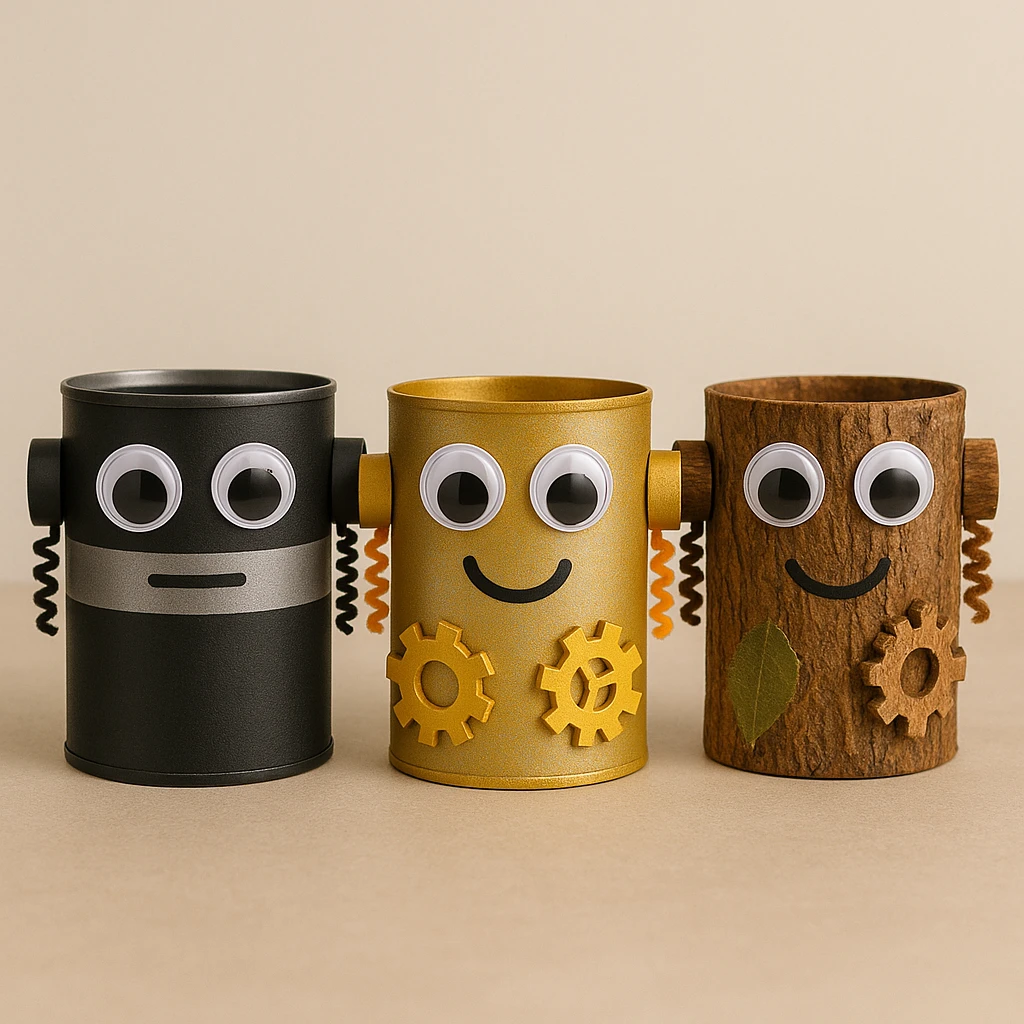
Customization Ideas
Style 1: Metallic Minimalist Robot
Use just silver and black paint for a sleek, modern look. Stick to angular shapes and minimal decorations to keep it clean and futuristic.
Style 2: Colorful Kid Bot
Swap the metallic tones for bright, playful colors like red, blue, and yellow. Add funny eyes, fuzzy eyebrows, or even stickers to make it extra silly.
Style 3: Nature Bot
Cover the can in bark-textured paper or green paint and use leaves, twigs, and earthy tones. This version feels more eco-friendly and blends well with nature themes.
Educational or Seasonal Uses
This craft ties perfectly into STEAM education, especially when learning about recycling, robotics, or art. Teachers can use it during robot-themed lessons or Earth Day to promote creative reuse.
Seasonally, it’s ideal for back-to-school crafts or summer camps. It's also a great take-home gift for classroom parties or workshops.
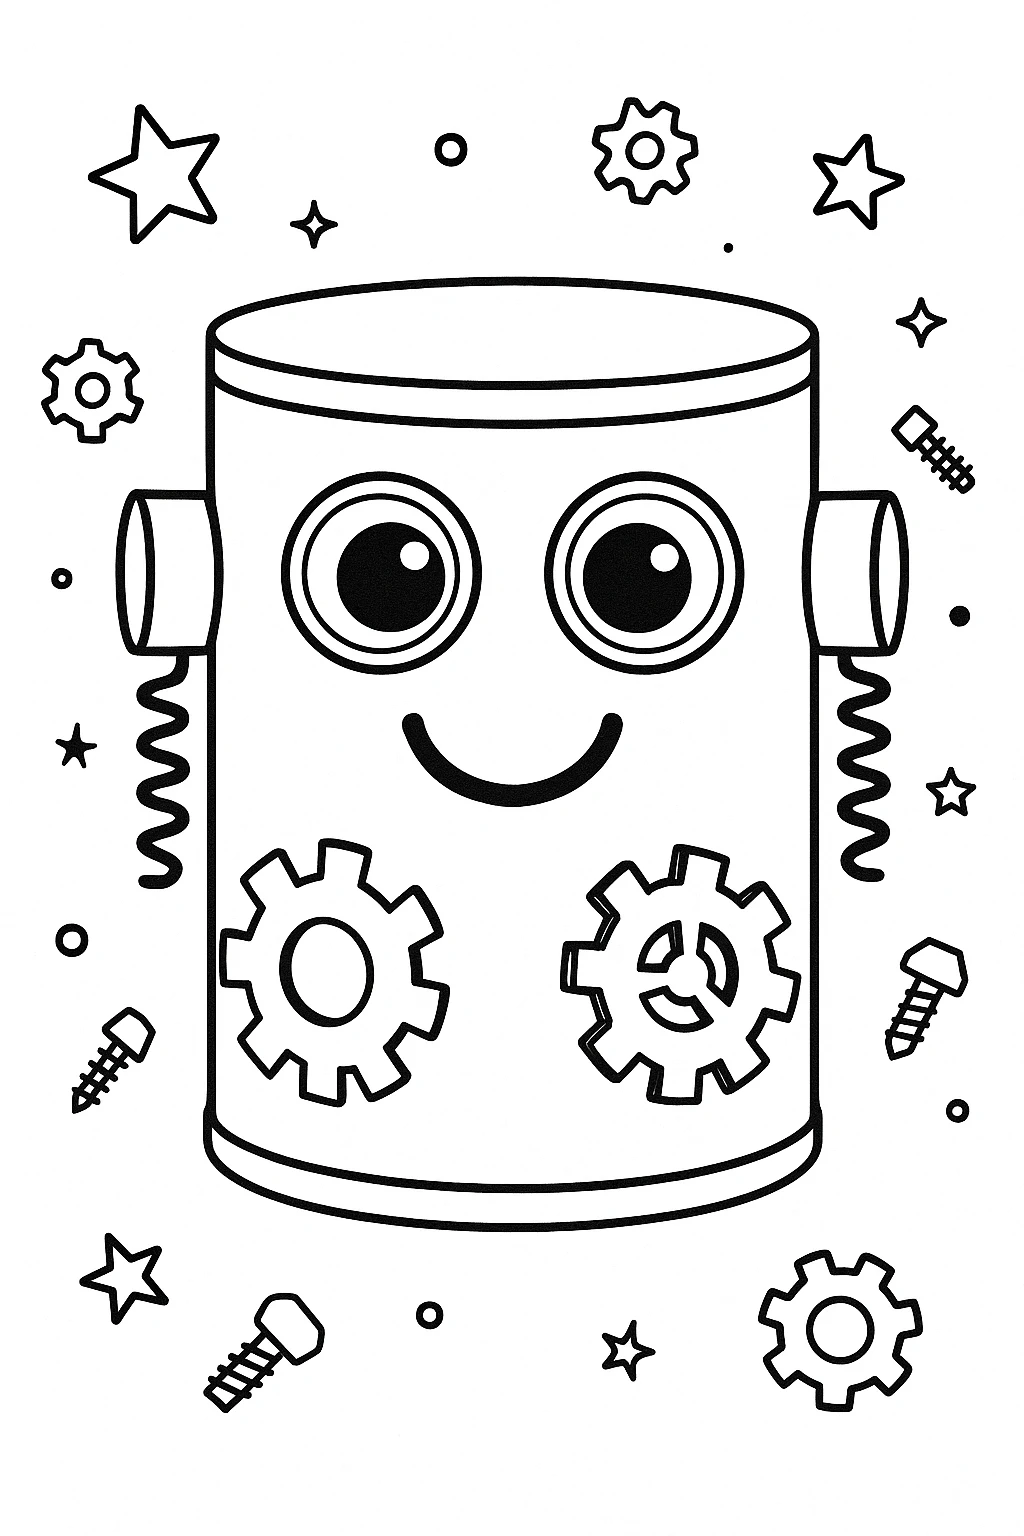
Printable Template
To make this craft even easier, we’ve included a printable template with robot eyes, mouths, and various gear shapes. Simply print the sheet, cut out the designs, and glue them onto your can. It's perfect for group activities where pre-cut pieces save time and effort.
Whether you're hosting a classroom project or crafting at home, these templates help younger kids jump right into the creative process. Just print, color, and assemble—no advanced skills needed!
Conclusion
The DIY Steampunk Robot Pencil Holder combines fun crafting with useful results. With just a few household items and some imagination, you can bring a quirky robot friend to life. It’s perfect for organizing your desk, teaching about recycling, or simply enjoying some crafty bonding time.
Try out different styles and encourage kids to invent their own robot personalities. This project is a delightful way to engage creativity while keeping your space tidy and cheerful.
DIY Steampunk Robot Pencil Holder
Equipment
- Hot glue gun
- Scissors
- Paintbrush or sponge
Materials
- 1 Recycled tin can Cleaned and label removed
- Metallic acrylic paints Gold, silver, bronze
- Googly eyes Large size
- Black marker or adhesive vinyl For robot mouth
- Foam gears or cardstock gear cutouts
- 2 Bottle caps or foam pieces For ears
- 2 Orange pipe cleaners Spiraled for robot wires
- Hot glue sticks
- Optional: Sealer spray or Mod Podge For finishing
Instructions
- Make sure the tin can is completely clean and dry. Remove any sharp edges using pliers or duct tape to ensure it's safe for children to handle.
- Using a mix of metallic paints, cover the entire surface of the can. You can sponge silver and bronze together for a distressed, vintage metal look. Let it dry for at least 30 minutes or until fully set.
- Glue on two large googly eyes near the top of the can. Below them, draw or stick a smiling mouth using a black marker or a strip of adhesive vinyl.
- Use foam or cardstock gear cutouts to decorate the front of the can. Position them around the cheeks or on the body for a mechanical look. Use hot glue to secure them firmly.
- Glue one bottle cap or foam piece to each side of the can to mimic robot ears. Attach a short piece of orange pipe cleaner from each ear to the body to act as whimsical wires.
- Once all pieces are in place, check that everything is secure. Allow the glue and paint to dry completely—this may take another 20–30 minutes. Optionally, spray with a sealer or apply Mod Podge for extra durability and shine.