
Thanksgiving is the perfect time of year to let kids' imaginations run wild, especially when it comes to the classic classroom favorite: the turkey disguise project. One of the most exciting and unexpected ideas is this DIY Stealth Samurai Turkey — a paper craft project that brings together tradition, storytelling, and some sneaky fun! Disguising the turkey has never been so cool.
This project is a great way to combine simple crafting skills with a touch of creative flair. Whether you're doing this at home with your kids or in a classroom with a group, the finished samurai turkey is sure to draw smiles. With bold shapes, a ninja-style headband, and even paper swords, this paper turkey is ready for anything — except being eaten for Thanksgiving dinner!
Let’s get started by gathering our materials and prepping our workspace.
Materials Needed
- Black, brown, yellow, red, white, and gray cardstock
- Scissors
- Glue stick or craft glue
- Pencil
- Optional: googly eyes, black marker

Step-by-Step Instructions
Step 1: Prepare the Turkey Base
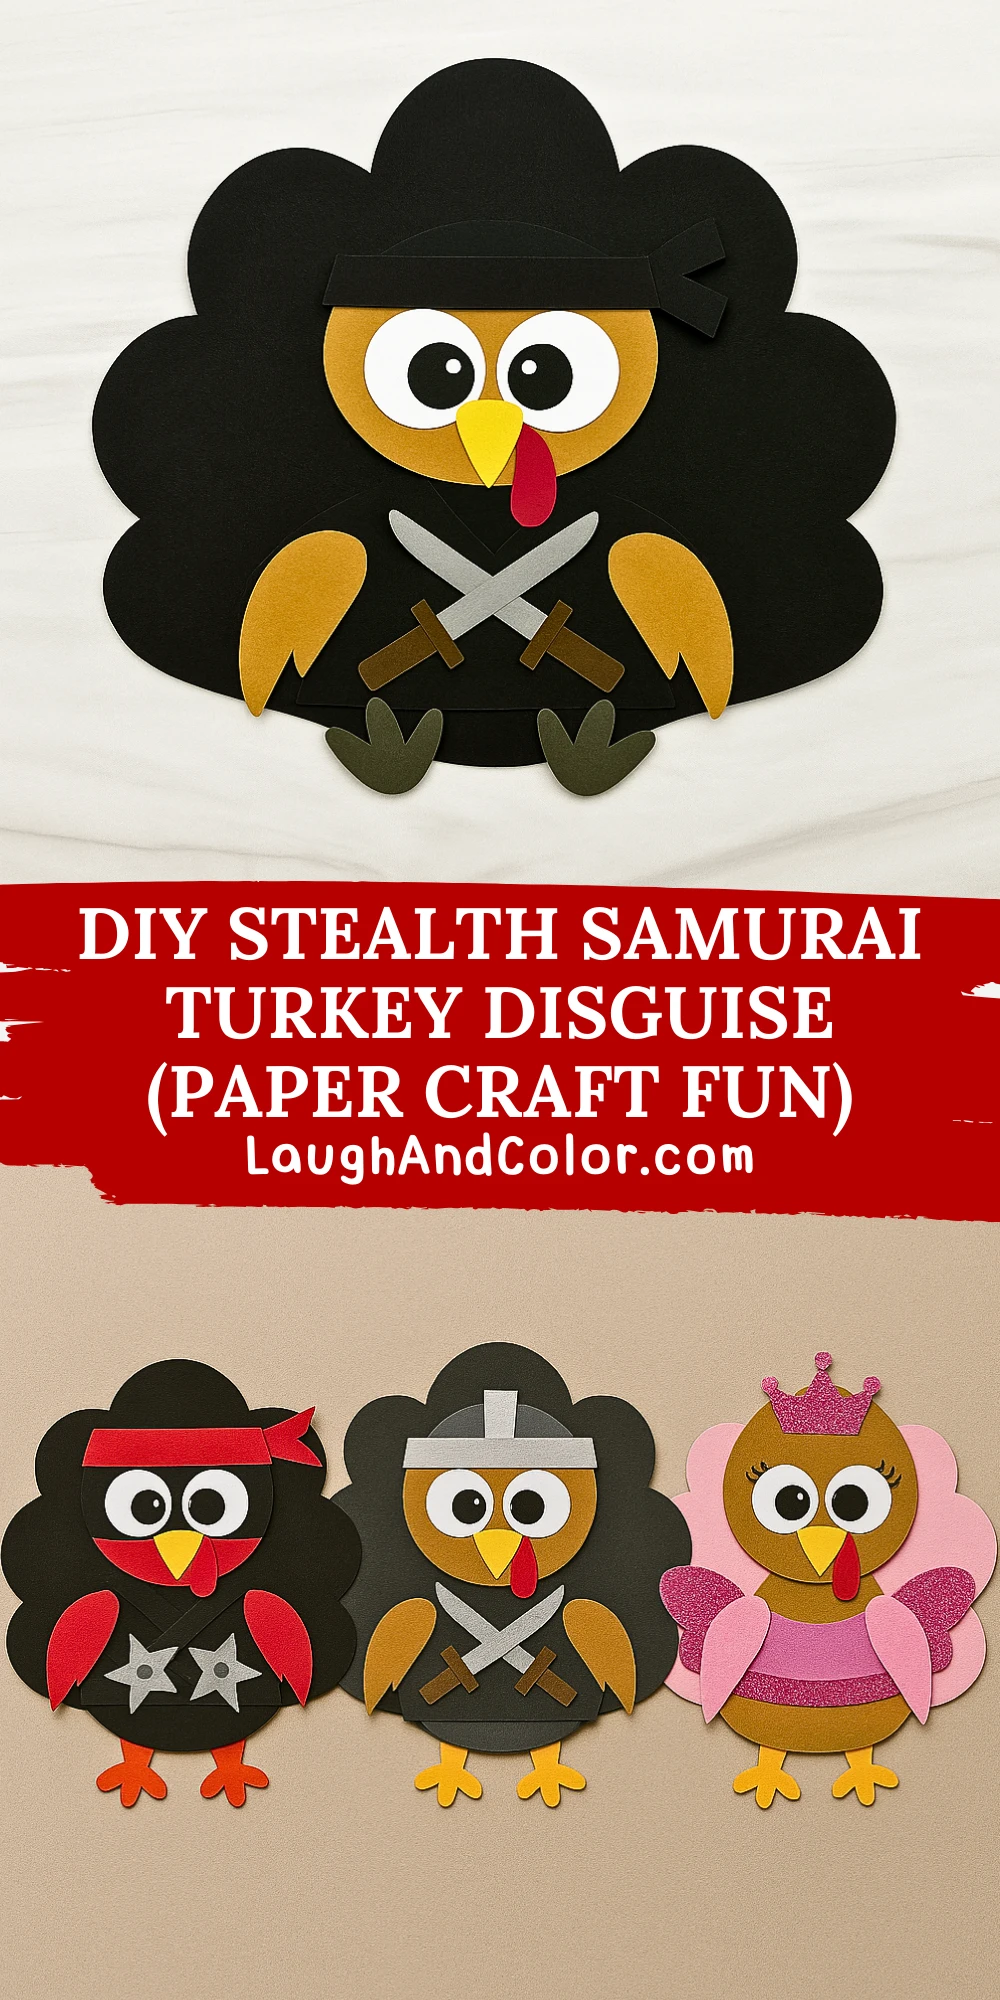
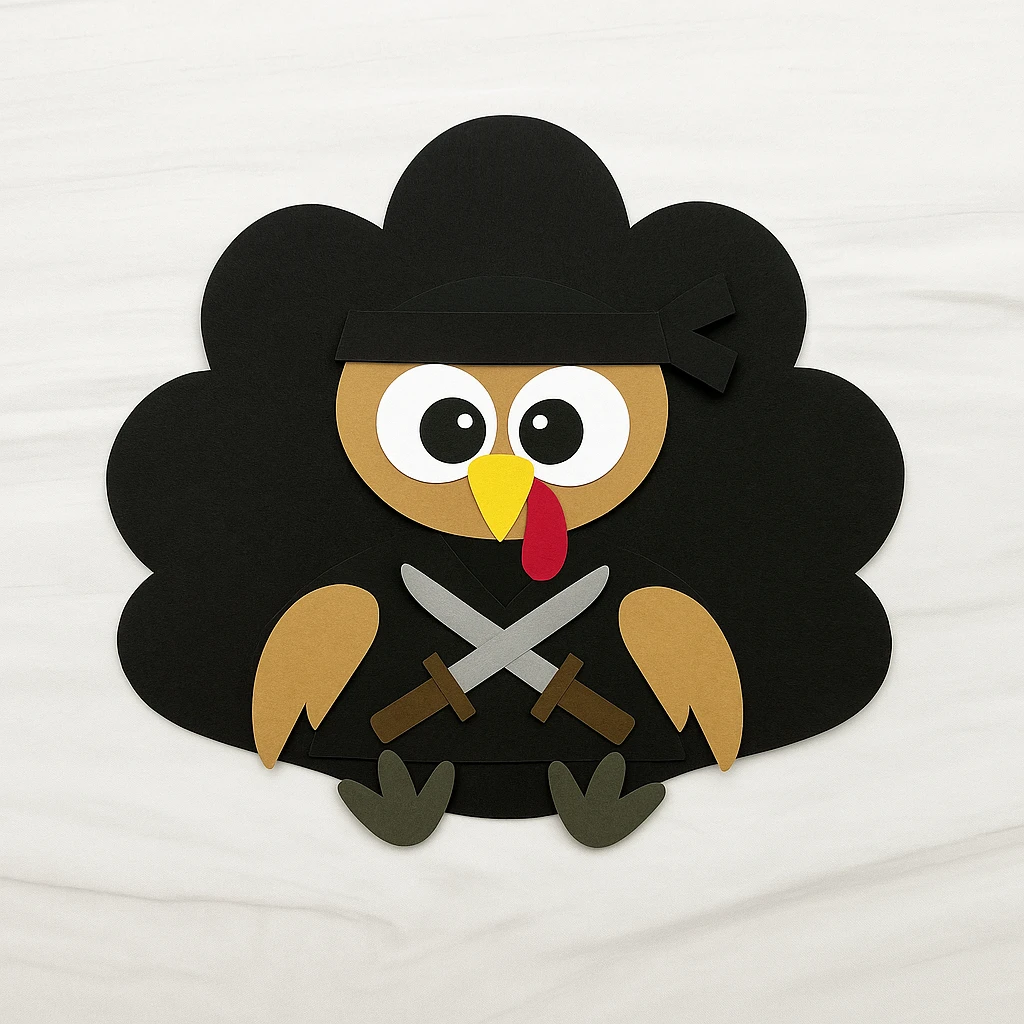
Start with cutting out a large scalloped black shape for the turkey's body — this forms the dramatic feather backdrop. Cut a smaller circle from brown cardstock to serve as the turkey’s face and a slightly larger black circle for the chest.
Tip: If you're working with young children, trace the shapes for them first and let them focus on the gluing.
Step 2: Cut Out the Samurai Elements
Create two small gray swords with curved blades and brown handles. These can be crossed at the front to make your turkey look extra fierce! Also, cut two wing shapes from light brown paper and two small black "feet" shapes. Finally, cut a black headband strip and a small triangle end piece for the tie.
Step 3: Assemble the Head and Face
Glue the brown face circle to the upper portion of the body. Cut and glue two large white circles and two smaller black circles for the eyes. Add a small yellow triangle for the beak and a red teardrop shape to act as the wattle hanging from one side.
Tip: Let the kids position the eyes however they like — crossed eyes or wide-eyed expressions add charm.
Step 4: Attach the Swords and Arms
Glue the crossed swords in the center of the black chest circle. Then attach the wings so that they appear to be resting on top of or near the sword handles, like the turkey is gripping them ninja-style.
Step 5: Complete with Final Touches
Add the headband across the top of the turkey’s head, tucking the loose tie piece behind it on one side. Glue the feet at the base. You can also add optional extras like a black belt, star-shaped stickers, or even tiny throwing stars made of silver cardstock!
Let the glue dry completely before displaying or using the turkey for classroom projects.
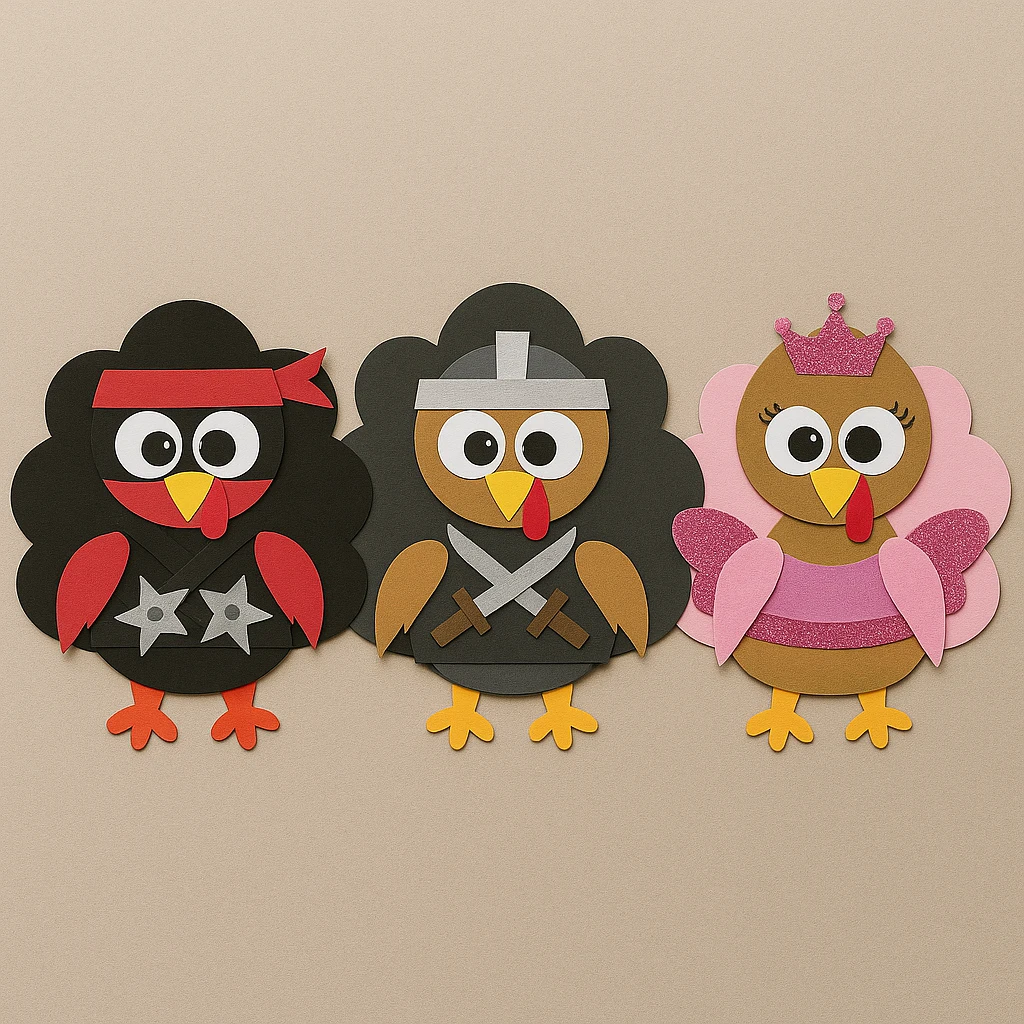
Customization Ideas
- Ninja Turkey Variant: Use red, gray, and black for a sleeker ninja look. Swap out the swords for throwing stars made from metallic paper.
- Robot Samurai Turkey: Replace cardstock with metallic foil paper. Add mechanical eye details using silver marker or foil pieces.
- Princess Warrior Turkey: Use pinks and purples for the base. Add glittery sword handles, rhinestone stickers, and a crown instead of a headband.
Each of these custom ideas makes the turkey even more fun and encourages kids to think outside the box.
Educational or Seasonal Uses
This DIY craft is a hit for November classroom projects and makes a fantastic take-home keepsake. It pairs beautifully with writing assignments where students explain their turkey’s disguise and backstory. This not only builds fine motor skills but also strengthens storytelling and descriptive writing.
Teachers can use this to discuss traditions, symbolism in clothing (like samurai armor), and creative problem-solving. It's perfect for thematic bulletin boards and family craft time.
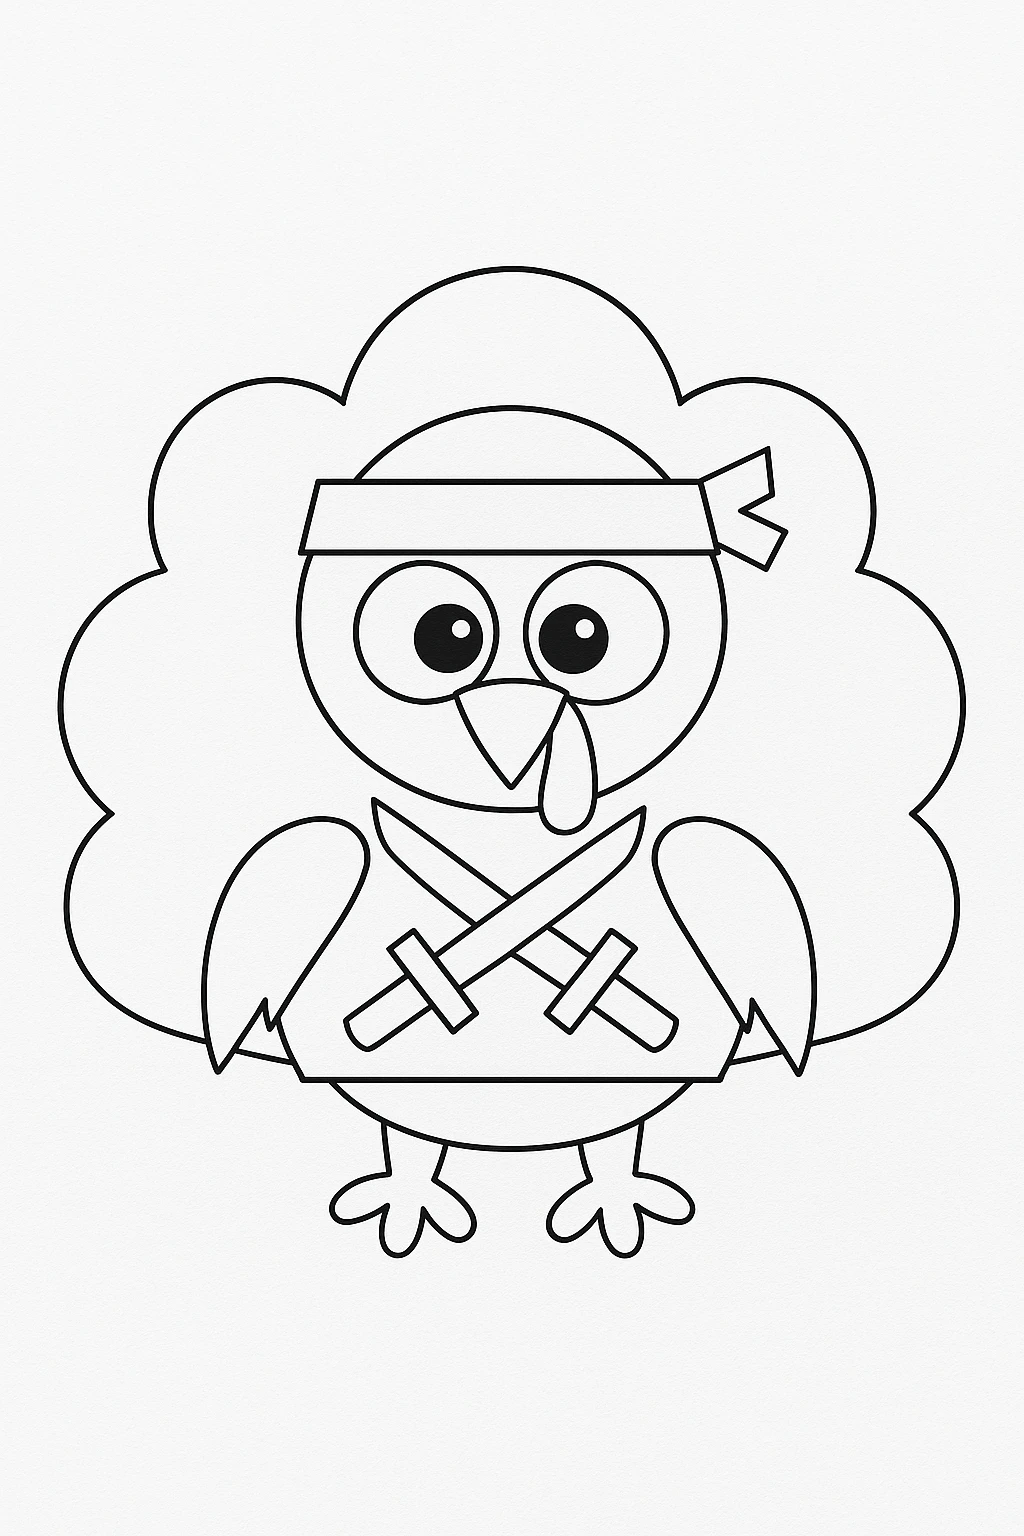
Printable Template
To make this project even easier, we’ve included a ready-to-use printable template. Just print the pages, let kids color in the parts they want (or leave them as-is for bold paper crafts), cut out the shapes, and follow the instructions above to assemble.
This template works great for both home and classroom use — no need to draw the shapes from scratch, so you can focus more on creativity and storytelling!
Conclusion
Disguising a turkey has never been this fun or stealthy! With our DIY Stealth Samurai Turkey, you’re combining paper crafting with a burst of imagination and seasonal charm. Whether it’s part of a Thanksgiving unit or a weekend activity at home, this turkey is ready to blend in — or stand out in the best way.
Encourage your little ones to try their own disguises and build their own turkey stories. The sky’s the limit when it comes to creativity!
DIY Stealth Samurai Turkey Disguise (Paper Craft Fun)
Equipment
- Scissors
- Glue stick or craft glue
- Pencil
Materials
- Black cardstock
- Brown cardstock
- Yellow cardstock
- Red cardstock
- White cardstock
- Gray cardstock
- Optional: Googly eyes or black marker
Instructions
- Step 1: Prepare the Turkey Base - Cut out a large scalloped black shape for the turkey's body, a brown circle for the face, and a slightly larger black circle for the chest.
- Step 2: Cut Out the Samurai Elements - Cut two gray swords, two light brown wings, two black feet, and a black headband with a tie end.
- Step 3: Assemble the Head and Face - Glue the brown face, eyes (white and black circles), yellow beak, and red wattle onto the upper body.
- Step 4: Attach the Swords and Arms - Cross the swords on the chest and place the wings so they appear to grip them.
- Step 5: Complete with Final Touches - Add the headband, glue on the feet, and decorate as desired.