
Transform Thanksgiving into a royal desert adventure with this creative and colorful Desert Oasis Turkey Queen Disguise Craft! This whimsical project lets kids dress up a turkey as a queen, complete with a flowing gown, sparkling crown, and feathers as vibrant as the desert sunset. It's a perfect blend of creativity and storytelling, allowing children to imagine their turkey reigning in a palm tree–lined oasis under a golden sun.

Crafting this turkey disguise is not only fun, but it also helps kids practice fine motor skills, color recognition, and imaginative play. Whether you're a parent planning a weekend activity or a teacher looking for a festive classroom project, this turkey queen is a show-stopping addition to any Thanksgiving craft collection. Plus, the desert theme adds a fresh and playful twist that stands out from the usual fall decor.
Materials Needed
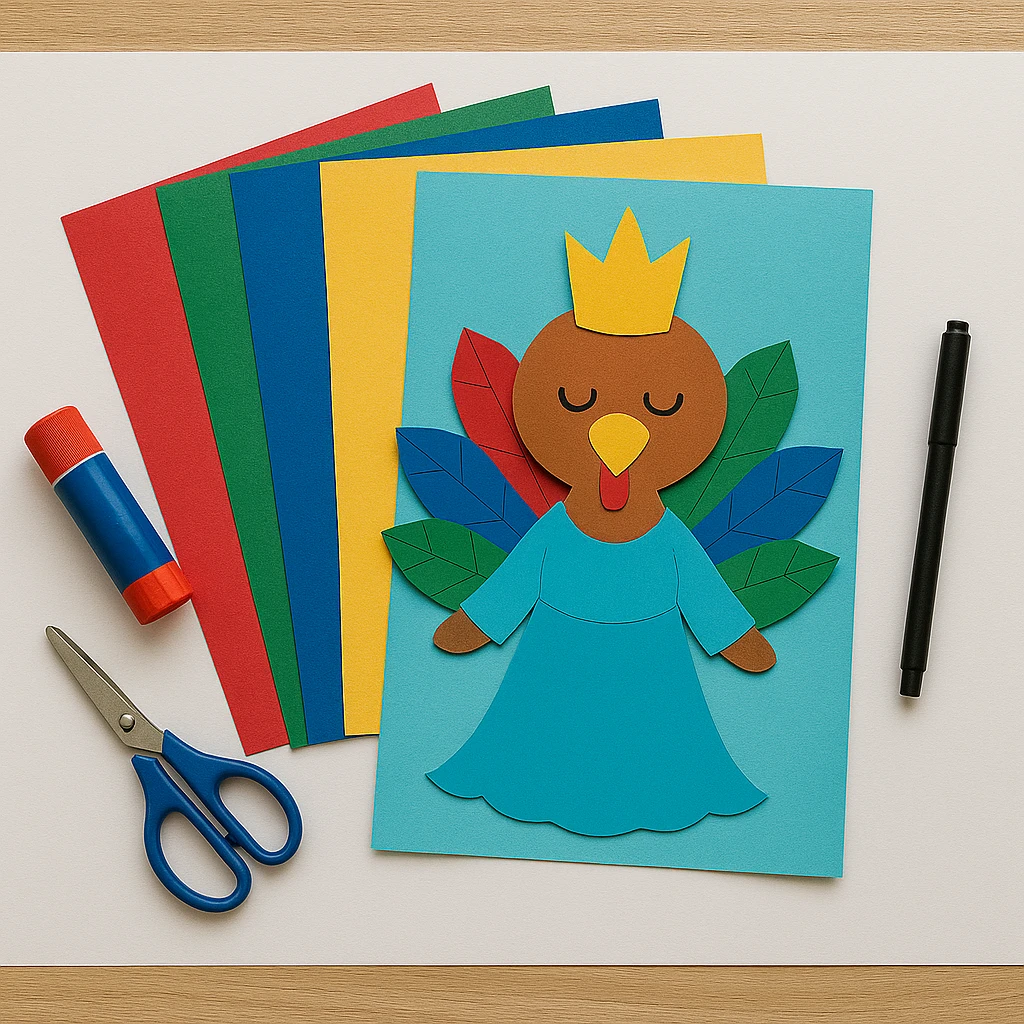
- Brown construction paper (for turkey body)
- Red, blue, green construction paper (for feathers)
- Yellow construction paper (for beak and crown)
- Light blue paper (for the gown)
- Scissors
- Glue stick
- Black marker or crayon
- Printable turkey and crown templates
- Extra construction paper (for background: palm trees, sun, clouds, sand dunes)
Step-by-Step Instructions
Step 1: Print and Cut Out the Turkey Template
Print out the basic turkey body template on sturdy paper or cardstock. Carefully cut around the shape, including the head, body, and small details like the beak and wattle. Use brown construction paper to recreate the turkey shape if you're not using a printable.
Step 2: Create the Desert Background Scene
Set the stage for your turkey queen! Cut out palm trees from green and brown paper, rolling sand dunes from yellow paper, and a sun and clouds to complete the oasis vibe. Glue these onto a large light blue or tan sheet as the background. This helps your craft feel like a full scene, not just a character.
Step 3: Assemble the Turkey Queen’s Feathers
Cut feather shapes out of colorful construction paper—reds, blues, and greens work great for a royal look. Glue the feathers in a fan shape behind the turkey's body, layering them slightly to create depth and volume.
Step 4: Design and Attach the Royal Dress
Using blue paper, cut out a simple gown shape. Think about how a royal robe would flow: wide sleeves and a flared skirt work well. Glue the gown onto the front of the turkey's body, overlapping just a bit onto the feathers for cohesion.
Step 5: Make and Glue the Crown
Cut a tall, regal crown shape from bright yellow or gold paper. You can keep it simple or add gem shapes for extra flair. Attach the crown to the top of the turkey's head, tilting it slightly for personality.
Step 6: Add Facial Details and Final Touches
Draw closed or open eyes on the turkey using a black marker. Add eyelashes or a smile for character. Check that all pieces are secure, and consider adding glitter or stickers for sparkle. Let everything dry completely.
Customization Ideas
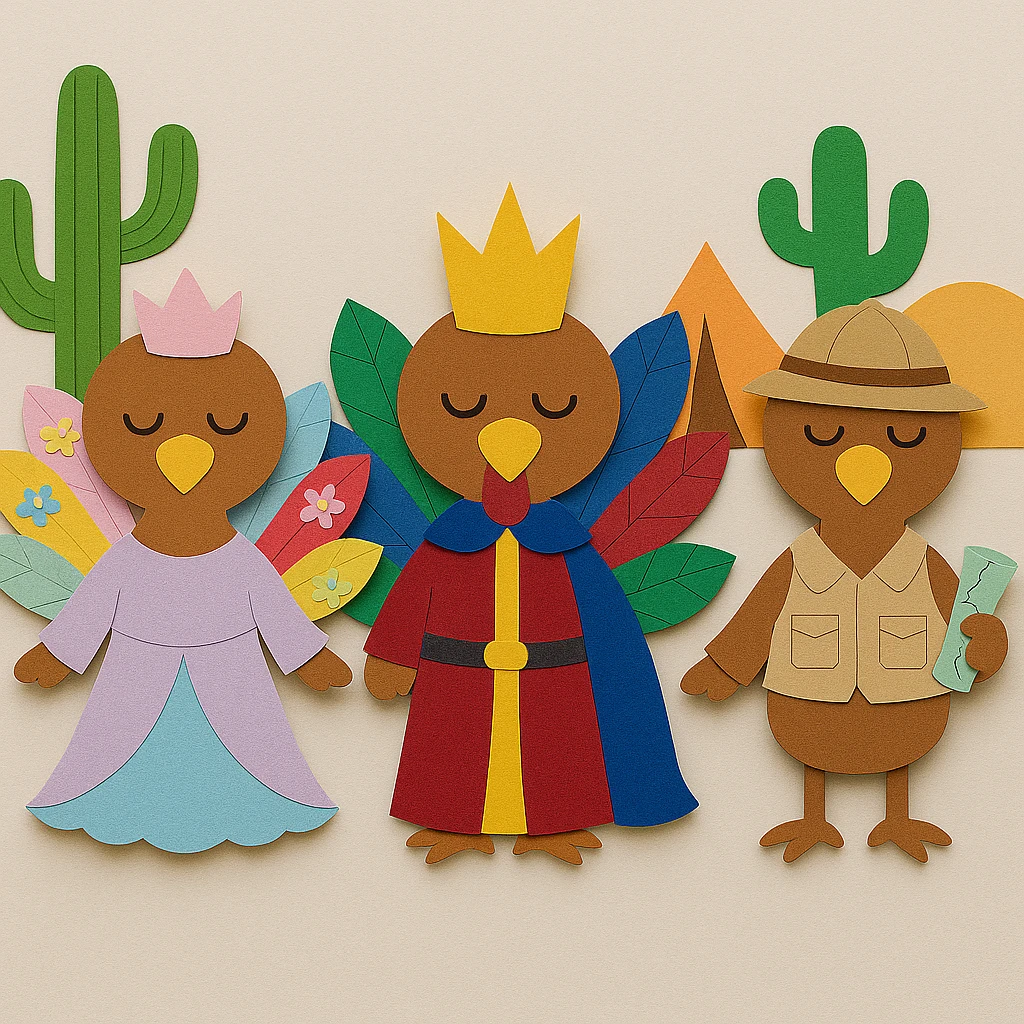
Royal Princess Turkey
Swap bold colors for soft pastels and add glitter paper for the crown and gown. Use floral embellishments or heart-shaped feathers to enhance the fairytale look.
King of the Oasis
Go bold with jewel tones like royal blue, ruby red, and deep gold. Shape the robe to resemble a tunic, and make a tall pointed crown for a powerful desert ruler.
Safari Turkey Explorer
Ditch the gown and crown for an explorer vest made from tan paper. Add a paper explorer hat, binoculars, and even a little paper map or compass.
Educational/Seasonal Uses
This craft fits beautifully into a Thanksgiving “Disguise the Turkey” theme, giving kids a chance to use their imagination while exploring new environments. Pair the activity with a lesson on desert habitats, animal adaptations, or a story-writing assignment where students describe their turkey's adventures as royalty in the desert. It’s also a unique way to celebrate seasonal creativity in both home and school settings.
Printable Template Section
To make this project even easier, use the printable turkey and crown templates provided. Simply print, color, and cut—no complex drawing required. The printable ensures consistent shapes and is a huge time-saver for classroom activities or group craft stations.
Let kids personalize their printable with their favorite colors and patterns before assembling. This makes the project approachable for all ages, while still leaving room for artistic flair and storytelling.

Conclusion
The Desert Oasis Turkey Queen is more than just a disguise—she’s a doorway into creative worlds where turkeys wear crowns and rule over palm-dotted sandscapes. This project encourages kids to craft outside the box and explore new ideas while preparing for Thanksgiving in a fun and imaginative way. Whether used as classroom decor or proudly displayed at home, this royal turkey is sure to delight.

Desert Oasis Turkey Queen Disguise Craft for Kids
Equipment
- Scissors
- Glue stick
- Printable template
- Black marker
Materials
- Brown construction paper for the turkey body
- Red, blue, green construction paper for feathers
- Yellow construction paper for beak and crown
- Light blue paper for the gown
- Printable turkey and crown templates
- Extra construction paper for background (palm trees, sun, clouds, sand dunes)
Instructions
- Print out the basic turkey body template on sturdy paper or cardstock. Carefully cut around the shape, including the head, body, and small details like the beak and wattle.
- Create the desert background by cutting out palm trees, sand dunes, sun, and clouds from colored paper. Glue these onto a large sheet to form your oasis scene.
- Cut feather shapes out of red, blue, and green paper. Arrange and glue them in a fan shape behind the turkey body to create colorful tail feathers.
- Cut out a gown shape from light blue paper and glue it to the front of the turkey. Make sure it overlaps slightly onto the feather area for a cohesive look.
- Make a crown from yellow or gold paper and decorate as desired. Glue it onto the top of the turkey’s head at a fun angle.
- Use a black marker to draw eyes and a smile. Add any final embellishments like glitter or stickers. Let the craft dry completely before displaying.