
Sugar skulls are more than just colorful decorations—they are deeply symbolic pieces rooted in Mexican culture, especially during Día de los Muertos (Day of the Dead). These intricately decorated skulls celebrate the lives of loved ones who have passed and bring vibrant beauty to altars and homes. Crafting your own sugar skull-themed decor can be a joyful and creative way to honor this tradition.

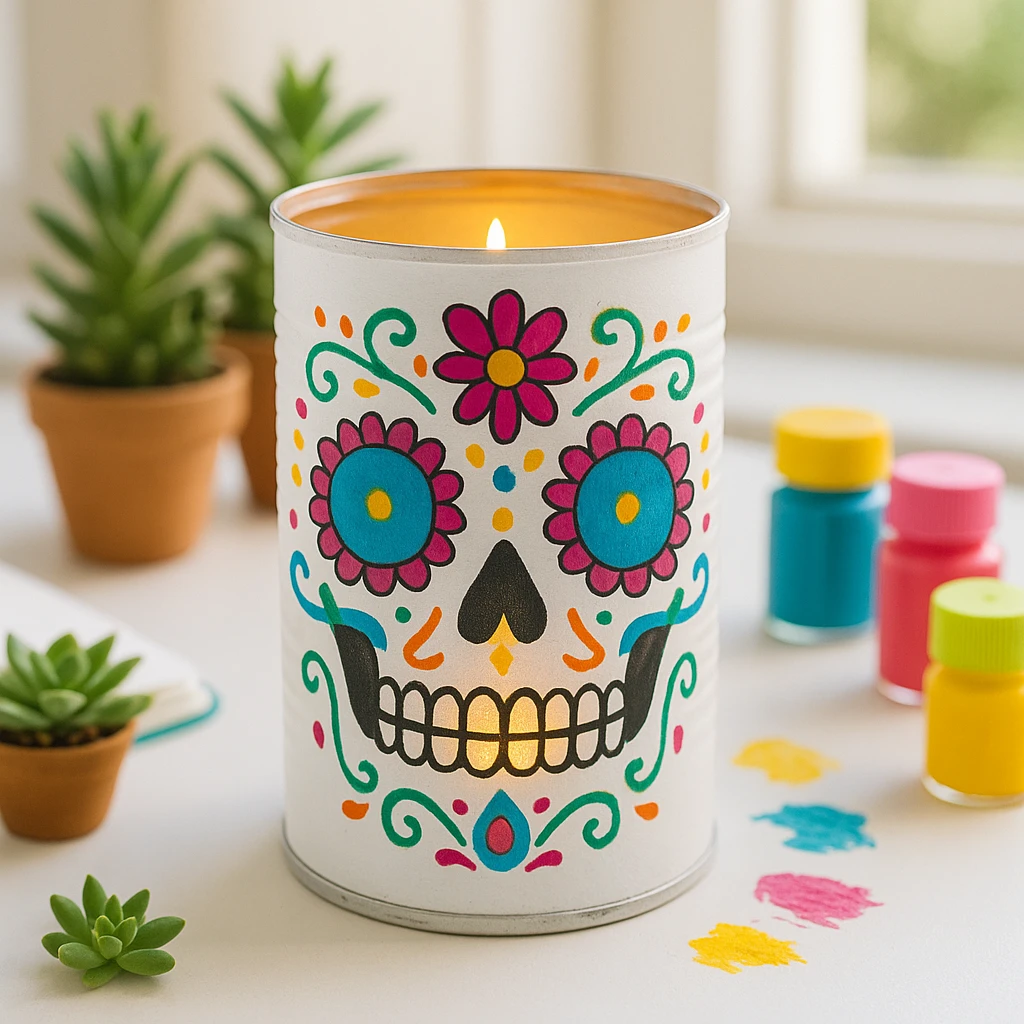
This Colorful Sugar Skull Candle Can Craft is a delightful way to upcycle an old tin can into a piece of glowing art. Whether you're creating it for a themed event, seasonal decoration, or simply a rainy afternoon activity, this project brings bold colors, creativity, and cultural appreciation together. It's easy enough for beginners and fun for all ages, making it perfect for classrooms, family crafts, or individual projects.
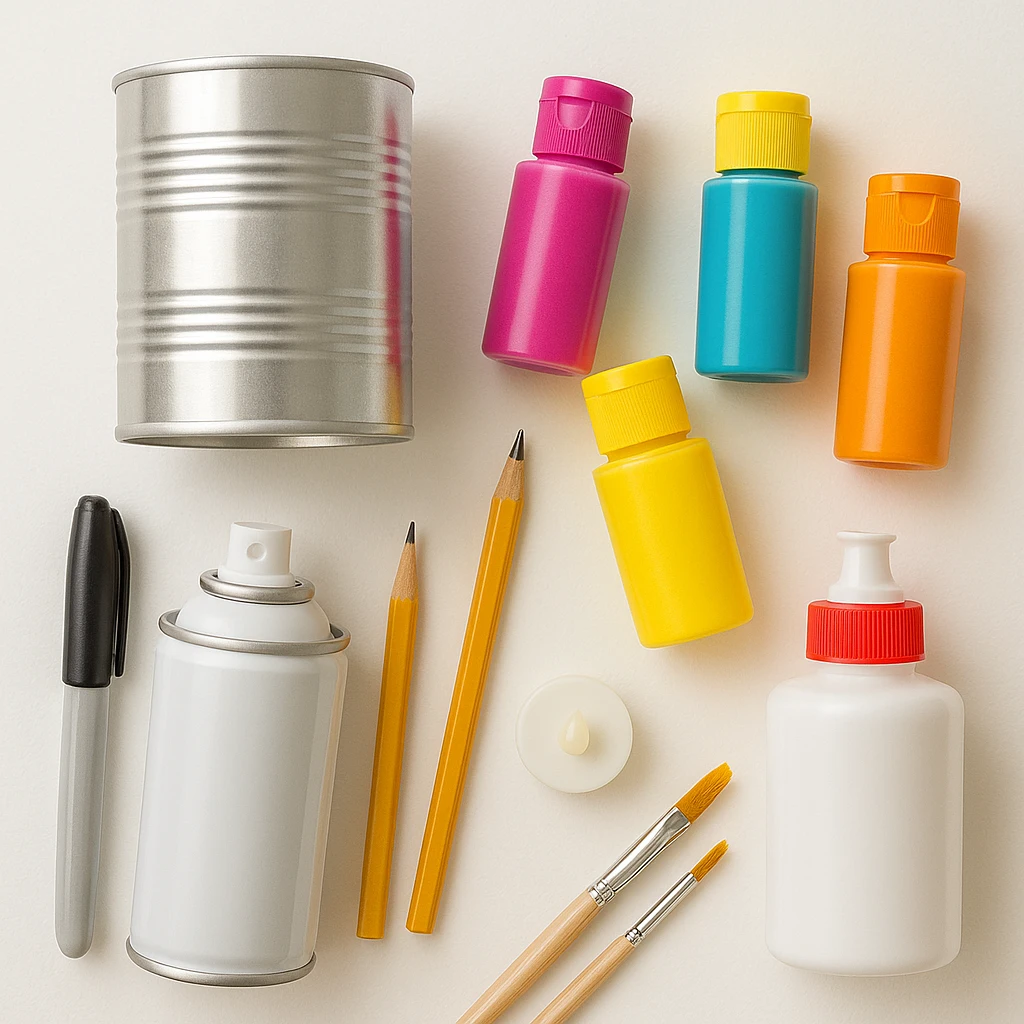
Materials Needed
- 1 clean tin can (label removed, washed, and dried)
- Acrylic paints in bright colors (pink, blue, yellow, teal, orange)
- Black permanent marker or black paint with a fine brush
- White spray paint (optional, for base coat)
- Paintbrushes (fine tip for detail, medium for base colors)
- Pencil and eraser
- Small candle or LED tealight
- Mod Podge or clear sealant spray (optional for finishing)
Step-by-Step Instructions
Step 1: Clean and Prep the Tin Can
Start by thoroughly washing your tin can to remove any residue or label glue. Dry it completely. If the inside has sharp edges, carefully press them down or use a safety can opener to remove them entirely. This ensures the craft is safe to handle.
Step 2: Apply a White Base Coat (Optional)
If your tin can has strong printing or a dark color, consider applying a white spray paint base coat. This helps your design pop with vibrant color and gives a smooth painting surface. Let it dry fully—about 30 minutes to an hour.
Step 3: Sketch the Sugar Skull Design
Use a pencil to lightly sketch your sugar skull face. Start with the eyes—often drawn as flower-like circles—then add a nose, teeth, and surrounding decorative patterns like swirls, hearts, and dots. This sketch will guide your painting process.
Step 4: Paint the Design with Bright Colors
Fill in your design using bright acrylic paints. Paint flower eyes in teal and magenta, add golden yellow accents, and bring the skull to life with cheerful colors. Use a fine brush for small details and a steady hand. Let each color dry slightly before adding another next to it to avoid smudging.
Step 5: Outline Details with Black Marker or Paint
Once the paint is dry, outline your entire design using a black permanent marker or fine-tip paintbrush with black paint. This helps define features and gives the craft its iconic sugar skull look. Add any final embellishments or touch-ups here.
Step 6: Add the Candle and Finish
Place a small candle or battery-operated LED tealight inside the can. For a lasting finish, consider applying a coat of Mod Podge or clear sealant spray over the exterior design. When lit, the candle glows through the mouth and eyes, adding a magical ambiance to any setting.
Customization Ideas
Classic Floral Skull – Stick to traditional Día de los Muertos motifs like marigold flower eyes and symmetrical face patterns in warm tones (orange, yellow, pink). Add cross shapes and heart designs to complete the authentic style.
Neon Pop Skull – Use neon pink, electric blue, and lime green for a modern twist. Add starburst patterns and zigzag lines to make the design pop, perfect for a funky party vibe.
Minimalist Monochrome Skull – Go for a clean black-and-white aesthetic. Use fine lines and symmetrical shapes to create an elegant, modern take on the sugar skull look.

Educational/Seasonal Uses
This craft project is a meaningful way to introduce cultural traditions like Día de los Muertos to kids and students. Teachers can incorporate it into lessons about Mexican heritage, symbolism in art, and holiday customs. Around Halloween, it doubles as a vibrant and respectful alternative to spooky decorations.
Art classes can use it to teach symmetry, balance, and the importance of color. It’s also a great group activity for family nights or multicultural events.
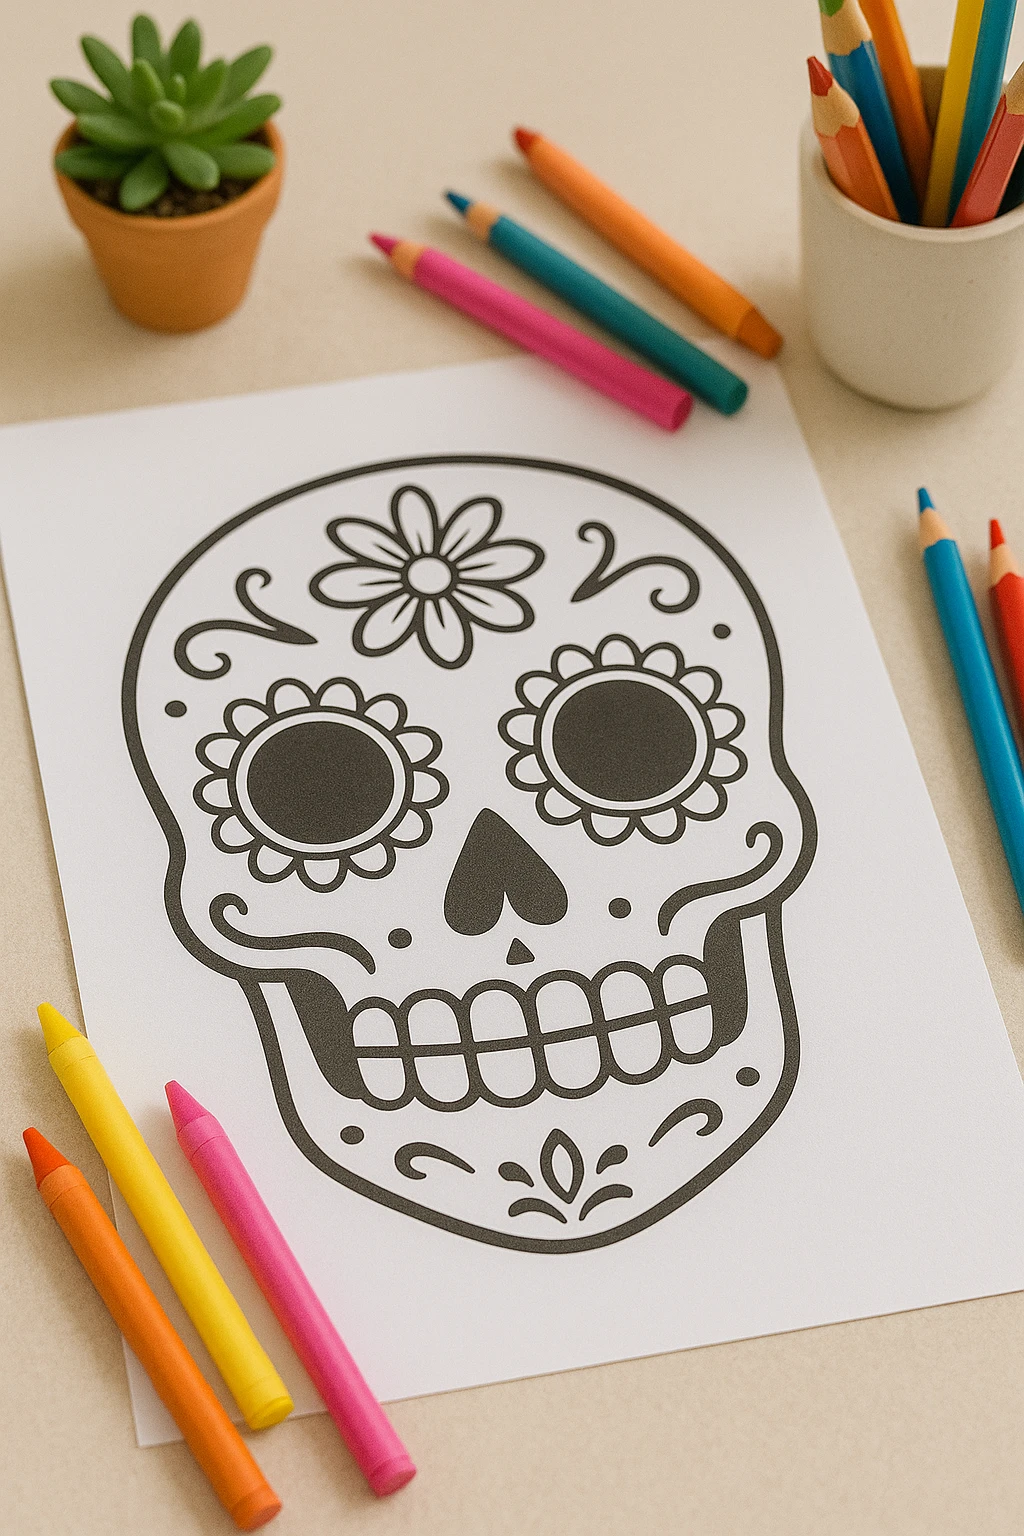
Printable Template
To make this craft even easier, you can use a printable sugar skull face template. Just print the design, color it in, cut it out, and glue it directly onto the can. It’s perfect for younger kids or those less confident in their freehand drawing skills.
This template allows for a mess-free option while still engaging in the colorful fun. Once applied, follow the same steps to seal and add the candle.
Conclusion
The Colorful Sugar Skull Candle Can Craft is not only fun and creative, but it also offers a hands-on way to celebrate a beautiful cultural tradition. Whether you’re decorating your home, preparing for a celebration, or crafting with kids, this project lights up more than just a room—it shines with meaning and joy. Display your glowing creation proudly or share it as a handmade gift with heart.
Colorful Sugar Skull Candle Can Craft
Equipment
- Tin can
- Paintbrushes
- Pencil
- Candle or LED tealight
Materials
- 1 Clean tin can Label removed and dried
- Acrylic paints (variety of bright colors)
- Black permanent marker or black paint
- White spray paint Optional base coat
- Paintbrushes (fine and medium)
- Pencil and eraser
- 1 Small candle or LED tealight
- Mod Podge or clear sealant spray Optional for finish
Instructions
- Clean the tin can thoroughly, removing labels and glue. Dry it completely and ensure edges are safe.
- Apply a white spray paint base coat if needed. Let it dry for 30-60 minutes.
- Use a pencil to lightly sketch the sugar skull face design onto the can.
- Fill in the design with colorful acrylic paints. Allow sections to dry before painting adjacent areas.
- Outline the dry design with a black permanent marker or fine-tip brush and black paint for bold contrast.
- Insert a small candle or LED tealight. Optionally seal the can with Mod Podge or clear spray.