

Creating personalized name crafts is one of the most engaging ways to teach young children how to recognize letters and spell their names. This festive Christmas Tree Name Craft adds a seasonal twist, turning learning time into holiday fun. Whether you're a teacher decorating your classroom or a parent preparing for a cozy winter afternoon activity, this project combines literacy skills with hands-on creativity.
The activity helps build fine motor skills, introduces sequencing as kids arrange letters in the correct order, and reinforces letter recognition—all wrapped up in a cheerful holiday theme. Plus, the final product doubles as a cute decoration kids will be proud to show off. It's a memorable keepsake and an educational tool in one!
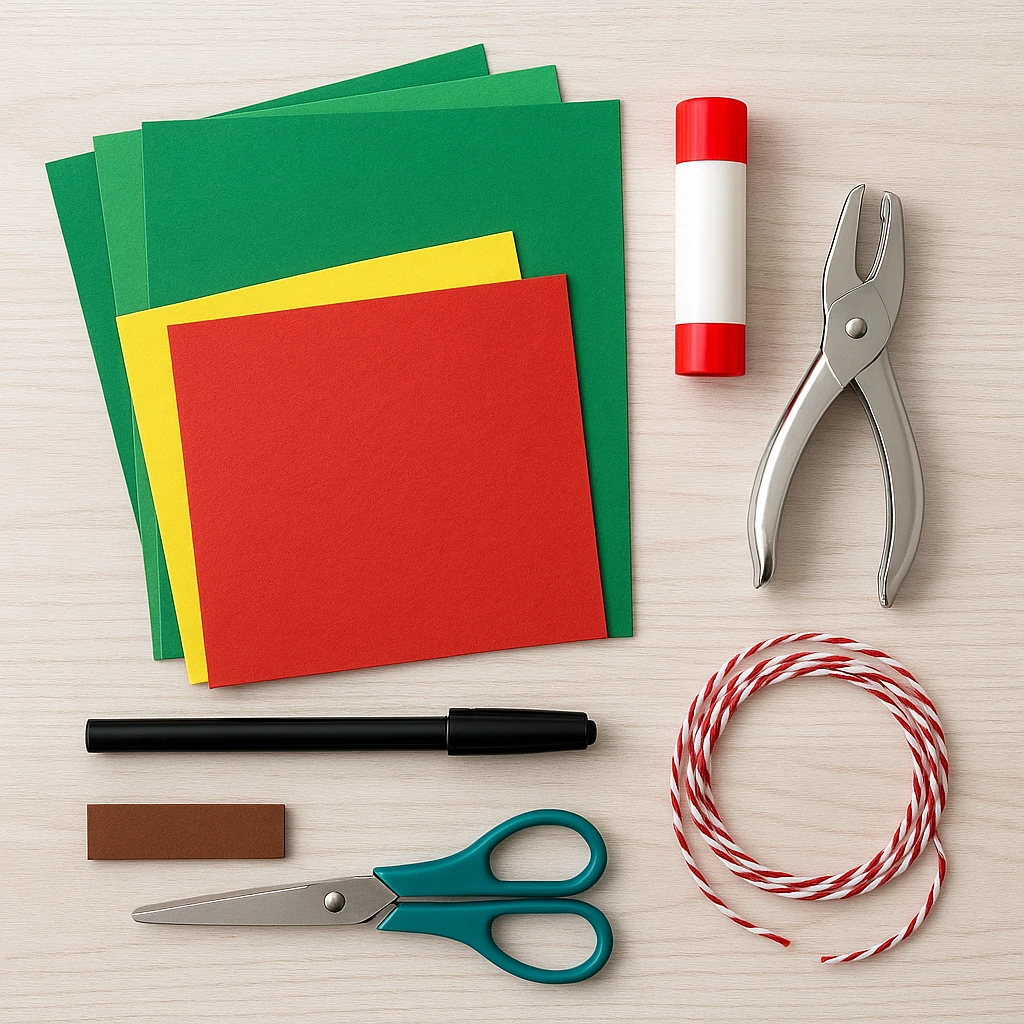
Materials Needed
- Green construction paper (light and dark shades for layered effect)
- Red construction paper (for letter circles)
- Yellow construction paper (stars)
- Brown construction paper (tree trunks)
- Scissors
- Glue stick or glue
- Hole punch
- String or yarn
- Black marker or pre-cut letters
- Optional: holiday-themed stickers, glitter glue, or mini pom-poms
Step-by-Step Instructions
Step 1: Cut Out Tree Pieces
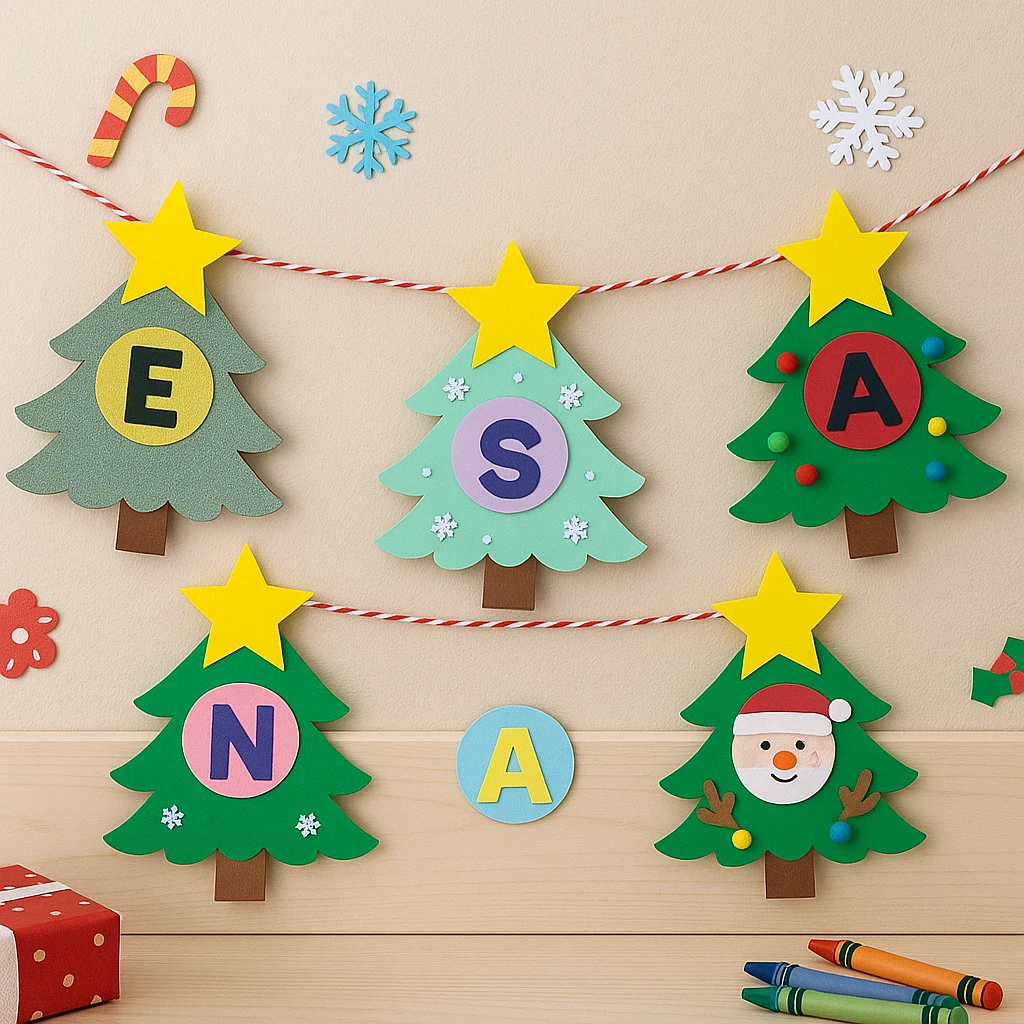
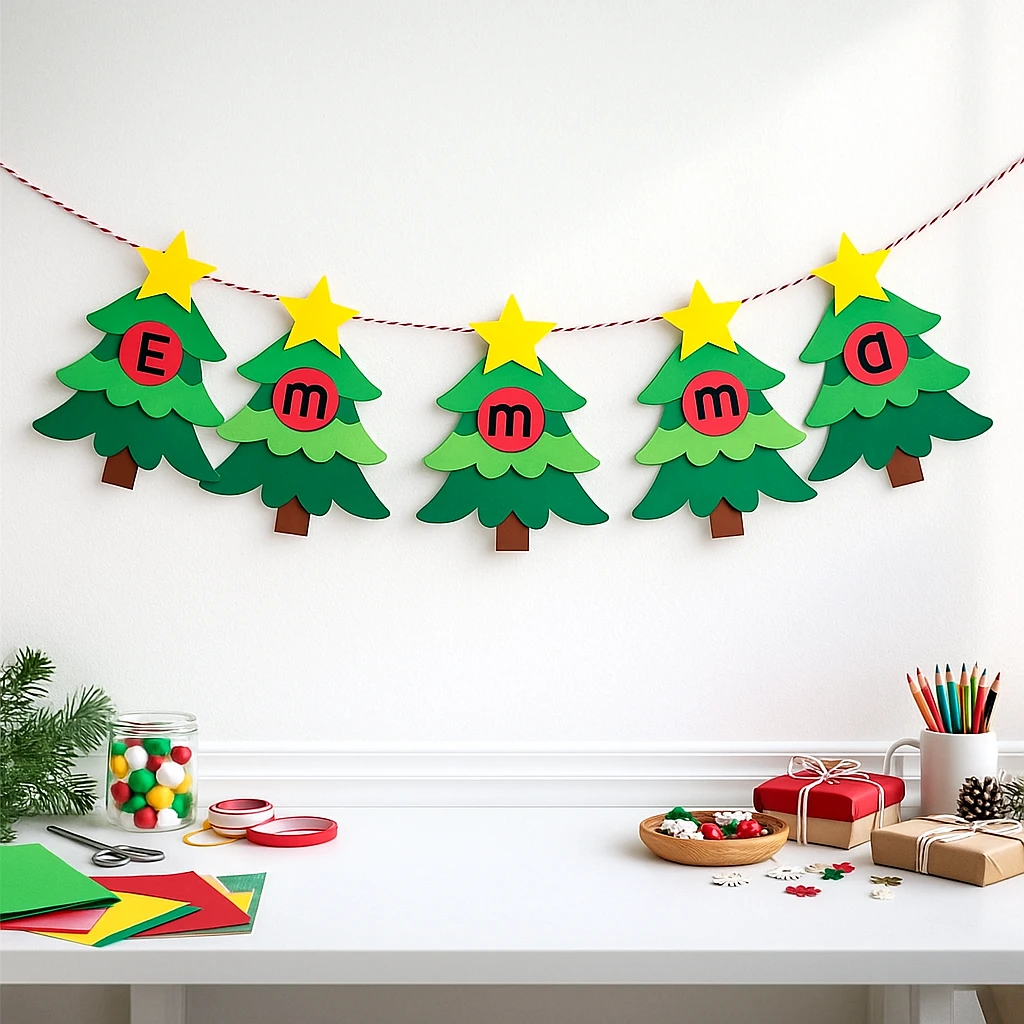
Start by cutting out the pieces you'll need to create your Christmas trees. You'll need layered branches from green paper (at least two shades for dimension), small rectangles for trunks from brown paper, and stars from yellow paper. Each letter of the child's name will need its own tree.
Step 2: Assemble the Tree
Glue the green tree layers together, stacking them from largest at the bottom to smallest at the top to form a full tree. Attach a brown trunk at the bottom and a yellow star at the top. Repeat for each letter in the child's name.
Step 3: Add Name Letters
Cut out red circles to place in the center of each tree. Use a black marker to write one letter per circle or glue on pre-cut letters. Stick each letter circle onto the center of a tree, ensuring the name is spelled correctly across the sequence.
Step 4: Attach the Star and Punch Holes
Double-check the yellow star is secure at the top of each tree. Then, use a hole punch at the top of each star to prepare the trees for threading.
Step 5: String the Trees
Thread string or yarn through each hole, making sure the letters are in the correct order. Leave extra length on both ends for hanging. You now have a festive name banner ready to decorate a wall or classroom board.
Step 6: Decorate (Optional)
Let kids add their personal touch. Use glitter, pom-poms, stickers, or even draw mini ornaments on the trees. This adds flair and helps develop fine motor control further.
Customization Ideas
1. Color Variation Trees
Try using metallic or pastel-colored construction paper for a unique holiday color scheme. Silver, gold, or icy blue trees offer a winter wonderland twist.
2. Themed Trees
Make each tree represent a different character: one can be Santa-themed with a red hat, another can be a reindeer with antlers, and so on. This can make the project even more imaginative and playful.
3. Mini Banner Version
For shorter names or a quick version, create a mini banner using just the child's initials or festive words like "JOY" or "NOEL."
Educational and Seasonal Uses
This craft is not only decorative but also highly educational. It's excellent for practicing:
- Letter recognition and name spelling
- Sequencing and order
- Fine motor skills through cutting, gluing, and stringing
Use it in December lesson plans, winter break activity kits, or family craft nights. It’s also a charming option for classroom displays where each child’s name can be featured.
Printable Template Section
To make this project even easier, you can use a ready-made printable template. It includes pre-sized tree shapes, letter circles, stars, and trunks—just print and cut. This is ideal for busy classrooms or parents who want to prep quickly.
With the printable version, all the sizing and shapes are done for you, so children can jump right into coloring and decorating. It’s a great way to simplify the process while still giving kids the creative freedom to personalize their trees.
Conclusion
The Christmas Tree Name Craft is a joyful way to combine holiday spirit with early learning. It helps children engage with their names in a hands-on, memorable way and creates something festive they’ll be proud to display. Whether you're crafting at home or in a classroom, this is a simple yet meaningful activity to celebrate the season with young learners.
Christmas Tree Name Craft for Preschool & Kindergarten
Equipment
- Scissors
- Glue stick
- Hole punch
- String or yarn
Materials
Main Materials
- Green construction paper use light and dark shades for tree layers
- Red construction paper for letter circles
- Yellow construction paper for stars
- Brown construction paper for tree trunks
- Black marker or letter cutouts to write the name
- Holiday stickers, glitter glue, mini pom-poms optional for decorating
Instructions
- Cut out green tree layers, brown trunks, and yellow stars. You'll need one tree per letter in the child's name.
- Glue the green layers together, then add the brown trunk and a yellow star on top.
- Write one letter of the name on each red circle. Glue the circles onto the center of each tree.
- Punch a hole at the top of each tree through the star for hanging.
- Thread the trees onto yarn or string in the correct name order, leaving space to hang.
- Decorate the trees using glitter, stickers, or pom-poms as desired.