
There's something magical about combining crafts and storytelling during the holidays, and this Christmas Grinch card does exactly that. Inspired by the iconic character from Dr. Seuss's classic tale, this DIY card captures the mischievous charm of the Grinch while bringing plenty of smiles. Whether you're working with kids at home, in a classroom, or looking for a creative holiday party activity, this craft is simple, festive, and full of personality.

The beauty of this craft is its accessibility. With just a few supplies like colored paper, glue, and scissors, kids can create a card that’s not only fun to make but also perfect to gift. Plus, it provides a hands-on opportunity to develop fine motor skills, follow instructions, and enjoy imaginative play. Let’s walk through everything you need and each step to bring your Grinch to life!
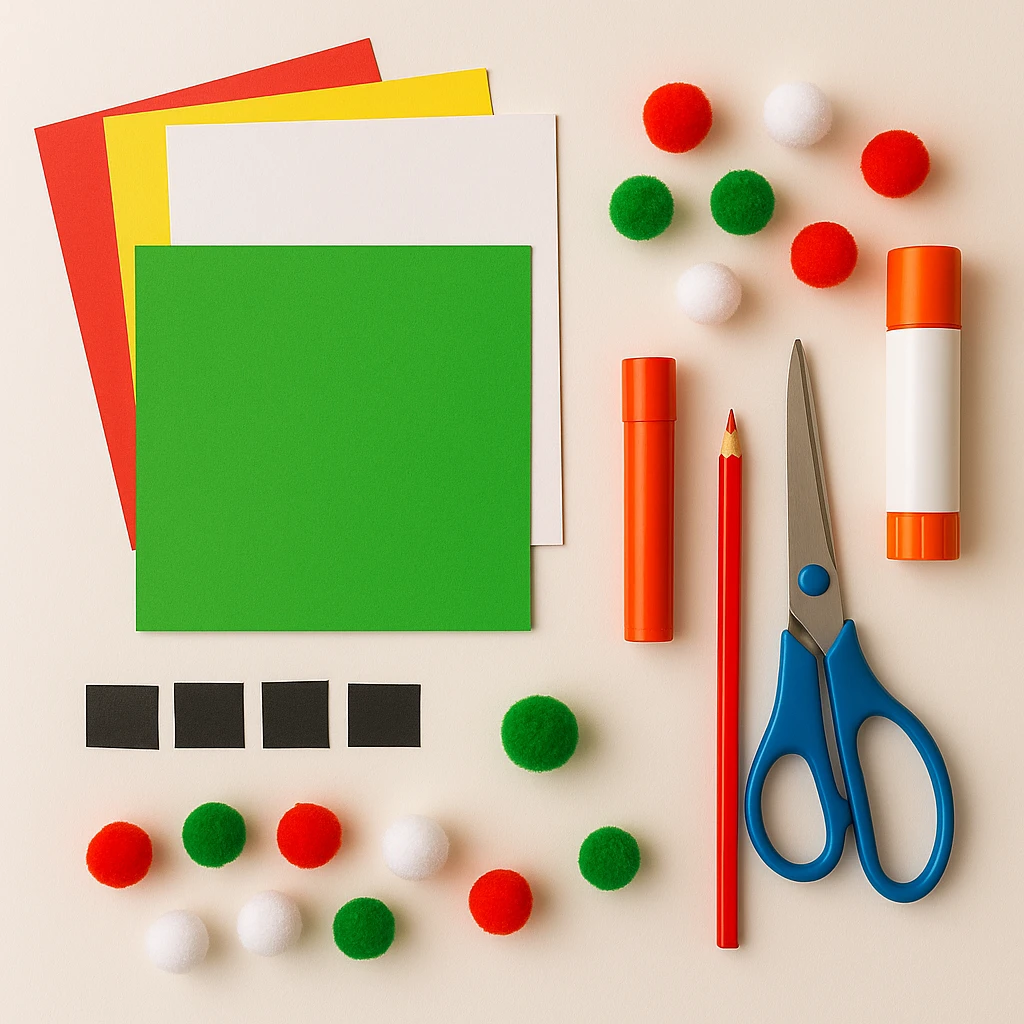
Materials Needed
- Green cardstock or construction paper (for Grinch face)
- Red and white paper (for Santa hat)
- Yellow paper (for eyes)
- Black paper (for eyebrows and mouth)
- Green pom-pom (for nose)
- Red, green, and white pom-poms (optional decorations)
- Scissors
- Glue stick
- Red colored pencil or crayon
- Optional: glitter, ribbon, googly eyes, snowflake cutouts
Step-by-Step Instructions
Step 1: Prepare Your Grinch Base
Start by cutting a large oval or rounded shape from green cardstock. This will be the main face of your Grinch. You can use a bowl or plate as a guide to trace the shape if needed. Be sure it's large enough to include all the facial features and still fit on the front of a card.
Step 2: Cut Out Facial Features
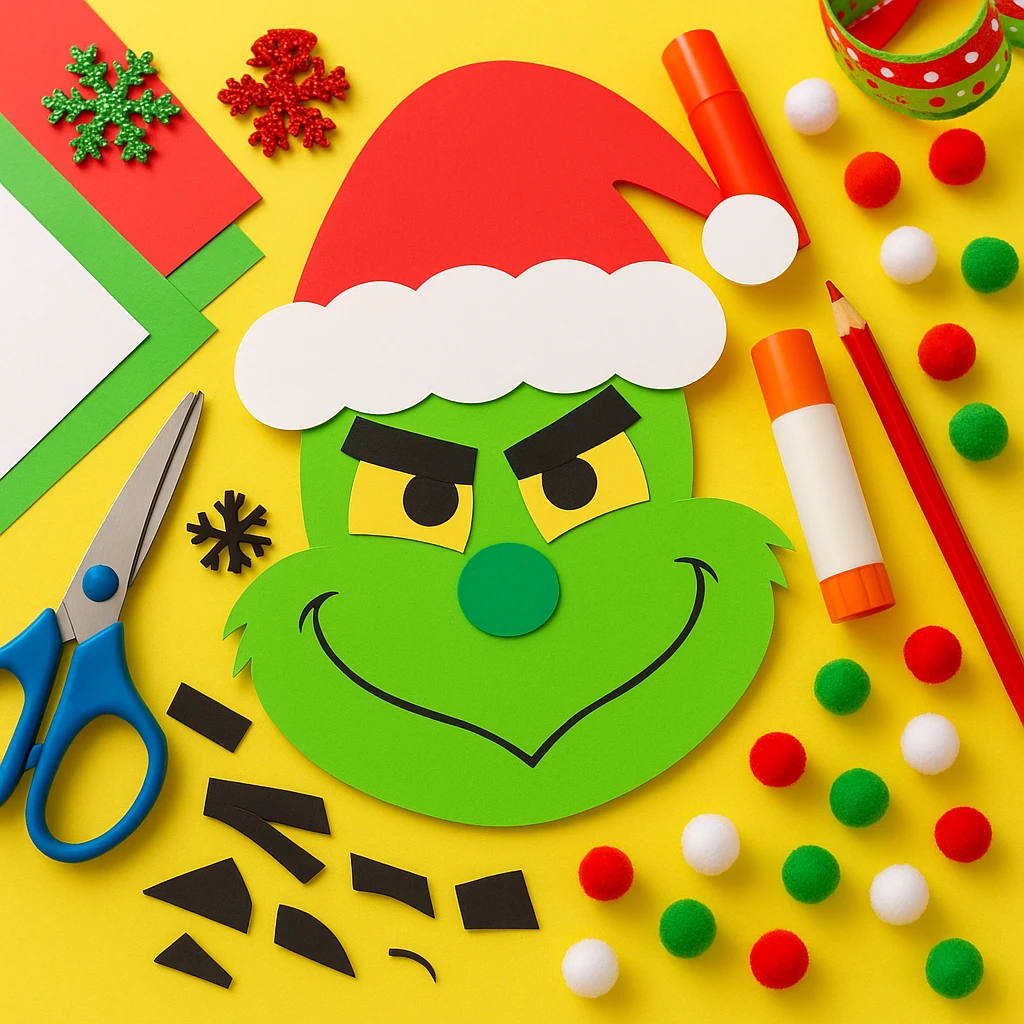
Using black paper, cut out the eyebrows, pupils, and the mischievous grin. For the eyes, use yellow paper to make rounded squares or ovals, and add smaller black circles for pupils. You’ll also want to cut out a small green circle from the same cardstock for the nose — or use a green pom-pom for a 3D effect.
Step 3: Assemble the Grinch Face
Start by gluing down the eyes in the center of the green face. Position the eyebrows above them at a slant to give that classic Grinchy expression. Glue on the pupils, then add the smile and nose. Adjust everything to fit and look expressive before securing them down with glue.
Step 4: Create the Santa Hat
Cut out a simple Santa hat shape from red paper. Make a white paper brim and a fluffy white circle for the tip. You can also use cotton balls or white pom-poms for added texture. Glue the hat to the top of the Grinch’s head.
Step 5: Add Details and Embellishments
Now comes the fun part! Use red, green, and white pom-poms to decorate around the hat or frame the card. Add glitter or snowflake stickers for some holiday sparkle. Kids can also draw in extra details like snow or a message.
Step 6: Attach to Card or Hang
Fold a piece of cardstock to make a greeting card. Glue the entire Grinch face to the front. Inside, kids can write a holiday greeting like “Merry Grinchmas!” If you prefer, you can punch a hole at the top and add a ribbon to hang it as a festive decoration.
Customization Ideas
Classic Grinch Style: Stick with traditional red and green color tones, and use a large green pom-pom for the nose. Perfect for fans of the original book and movie.
Sparkly Grinch: Use glitter glue or glitter paper for the hat and background. Add sequins to the eyes or along the smile for extra holiday shimmer.
3D Grinch: Instead of flat features, use foam shapes or raised stickers. Googly eyes and layered paper elements can make the Grinch come alive on the card.

Educational or Seasonal Uses
This craft fits perfectly into a winter lesson plan that involves reading “How the Grinch Stole Christmas.” Use it as an activity after storytime to reinforce character recognition, emotions, and creative expression. It's also ideal for classroom parties, library events, or as a rainy-day holiday project at home.
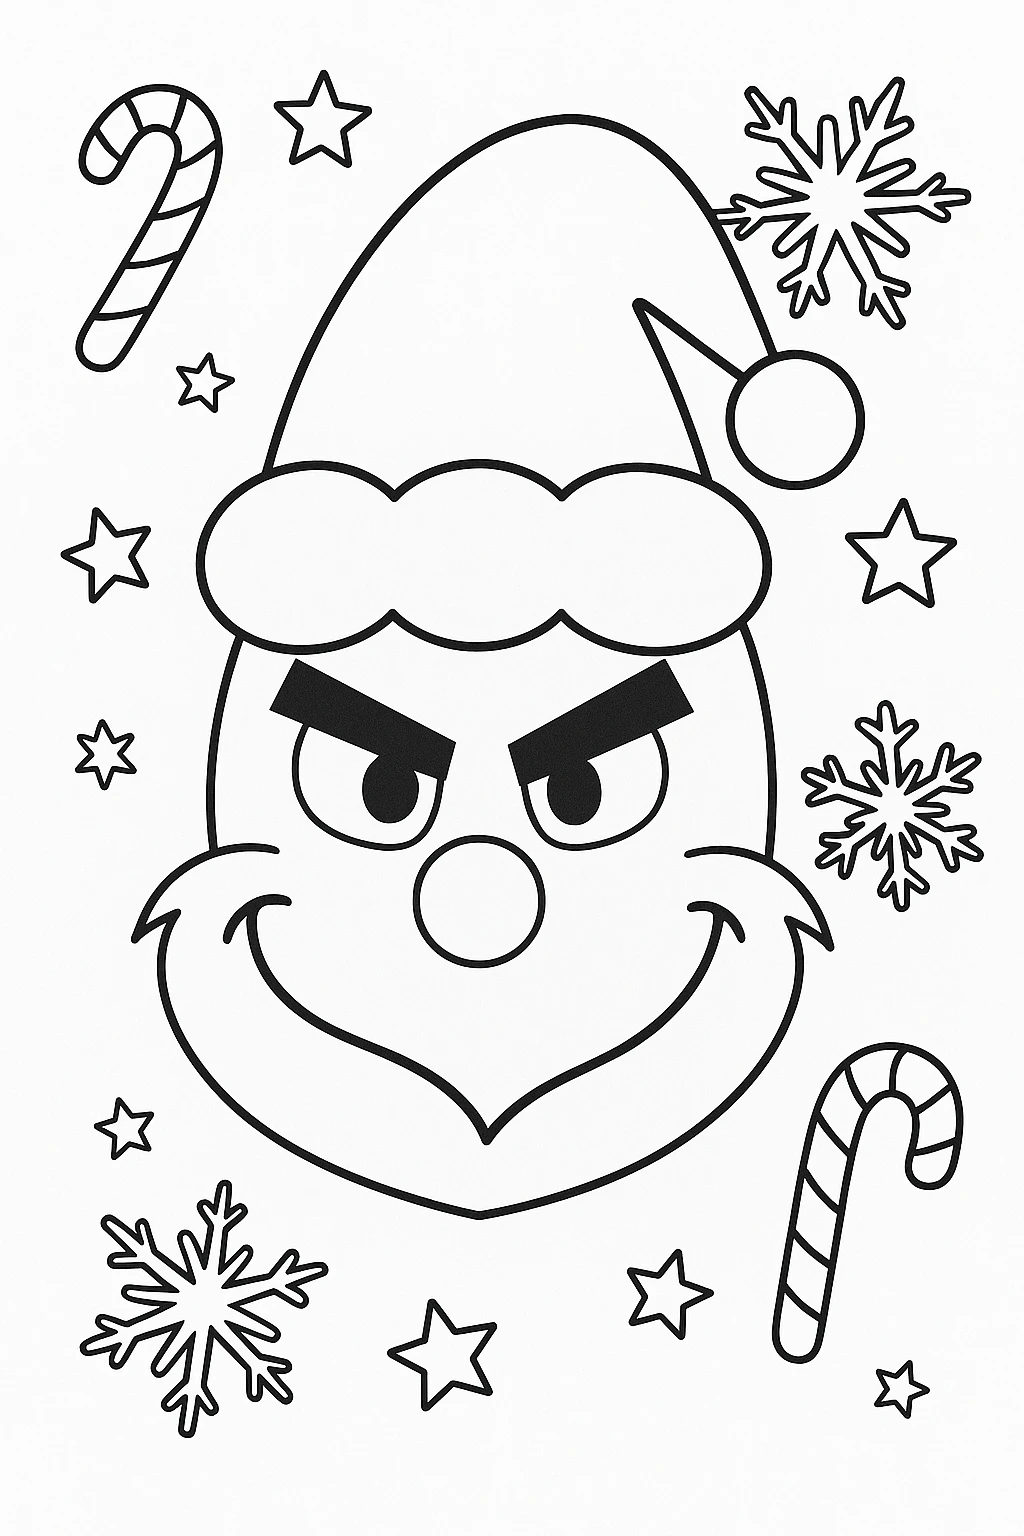
Printable Template
To make this project even easier, we’ve included a printable Grinch card template. Simply print out the shapes for the face, eyes, eyebrows, mouth, and hat on colored paper or on white paper for kids to color themselves. Once colored, they can cut and glue the pieces following the steps above. This is perfect for younger kids or group activities where prep time is limited.
Using the template saves time and ensures all the parts fit together well, especially helpful when crafting with little ones. Print, color, cut, and create — it's that easy!
Conclusion
Creating a Christmas Grinch card is a delightful way to blend storytelling, crafting, and holiday cheer. With simple materials and a little imagination, kids can build their own version of this iconic character. Whether it’s hung on the fridge or handed to a loved one, this craft is sure to bring smiles (and maybe grow a few hearts) this holiday season.
Christmas Grinch Card Kids Can Make
Equipment
- Scissors
- Glue stick
- Colored pencils or crayons
Materials
- Green cardstock or construction paper for the Grinch's face
- Red and white paper for Santa hat
- Yellow paper for the eyes
- Black paper for facial features
- Green pom-pom for the nose
- Red, green, and white pom-poms optional decorations
- Optional: glitter, ribbon, googly eyes, snowflake cutouts
Instructions
- Cut a large green oval or rounded shape to form the Grinch face. Use a plate or bowl as a guide if needed.
- Cut yellow paper for the eyes, black paper for pupils, eyebrows, and mouth. Use a green pom-pom or paper circle for the nose.
- Glue the facial features onto the green face: start with eyes, add eyebrows for expression, then glue on the nose and smile.
- Create a Santa hat using red paper for the base and white paper or pom-poms for trim. Glue it to the top of the head.
- Decorate with pom-poms, glitter, or stickers. Let kids personalize their Grinch with added details or messages.
- Glue the finished Grinch face onto folded cardstock to make a card, or punch a hole to hang it as decoration.