
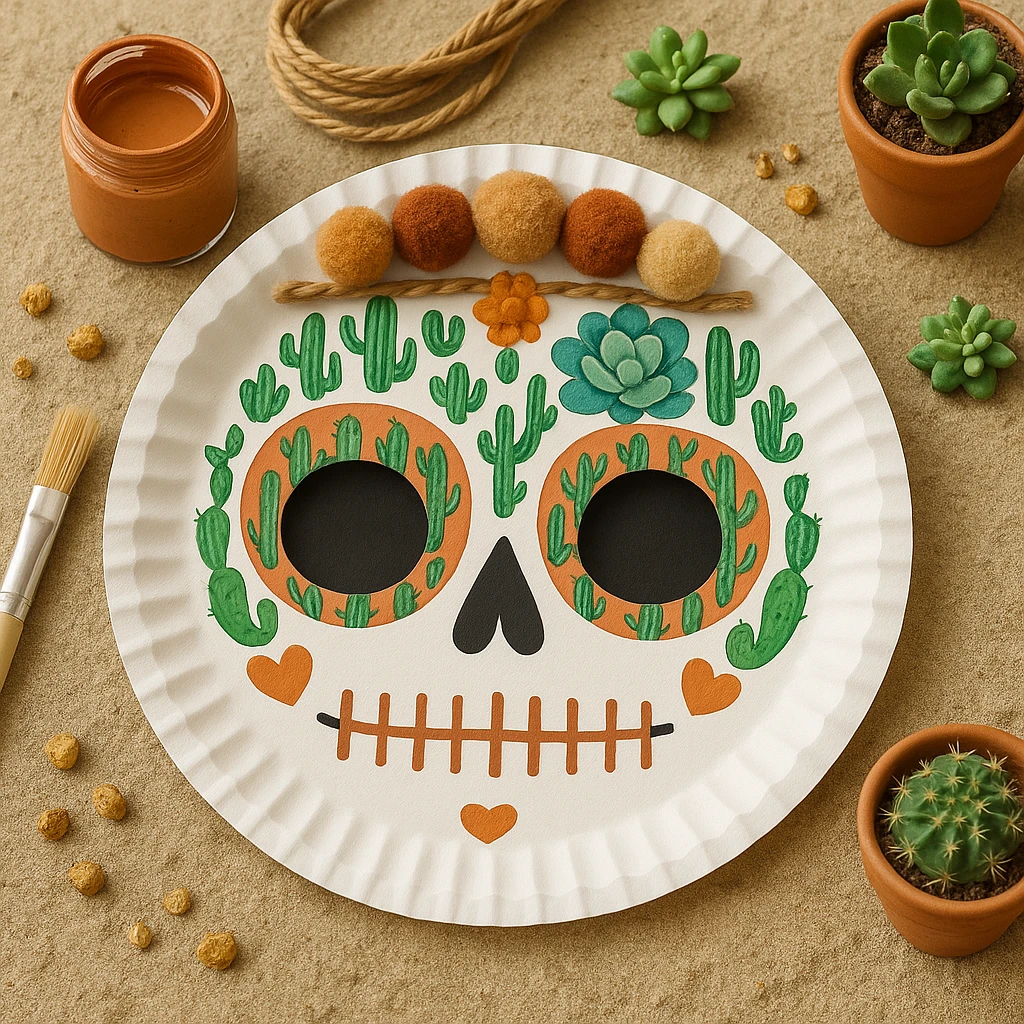
This Boho Cactus Desert Skull Plate Wall Art Craft is a vibrant and unique take on traditional Dia de los Muertos decorations. Combining colorful succulents, playful cactus patterns, and rustic desert tones, it transforms a simple paper plate into a stunning piece of wall art. With its charming details and natural textures, this project blends creativity with culture in a hands-on way that's perfect for kids and adults alike.

Whether you're celebrating the Day of the Dead, decorating for fall, or just want a southwest-inspired art project to brighten your space, this craft fits the bill. It’s budget-friendly, requires easy-to-find materials, and leaves plenty of room for creative expression. Plus, it introduces young crafters to Mexican cultural traditions while reinforcing fine motor skills and design concepts.
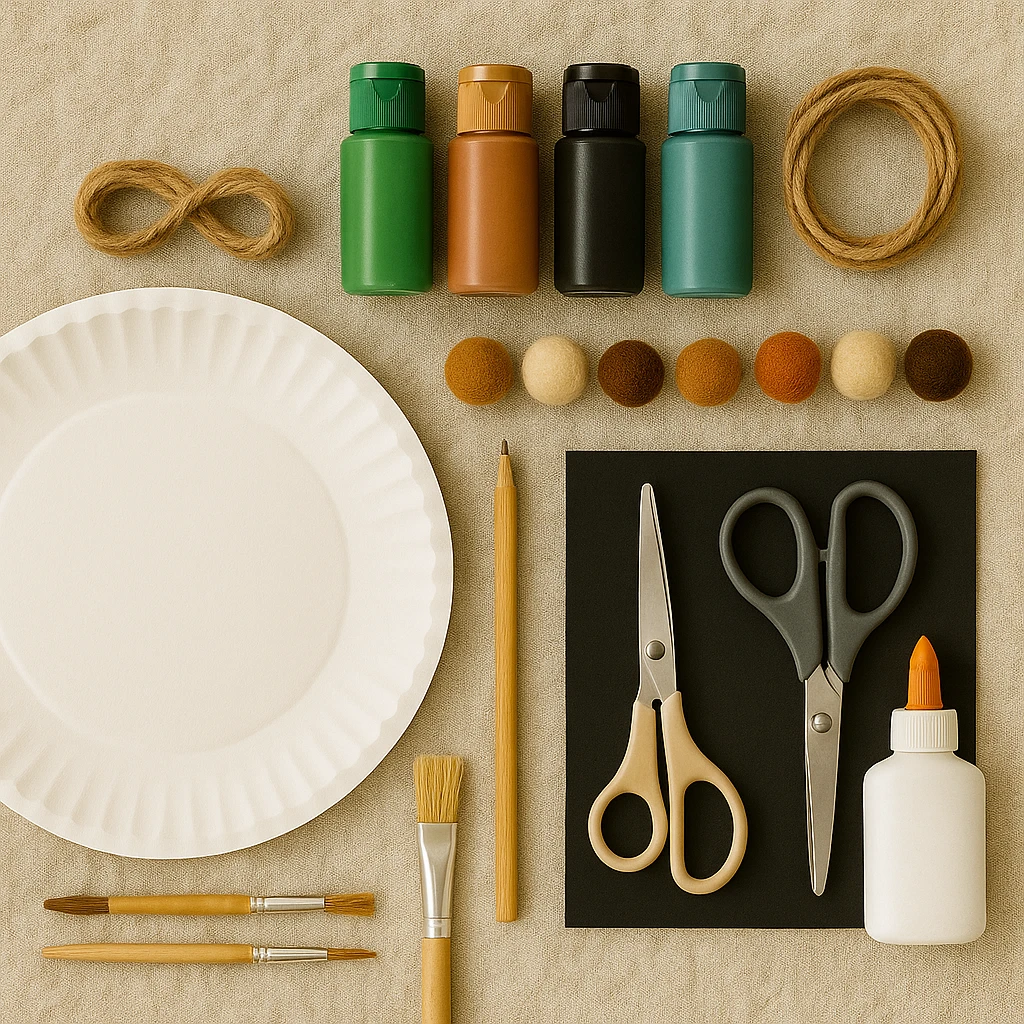
Materials Needed
- White paper plate (sturdy kind for painting)
- Acrylic paints: terracotta, black, green, white, teal
- Paintbrushes: fine and medium tip
- Pencil (for sketching design)
- Black cardstock or construction paper
- Scissors
- Craft glue or glue stick
- Twine or jute rope
- Mini pom poms in warm desert tones (orange, tan, rust, cream)
- Optional: small faux succulents or felt cutouts for added texture
Step 1: Draw and Cut Eye Holes
Start by turning your paper plate upside down and lightly sketching two large circles for the eyes. Use a cup or jar lid as a guide for even shapes. Carefully cut them out using scissors. These eye holes will give your skull its signature style and dimension.
Step 2: Sketch the Skull Design Lightly
With a pencil, outline the rest of your skull’s features. Sketch the nose in an upside-down heart shape and draw simple teeth lines across the bottom center of the plate. Add space for cacti and succulents above and around the eye sockets, imagining how they would organically grow.
Step 3: Paint Cactus and Succulent Elements
Using green and teal paints, begin filling in your cactus designs with vertical strokes, small arms, and dotted accents. Paint succulents using rounded petal shapes layered in a spiral. Let each color dry slightly before moving to the next to prevent smudging. These natural elements give your skull its lively, desert-inspired charm.
Step 4: Add Skull Features with Black Paint
Next, paint the nose with black acrylic paint, then add black lines for the teeth, giving it a classic Day of the Dead look. Paint inside the eye holes or glue black paper behind them for dramatic contrast.
Step 5: Glue on Eye Backing and Embellishments
Flip the plate over and glue black cardstock behind the eye holes so the openings appear dark. If using felt or faux succulent pieces, add them around the top and sides for added texture. This gives your skull an extra pop of character.
Step 6: Attach Twine and Pom Pom Garland
Cut a piece of twine the width of the top of your plate. Glue mini pom poms along it in alternating desert shades, then glue the twine across the top edge of the plate. This garland adds a fun boho flair.
Step 7: Let Dry and Hang or Display
Allow your finished piece to dry completely. Then use another piece of twine or tape to hang it on the wall. It also looks great propped on a shelf or used as part of a fall or cultural celebration display.
Customization Ideas
1. Boho Rainbow Style: Swap the cactus greens for rainbow colors and add pastel pom poms. Use gold or rose gold paint for accents to give it a whimsical feel.
2. Neon Skull Party Version: Paint the skull white and use neon pink, green, and yellow for the decorations. Add glow-in-the-dark paint or stickers to make it party-ready.
3. Floral Day of the Dead Theme: Replace cacti with bright marigolds, roses, and vines. Use traditional red, orange, and yellow color palettes to reflect more cultural symbolism.

Educational and Seasonal Uses
This craft is ideal for teaching about Dia de los Muertos and its cultural relevance. It’s also a great tie-in for lessons on desert ecosystems, Mexican art, or seasonal fall crafts. Perfect for classrooms, homeschoolers, or after-school art sessions.
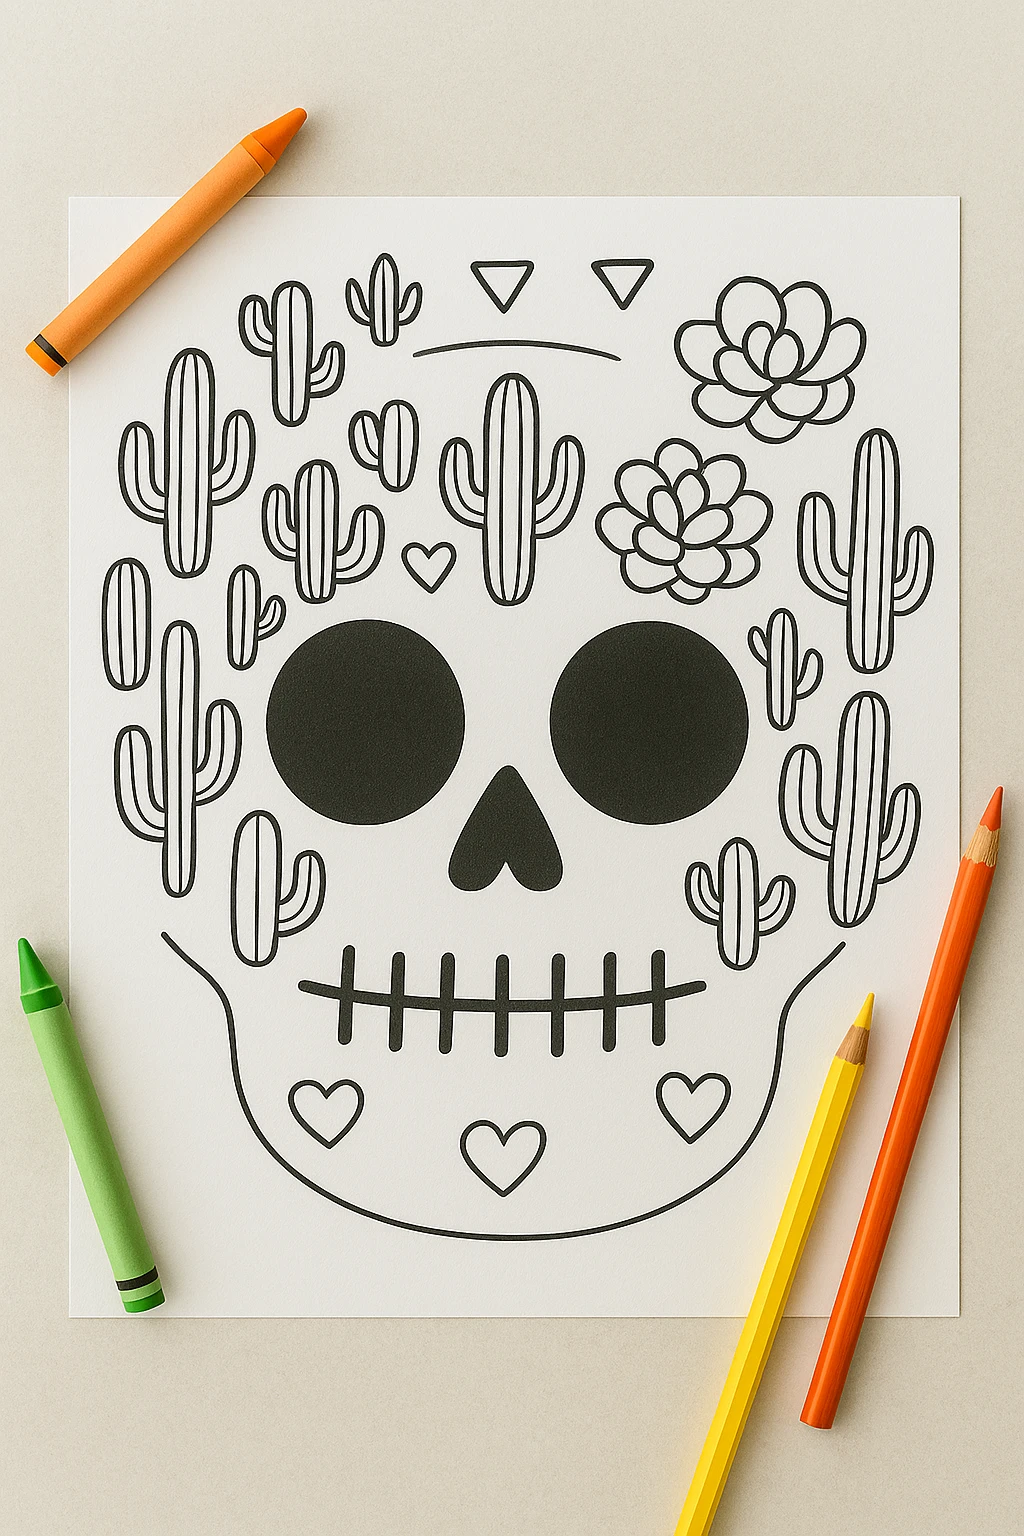
Printable Template
To make this project even easier, we’ve included a printable skull template. Just print, cut out, and trace onto your paper plate to get perfect shapes every time. It’s great for groups or young kids who need a little help with drawing.
This printable also works as a coloring page! Kids can color their designs first and then paint over them or add embellishments later. It’s a fun way to mix media and reduce prep time.
Conclusion
This Boho Cactus Desert Skull Plate Wall Art Craft is a fun and creative way to honor traditions while exploring your artistic side. With simple materials and endless design possibilities, it’s a project you’ll want to revisit every fall. Whether for cultural learning or just creative expression, it’s a perfect addition to your DIY craft collection.
Boho Cactus Desert Skull Plate Wall Art Craft
Equipment
- Scissors
- Paintbrushes
- Glue or glue stick
Materials
- 1 White paper plate Sturdy kind for painting
- Acrylic paints (terracotta, black, green, white, teal)
- 1 Pencil For sketching design
- Black cardstock or construction paper For backing eye holes
- Twine or jute rope For hanging and decoration
- Mini pom poms In desert tones like orange, tan, rust
- Optional faux succulents or felt cutouts For added decoration
Instructions
- Draw two large circles on the plate for eyes and cut them out carefully.
- Lightly sketch the rest of the skull design using pencil, including nose, teeth lines, and areas for cacti.
- Paint cactus and succulent elements using green and teal tones. Let dry between colors.
- Paint the skull's facial features with black paint, including the nose and teeth. Add black backing to eye holes if desired.
- Glue black cardstock behind the eye holes and any felt or 3D embellishments as desired.
- Glue pom poms to a piece of twine and attach it across the top of the plate for a decorative garland effect.
- Allow to dry completely and hang using tape or twine, or display as wall art or part of a seasonal setup.