
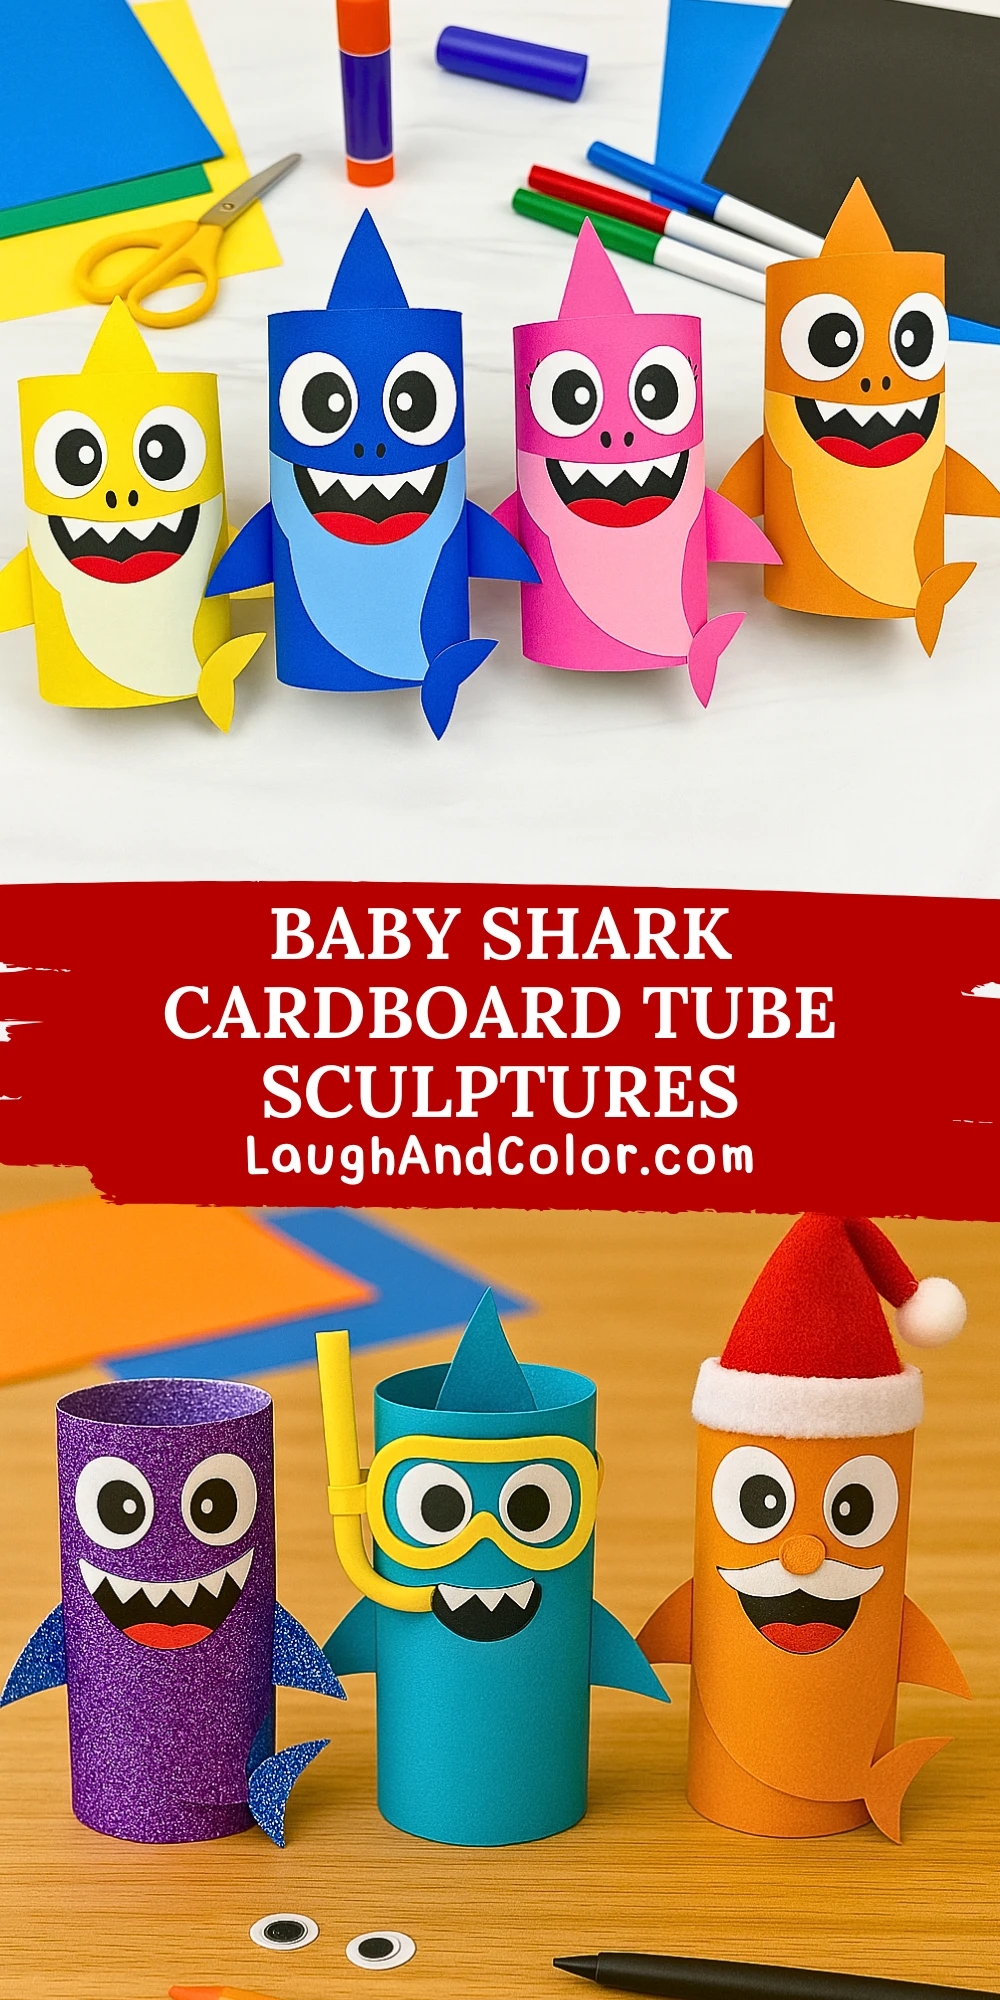
Baby Shark doo doo doo doo doo doo! If your home or classroom has been buzzing with this catchy tune, it’s time to turn that energy into a hands-on activity. These adorable Baby Shark cardboard tube sculptures are a wonderful way to combine a child’s favorite characters with creativity and crafting fun. Not only are they bright and cheerful, but they also help reinforce fine motor skills, encourage imaginative play, and promote upcycling everyday materials like toilet paper rolls.
This craft is ideal for preschoolers, kindergarteners, and even elementary-age kids with a love for crafting. It’s mess-free, affordable, and easily adaptable for different holidays or learning themes. Whether you’re a parent looking for a rainy-day project or a teacher planning an ocean-themed lesson, these colorful shark friends will be a hit.
Materials Needed
To make your own Baby Shark family, gather the following materials:
- Cardboard toilet paper tubes (1 for each shark)
- Colored construction paper (yellow, blue, pink, orange, white, black, red)
- Glue stick or craft glue
- Scissors
- Pencil
- Ruler
- Black marker
- Googly eyes (optional)

Helpful Tip: If you don’t have all the colors of construction paper, use white paper and let the kids color it in themselves!
Step-by-Step Instructions
Step 1: Prepare and Cover the Cardboard Tube
Start by selecting a construction paper color that matches the Baby Shark character you want to create (yellow for Baby Shark, blue for Daddy Shark, pink for Mommy Shark, orange for Grandpa Shark). Measure and cut a rectangle of paper large enough to wrap around the cardboard tube. Apply glue to one side and wrap the tube tightly, pressing the edges down securely.
Step 2: Cut and Attach the Belly and Fins
Cut an oval-shaped belly piece from lighter-colored paper (white or pale version of the body color). Glue it onto the front center of the tube. For the fins, cut two side fins and one tail fin from the same color as the body. Glue the side fins to each side and the tail fin at the back or side for a 3D effect.
Step 3: Create the Shark’s Face
Cut out two large white circles for eyes and two smaller black circles for the pupils, or use googly eyes. Glue them in place above the belly. Cut a red smile shape and a small row of triangular white teeth. Glue the teeth onto the mouth, then attach the whole mouth under the eyes. Add nostrils or freckles with a black marker to match the character details.
Step 4: Add the Tail and Dorsal Fin
Use the same body-color paper to cut a pointed dorsal fin. Glue this on the back upper side of the tube to resemble the shark's top fin. Make sure it's centered so it stands straight. Reinforce with extra glue if needed.
Step 5: Final Details and Character Styling
At this point, add character-specific details: for example, eyelashes for Mommy Shark or a mustache for Grandpa Shark. Use a marker or additional paper cutouts to make each one unique. Once everything is dry, your Baby Shark tube sculpture is complete and ready for play or display!
Customization Ideas
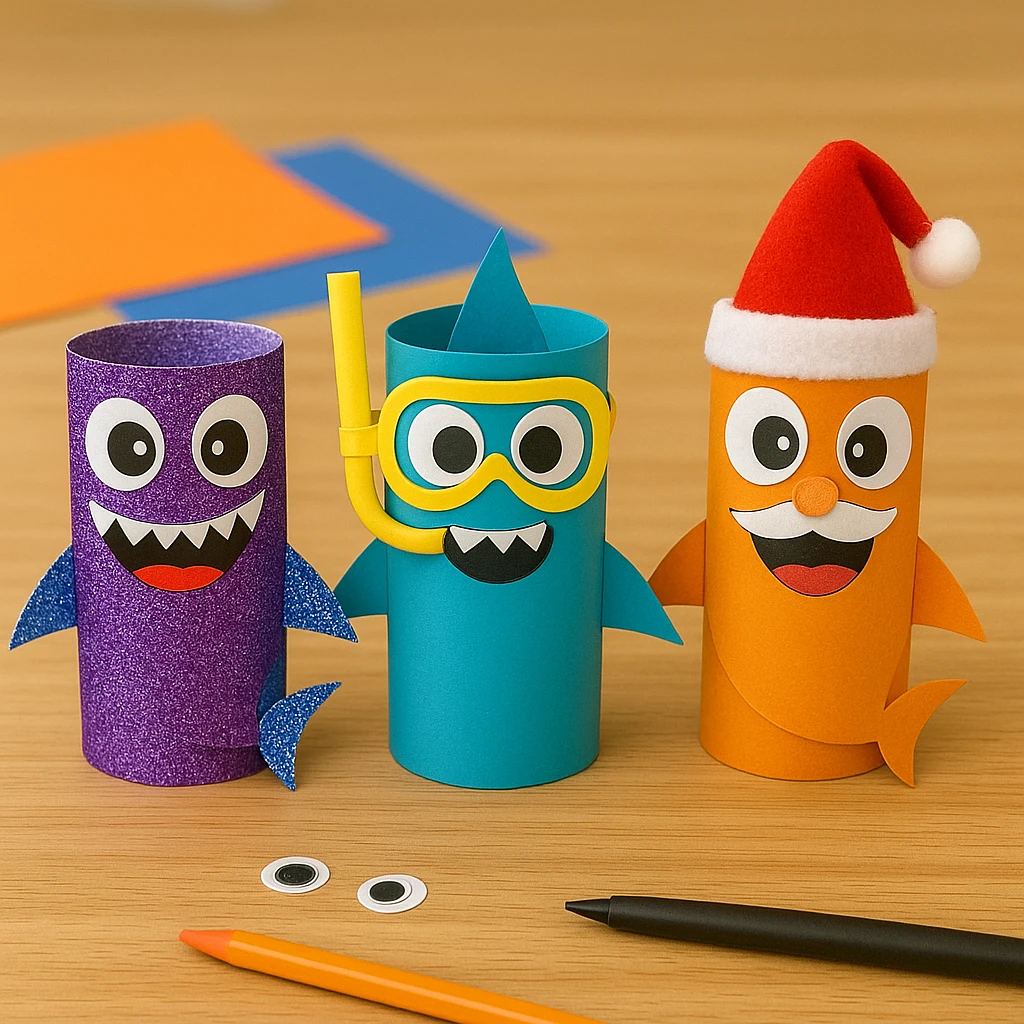
Style 1: Sparkle Sharks
Swap regular construction paper for glitter cardstock or sprinkle glitter over the belly and fins for a shimmery look.
Style 2: Ocean Explorer Sharks
Create small accessories like scuba goggles, snorkels, or even tiny seashells and glue them on to make your sharks look ready for adventure.
Style 3: Holiday Sharks
Turn your sharks into festive friends with simple additions. Santa hats for Christmas, bunny ears for Easter, or pumpkins for Halloween can give your characters a seasonal twist.
Educational or Seasonal Uses
These Baby Shark tube crafts are fantastic for more than just fun. Use them in ocean-themed classroom units to introduce marine life, practice storytelling, or as part of a lesson on recycling and creative reuse. They're also a great activity for birthday parties, summer camps, or holiday-themed craft stations.
Teachers can align them with storytime sessions or sing-alongs, while parents can use the characters as puppets to encourage imaginative play or spark conversations about underwater life.
Printable Template
To make crafting even easier, we’ve included a printable Baby Shark template with all the parts ready to trace, cut, and decorate. This is especially helpful for younger kids who may struggle with freehand cutting.
Just print the template on standard A4 paper, let your child color in the shapes if desired, then cut and assemble. It saves time and ensures each shark looks just right while still leaving room for personal touches.

Conclusion
Crafting your own Baby Shark cardboard tube sculptures is an easy, fun, and rewarding activity that children of all ages will love. With simple materials and endless ways to customize, it’s a perfect project for classrooms, parties, or quiet afternoons at home.
Not only will kids enjoy making their favorite shark characters, but they’ll also learn about recycling and expressing creativity through hands-on art. Try the whole Baby Shark family or invent new characters of your own—there’s no wrong way to swim into this colorful craft!

Baby Shark Cardboard Tube Sculptures: Easy and Fun DIY Craft for Kids
Equipment
- Scissors
- Glue stick or craft glue
- Pencil
- Ruler
- Black marker
Materials
Materials
- Cardboard toilet paper tubes One per shark
- Colored construction paper Yellow, blue, pink, orange, white, black, red
- Googly eyes Optional
Instructions
- Step 1: Prepare and Cover the Cardboard Tube - Choose your shark color, cut paper to wrap around the tube, glue in place.
- Step 2: Cut and Attach the Belly and Fins - Cut a belly oval, two side fins, and a tail fin. Glue all pieces in place.
- Step 3: Create the Shark’s Face - Add eyes, mouth, and teeth. Use marker for freckles or other character features.
- Step 4: Add the Tail and Dorsal Fin - Cut and glue the dorsal fin on the top back of the tube.
- Step 5: Final Details and Character Styling - Customize with eyelashes, accessories, or unique colors.