
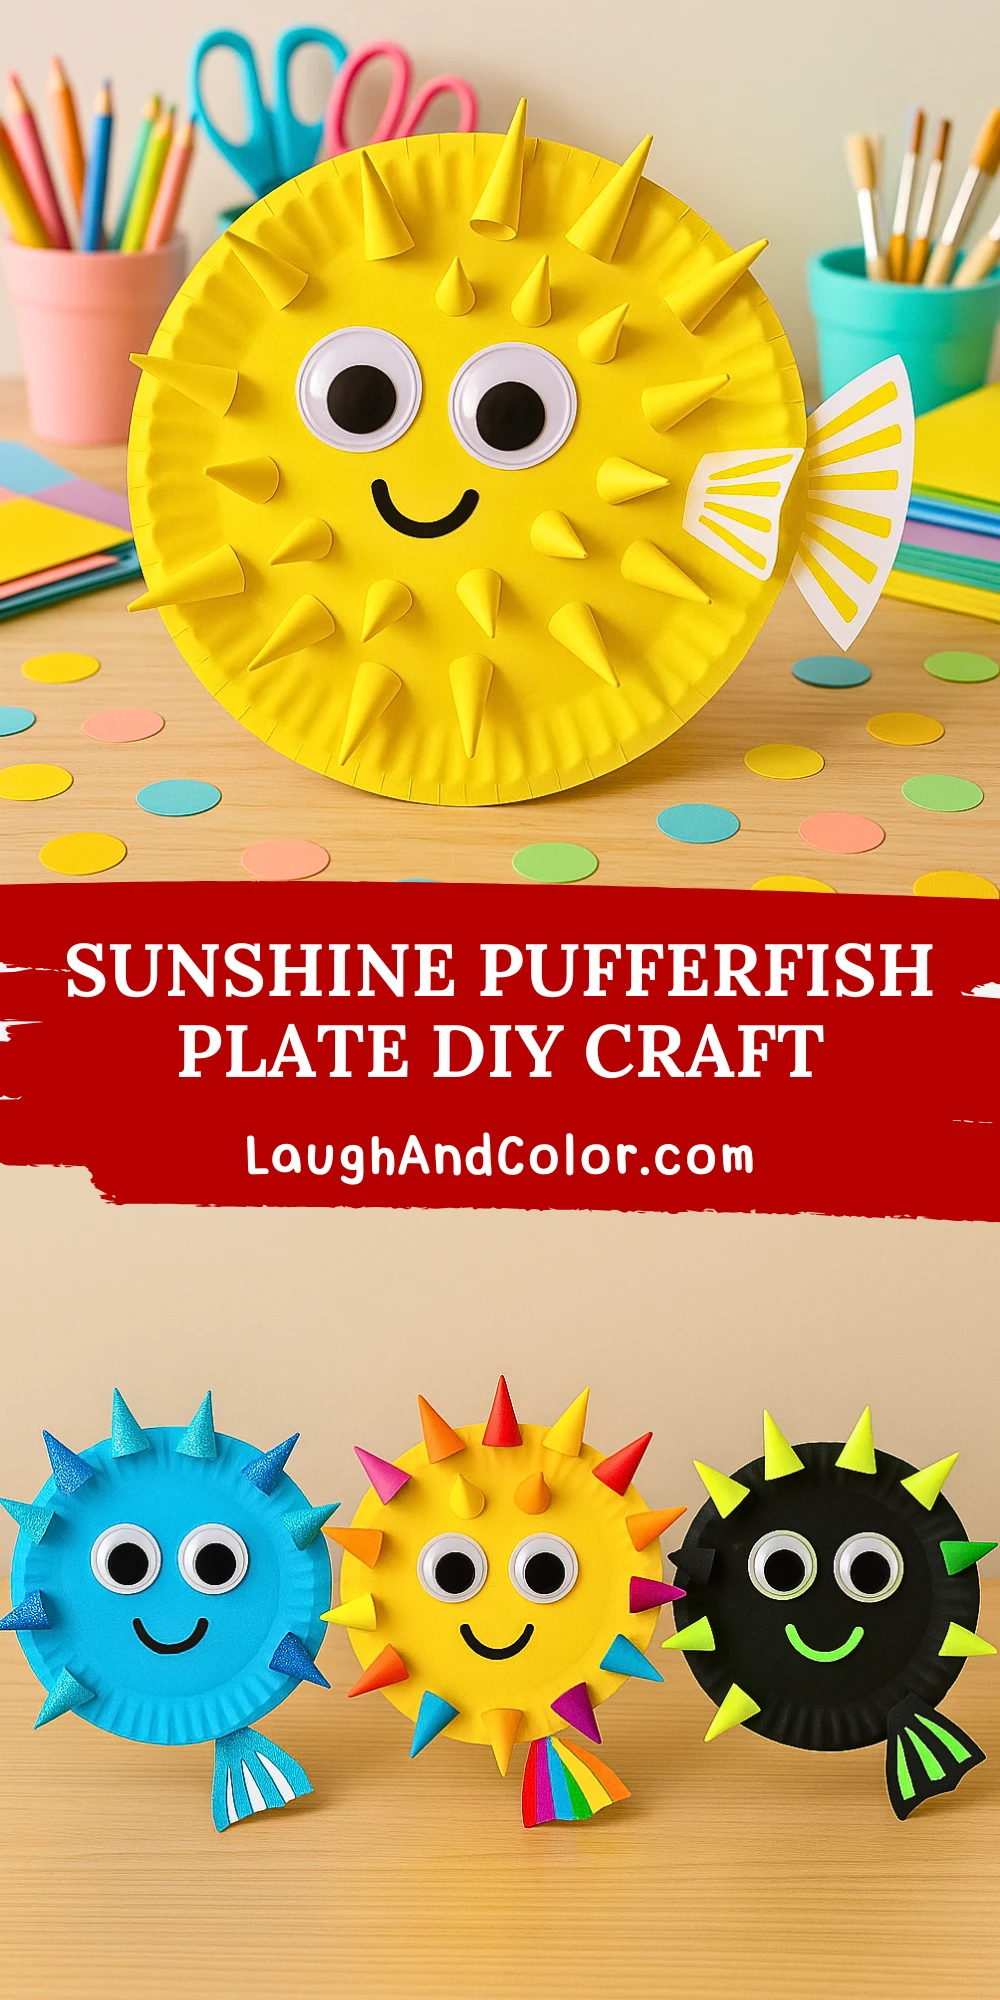
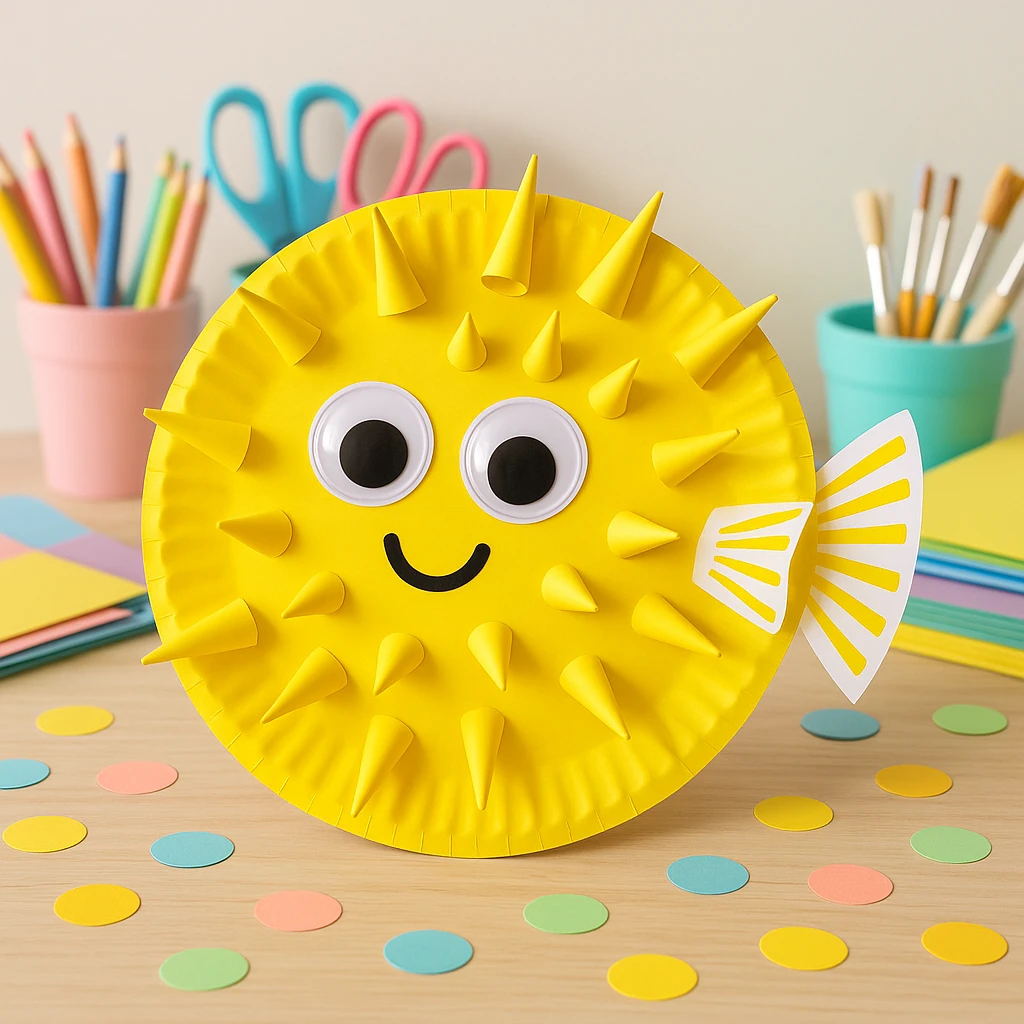
Brighten up your craft time with this cheerful Sunshine Pufferfish Plate DIY! Perfect for kids of all ages, this adorable project combines the fun of ocean-themed crafts with a splash of sunny creativity. With its big googly eyes, playful spikes, and friendly smile, this paper plate pufferfish is a great way to bring some undersea magic into your home or classroom.
Whether you're teaching little ones about marine life or planning a summer activity that’s hands-on and engaging, this craft hits the mark. It’s easy to make, uses simple materials, and offers lots of room for personalization. Kids will love building their own spiky fish and showing off their creations.
Let’s dive into the details and bring this sunny pufferfish to life!
Materials Needed
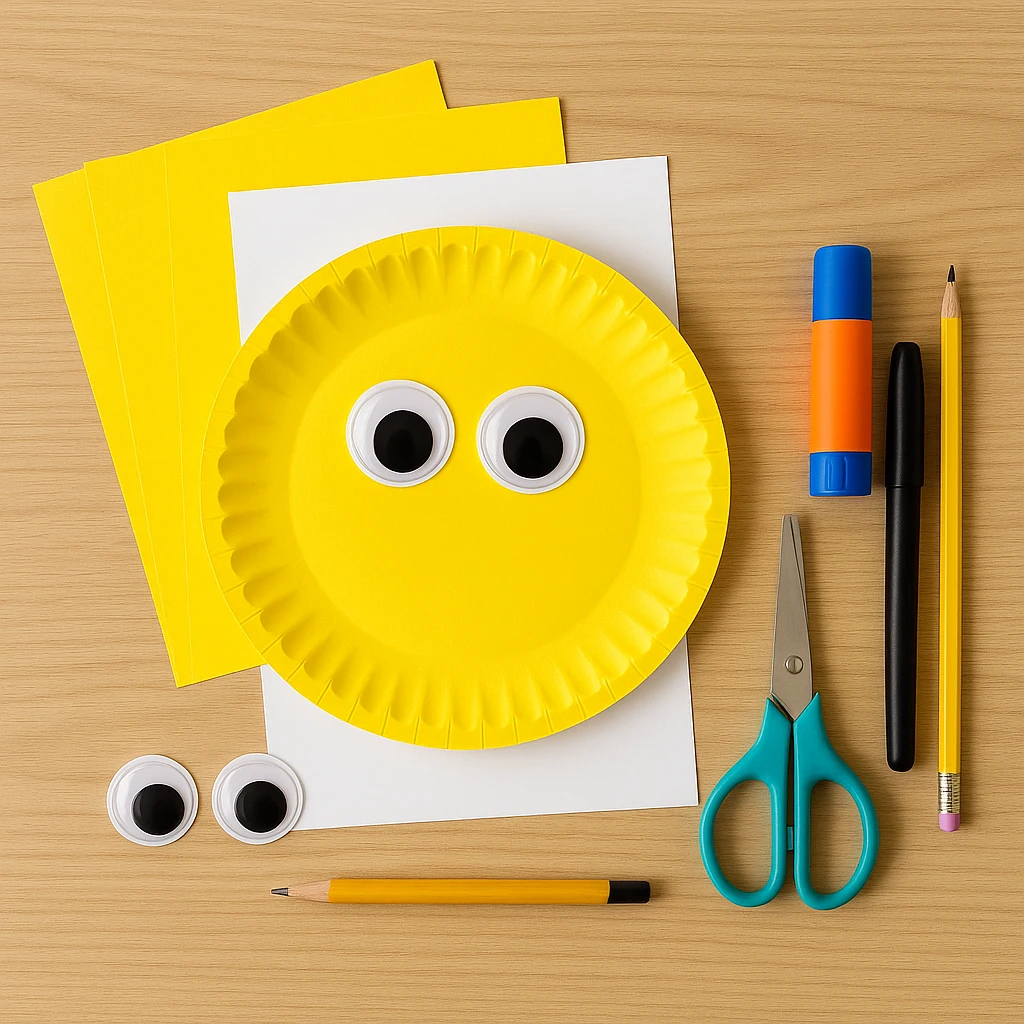
- 1 yellow paper plate (or white plate painted yellow)
- Yellow construction paper
- Googly eyes (large size)
- Black marker or peel-and-stick smiley face
- White cardstock (for the tail)
- Scissors
- Glue stick or craft glue
- Pencil
Helpful Tip: Pre-cutting the cone shapes for younger children will make the assembly smoother and faster.
Step 1: Paint the Paper Plate
If you're using a white plate, start by painting it a bright yellow and let it dry completely. This sets the cheerful base tone for your pufferfish. If you're using a yellow paper plate, you're already good to go!
Step 2: Make and Attach the Spikes
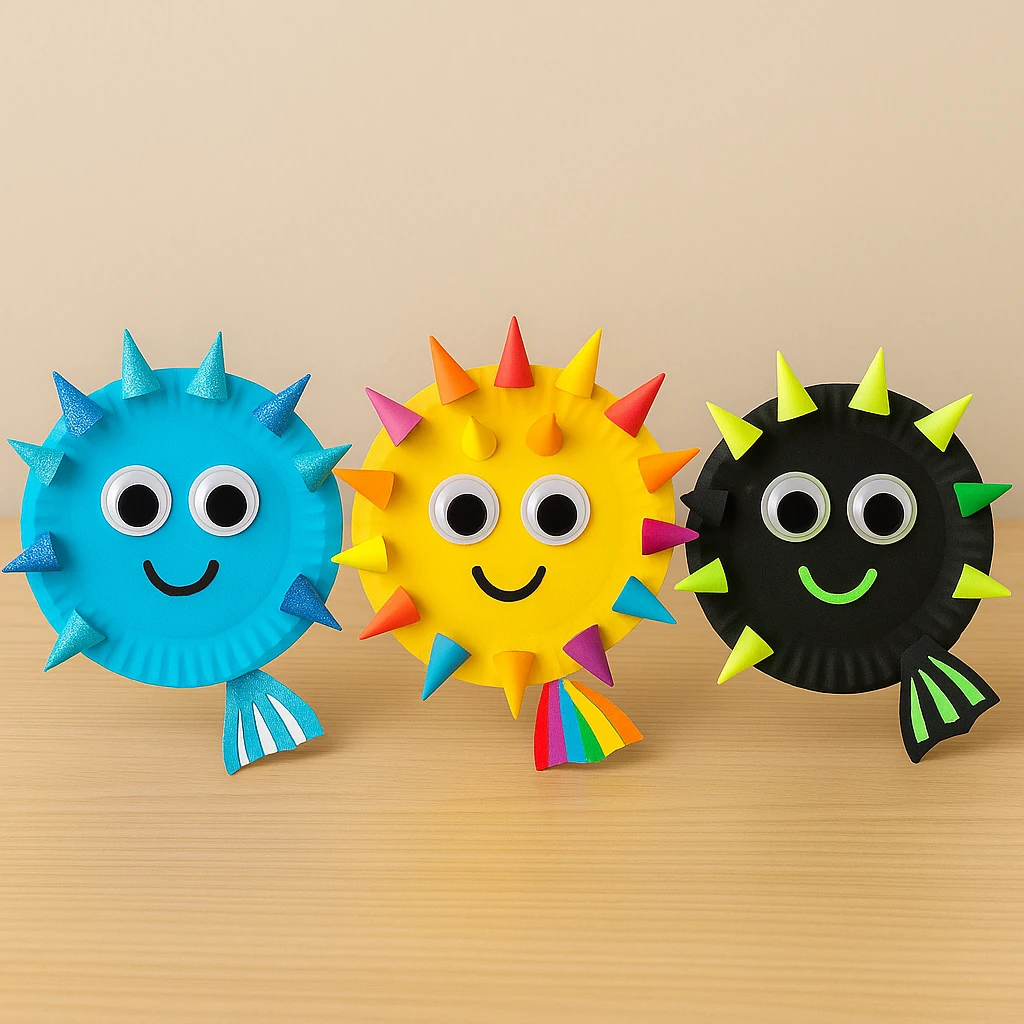
Cut several small triangles or cone shapes from yellow construction paper. Roll each one into a cone and secure with glue. These will be your pufferfish’s iconic spikes. Once you’ve made enough (around 20 works well), begin gluing them around the edge of the plate and randomly on the surface. Let dry.
Step 3: Add the Eyes and Smile
Glue two large googly eyes toward the center of the plate. Below the eyes, draw or stick on a happy smile using a black marker or a pre-cut smile shape. This brings your fish to life!
Step 4: Create and Attach the Fish Tail
Draw and cut out a simple tail fin shape from white cardstock. Add yellow lines or patterns with a marker for decoration. Glue the tail to the back edge of the plate so it sticks out like a real fin.
Step 5: Final Touches and Display Tips
Look over your fish and add any extra spikes or fun embellishments. You can hang your sunshine pufferfish on the wall, display it on a bookshelf, or turn it into a mobile with string!
Customization Ideas
Ocean Blue Pufferfish: Swap the yellow paper for blue tones and use a white plate base. Add glitter or light blue accents for a shimmering underwater effect.
Rainbow Celebration Fish: Create cones from assorted colors—red, green, blue, pink—and make a rainbow pufferfish. Perfect for parties or Pride-themed decor.
Glow-in-the-Dark Puffer: Use neon construction paper for the spikes and paint the plate with glow-in-the-dark paint. It makes a fun nightlight!
Educational and Seasonal Uses
This craft pairs wonderfully with ocean-themed lessons. Use it to teach about fish defenses, habitats, or ecosystems. It’s also a hit at summer camps, beach parties, or during storytime activities featuring sea creatures.
Teachers can incorporate it into bulletin board displays or reading corners, while parents might use it as part of a themed week during school breaks.
Printable Template
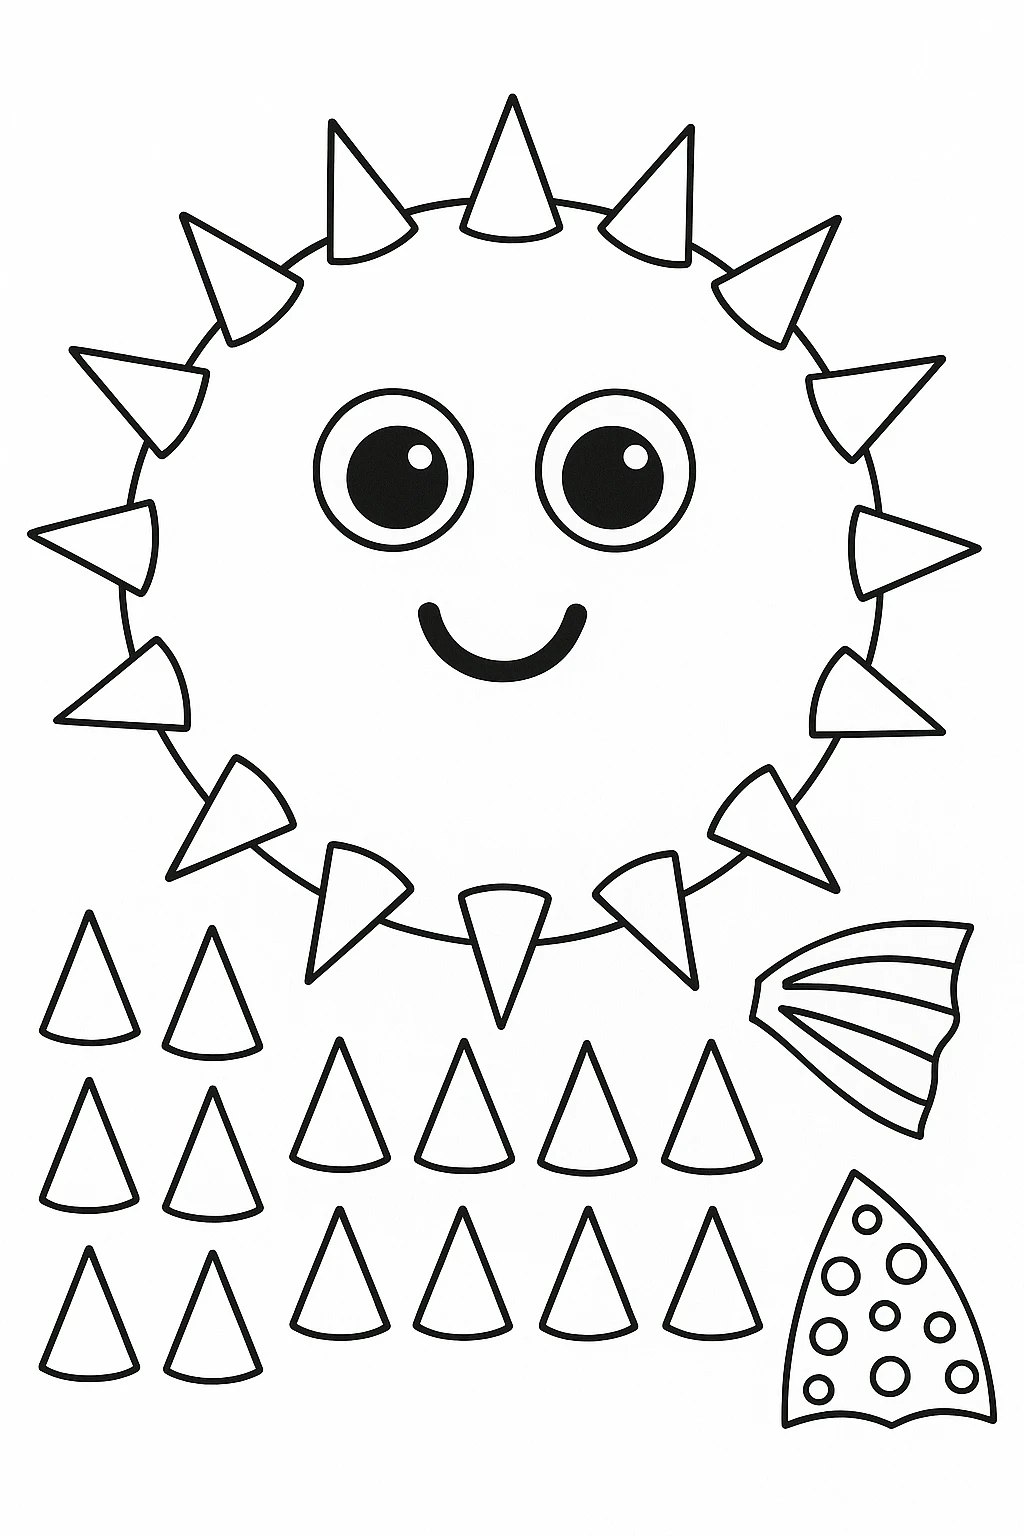
To make this craft even easier, we’ve included a printable template that features pre-sized spikes, eyes, and a tail fin. Simply print it out, let your child color in the pieces, and cut them out for assembly.
This template is especially great for classrooms or group settings—just print multiple copies, hand out crayons or markers, and watch the creativity flow!
Conclusion
Creating your own Sunshine Pufferfish Plate DIY is a joyful and enriching experience for kids. It encourages creativity, supports fine motor skills, and introduces young minds to the fascinating world of ocean animals. With endless room for customization, no two pufferfish will be exactly alike—and that’s part of the fun!
So grab your materials and get started—your sunny sea friend is waiting to be made!
Sunshine Pufferfish Plate DIY Craft
Equipment
- Scissors
- Glue stick or craft glue
- Black marker
- Pencil
Materials
- 1 Yellow paper plate (or white plate painted yellow)
- Yellow construction paper
- 2 Large googly eyes
- 1 White cardstock (for the tail)
Instructions
- Step 1: Paint the paper plate yellow and let it dry completely. If using a yellow plate, skip this step.
- Step 2: Cut and roll yellow construction paper into small cones. Glue them around the edge and surface of the plate to form spikes. Let dry.
- Step 3: Glue on two large googly eyes. Draw or stick on a smile with a black marker or cut-out.
- Step 4: Cut a tail shape from white cardstock. Add yellow lines or designs. Glue to the back of the plate.
- Step 5: Review your pufferfish. Add extra decorations if desired. Display or hang as needed.