
Baby Shark doo doo doo doo doo doo! If that catchy tune is a regular in your household, your little ones will absolutely love this adorable Baby Shark Paper Bowl DIY Craft. It’s the perfect hands-on activity that combines creativity, fine motor skills, and lots of giggles. Whether you’re planning a birthday party, a preschool activity, or a rainy day craft session, this project is simple to prep and super fun to make.

Using just a paper bowl, some colorful cardstock, and basic craft supplies, kids can create their very own shark character in under 30 minutes. The steps are easy to follow, and the result is an expressive, wide-eyed shark that’s as silly as it is cute. Even better, you can customize the shark’s color to match the whole Baby Shark family — think pink, yellow, or green!
Let’s dive into everything you need to get started.
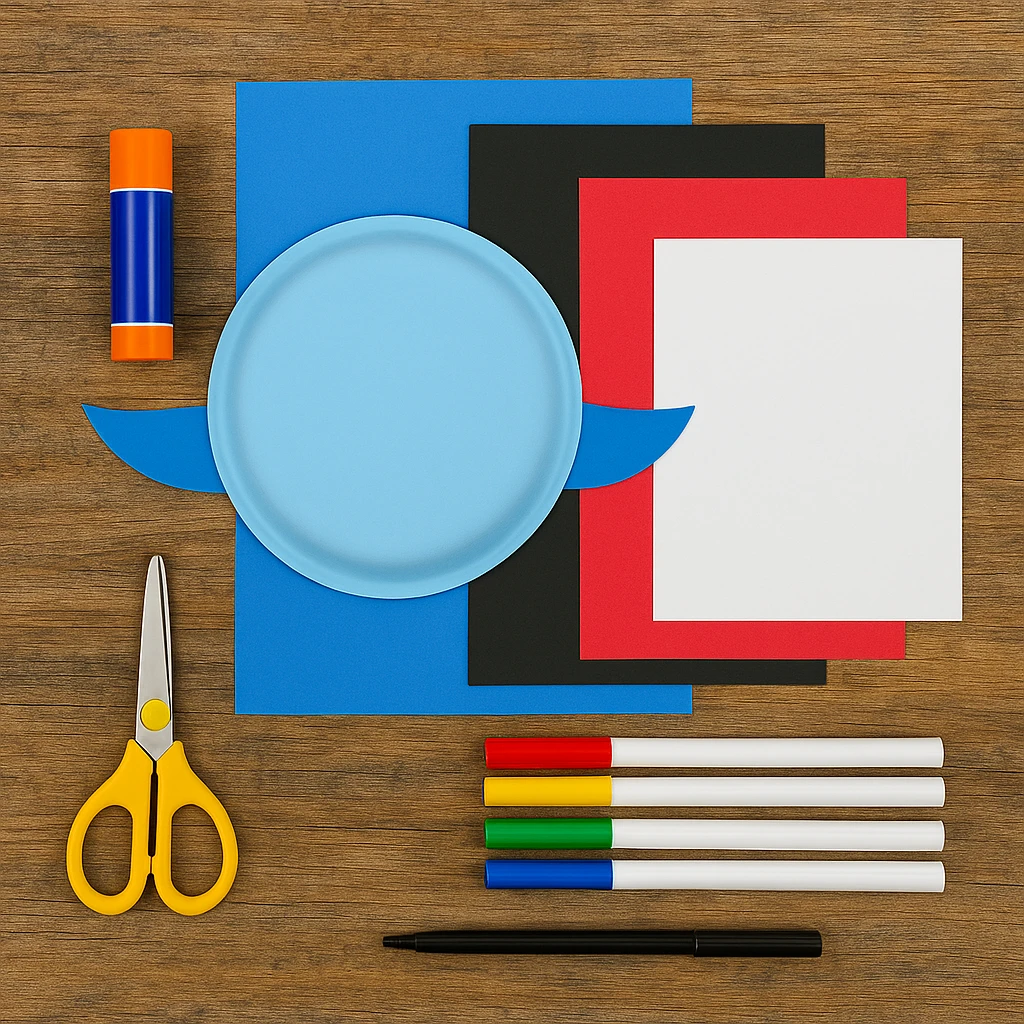
Materials Needed
- 1 paper bowl (white or any base color)
- Blue cardstock (for fins and tail)
- Black, white, and red cardstock (for face and mouth)
- Glue stick or liquid craft glue
- Scissors (child-safe)
- Black marker or pen
- Optional: Googly eyes, glitter glue, Baby Shark template printout
Step-by-Step Instructions
Step 1: Paint or Color the Paper Bowl
If your paper bowl is plain white, let’s give it some underwater flair! Use blue paint, markers, or colored paper to cover the outside of the bowl. This will be the shark’s body. Let it dry completely before moving to the next step.
Tip: If painting, use quick-dry craft paint and a sponge brush for smoother coverage.
Step 2: Cut Out the Shark Fins and Tail
From the blue cardstock, cut out two side fins and one top fin. You can make the fins triangular with slightly curved edges to resemble a shark. Optionally, cut a small tail fin if you'd like to glue it to the back.
Tip: Fold the paper in half to cut symmetrical fins!
Step 3: Make the Face: Eyes, Teeth, and Mouth
Cut two large white circles and two smaller black circles to create the eyes. For the mouth, use black cardstock to cut a wide, rounded shape. Then, cut zigzag white triangles for teeth and a red semicircle for the tongue.
Glue the eyes in place near the top center of the bowl. Layer the mouth pieces: black base first, then teeth, then tongue underneath.
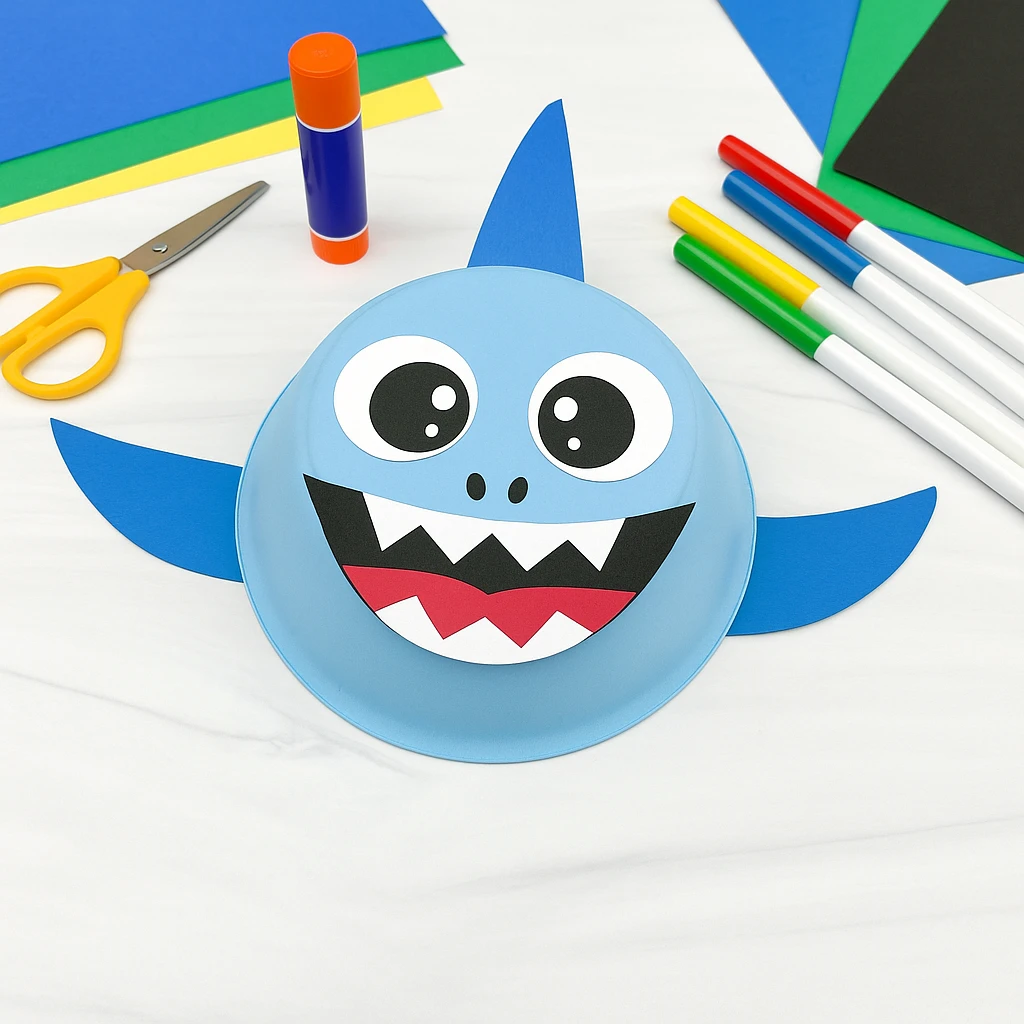
Step 4: Assemble and Glue Everything Together
Glue the fins to the back of the bowl — two on the sides and one on top. Add the mouth and eyes to the front. If using a tail, glue it to the back bottom edge.
Let everything dry for 5–10 minutes before handling. Use a black marker to draw small nostrils or additional facial details if desired.
Step 5: Add Final Details and Let Dry
Now’s the time to personalize! You can add glitter, googly eyes, or even stickers. Allow the entire craft to dry completely before displaying it.
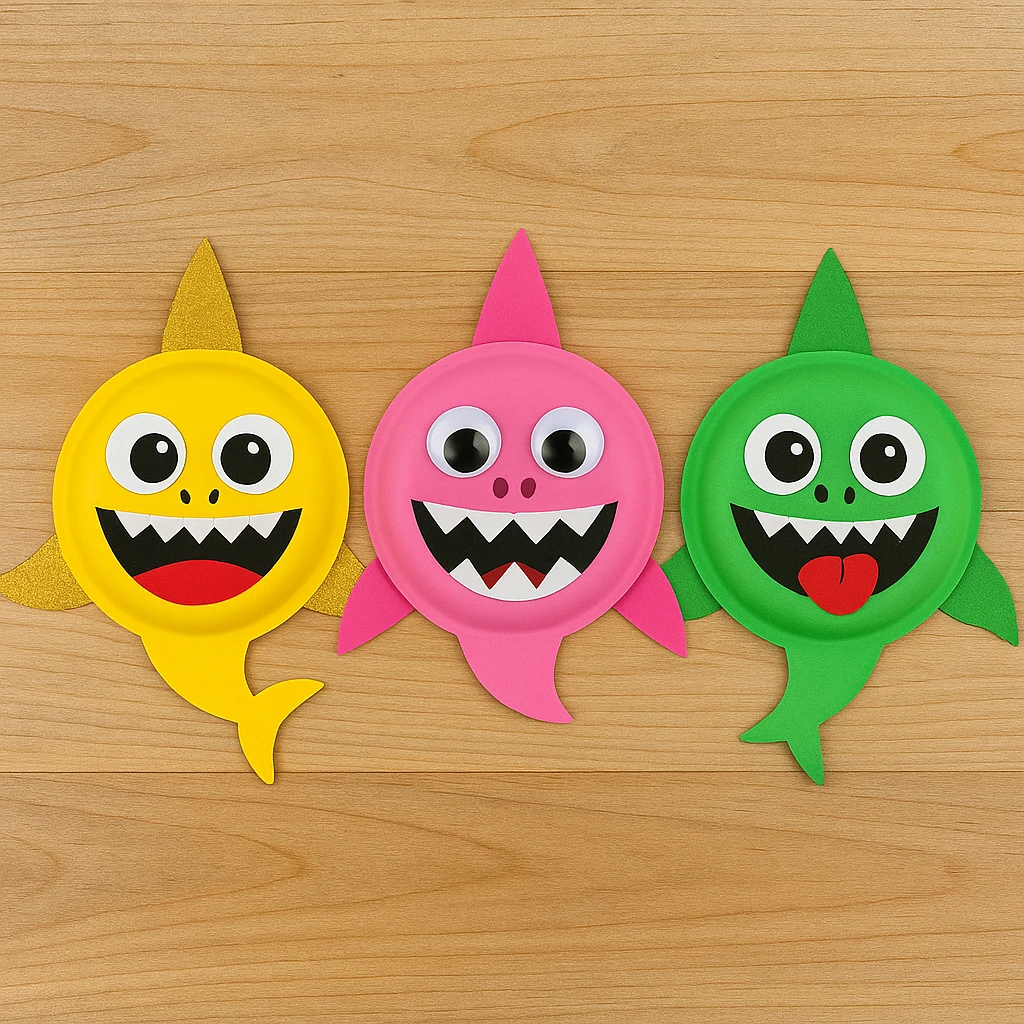
Customization Ideas
Want to make a whole Baby Shark family? Here are a few fun variations:
- Pink Mommy Shark or Yellow Daddy Shark: Swap out the blue cardstock and bowl color for pink or yellow. Use glitter paper for a glamorous touch!
- Googly Eyes for Extra Fun: Use wiggly eyes instead of paper ones to give your shark a silly, animated look.
- Textured Craft Paper: Use foam sheets or textured cardstock for added sensory appeal.
Educational or Seasonal Uses
This Baby Shark craft fits perfectly into a preschool ocean theme or underwater unit. Teachers can pair the activity with ocean books or Baby Shark sing-alongs to keep the kids engaged. It’s also a great choice for:
- Birthday Parties: Set up a shark-making table and let kids create their own sea creatures.
- Summer Camps: Combine with water play and storytelling.
- Indoor Rainy Day Fun: Easy clean-up and fun for all ages.
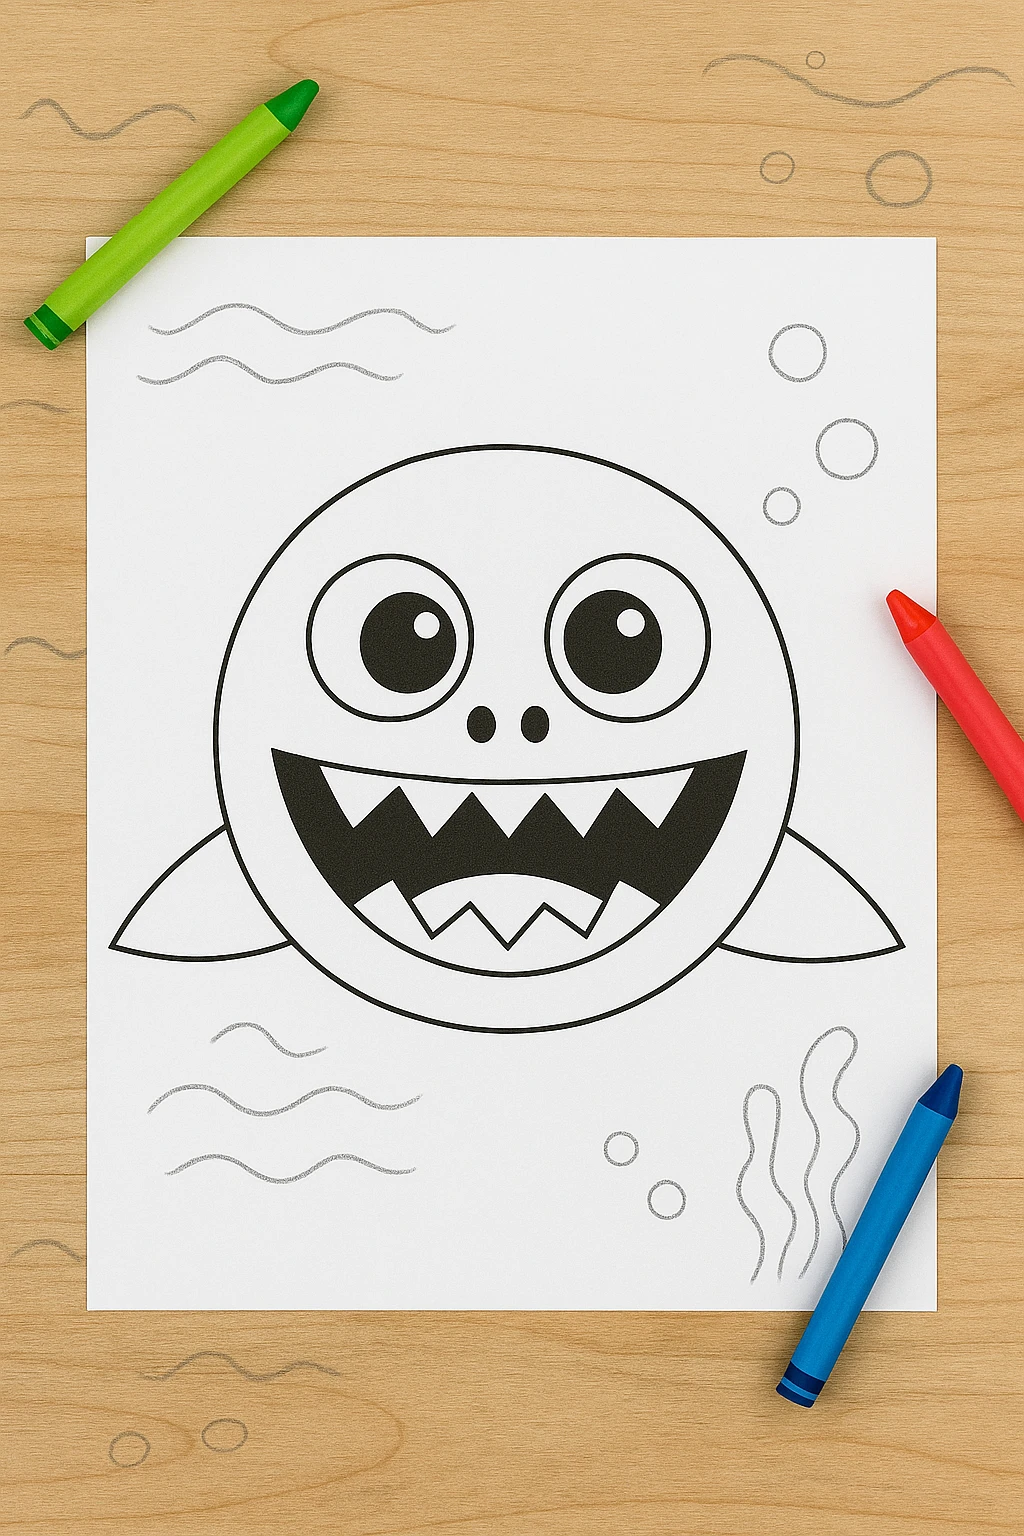
Printable Template
To make this craft even easier, we've included a printable Baby Shark face template. Just print it out on regular paper or cardstock and have your kids color in the pieces. Then cut them out and glue them onto a colored paper bowl.
This option is perfect for younger kids or classrooms where prepping individual shapes can be time-consuming. The template keeps it neat, quick, and fun!
Conclusion
This Baby Shark Paper Bowl DIY is an easy, entertaining, and colorful project that brings joy to both kids and adults. With just a few basic supplies, children can let their creativity swim free while building motor skills and expressing themselves through art. Whether it's a single shark or a whole ocean family, this craft is sure to be a fin-tastic hit!
Baby Shark Paper Bowl DIY Craft for Kids
Equipment
- Glue stick
- Scissors
- Markers or paint
Materials
Main Materials
- 1 Paper bowl (white or colored)
- Blue cardstock (for fins and tail)
- Black, white, and red cardstock (for face details)
- Glue stick or craft glue
- Scissors (child-safe)
- Black marker
- Optional: googly eyes, glitter glue, templates
Instructions
- Paint or color the outside of the paper bowl blue and let it dry completely.
- Cut out two side fins and one top fin from blue cardstock. Optionally, cut a tail fin.
- Create the eyes using white and black cardstock circles. Make a mouth using black for the base, white for teeth, and red for a tongue.
- Glue the fins to the back of the bowl and the face elements (eyes and mouth) to the front.
- Add final details like nostrils or glitter, and let the entire craft dry completely before displaying.