
Bring a burst of creativity to your fall celebrations with this Whimsical Hot-Air Balloon Turkey Craft! It’s the perfect project for kids to explore shapes, colors, and seasonal themes while creating a cheerful turkey soaring through the sky in a hot-air balloon. Whether you're crafting at home, in a classroom, or for a Thanksgiving family gathering, this delightful project is easy to assemble and fun to personalize.

This turkey-in-a-balloon twist on the traditional Thanksgiving craft is especially engaging for young artists. With its bright autumn colors, cute character design, and imaginative theme, it sparks storytelling and play. Plus, it's a fantastic way to combine crafting with discussions about gratitude, flight, or fall weather.
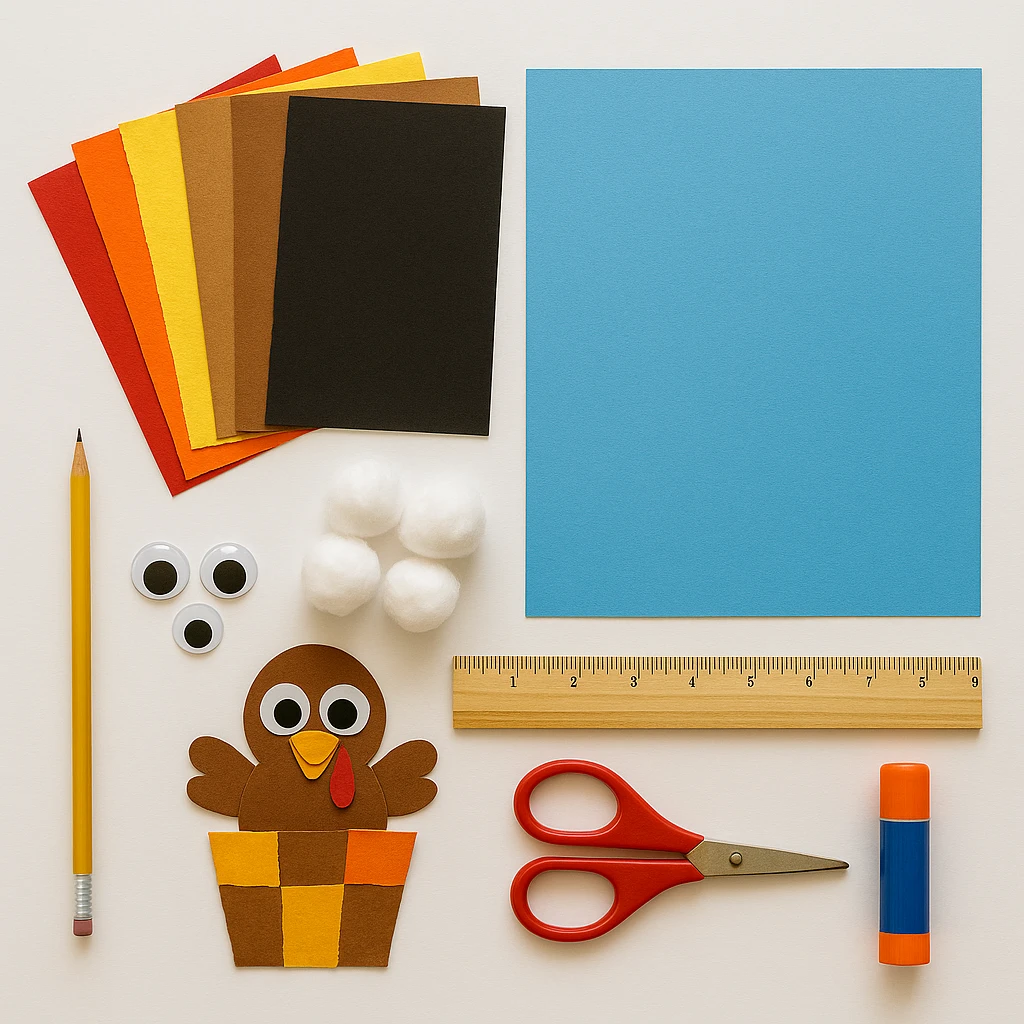
Materials Needed
- Colored construction paper or felt (red, orange, yellow, brown, tan, white, black)
- Blue background paper (for the sky)
- Child-safe scissors
- Glue stick or tacky glue
- Pencil for tracing
- Googly eyes (optional)
- Cotton balls or white paper for clouds
- Ruler (optional for basket squares)
Prep Time: 15 minutes
Craft Time: 30–40 minutes
Tip: Pre-cut shapes for younger children or use templates for easier assembly.
Step 1: Prepare the Background
Start with a blue sheet of paper as your background to represent the sky. You can keep it simple or glue on white cloud shapes or stretched cotton balls to add a soft, fluffy effect.
Step 2: Create the Hot-Air Balloon Top
Tear or cut out 5–6 curved strips of construction paper in red, orange, and yellow. These should be shaped like elongated teardrops or curved panels. Arrange them in a semicircle to form the rounded balloon top and glue them in place near the top half of the background.
Step 3: Make the Balloon Basket
Cut a small rectangle (about 3 inches wide by 2.5 inches tall) from brown paper to form the basket. Then cut smaller squares in yellow, orange, and tan to create a patchwork effect on the basket. Glue them on in a checkerboard pattern.
Step 4: Assemble the Turkey Body
Cut out a medium-sized oval for the turkey’s body from brown paper, and a smaller circle for the head. Add wings, a beak (yellow triangle), wattle (red teardrop shape), and eyes. Use either white/black paper circles or googly eyes for added dimension.
Step 5: Attach the Turkey to the Basket
Glue the turkey’s body so it appears to be popping out of the top of the basket. Add wings on either side as if it’s holding onto the basket’s edge.
Step 6: Connect the Balloon and Basket
Cut two narrow brown strips (about 4 inches long) to form the ropes connecting the basket to the balloon. Glue one strip on each side from the top corners of the basket up to the edges of the balloon.
Step 7: Add Final Details
Decorate the sky with extra clouds or even falling leaves. You can draw motion lines or add sparkle with glitter glue. For a fun twist, write a Thanksgiving message or child’s name on the balloon or basket.
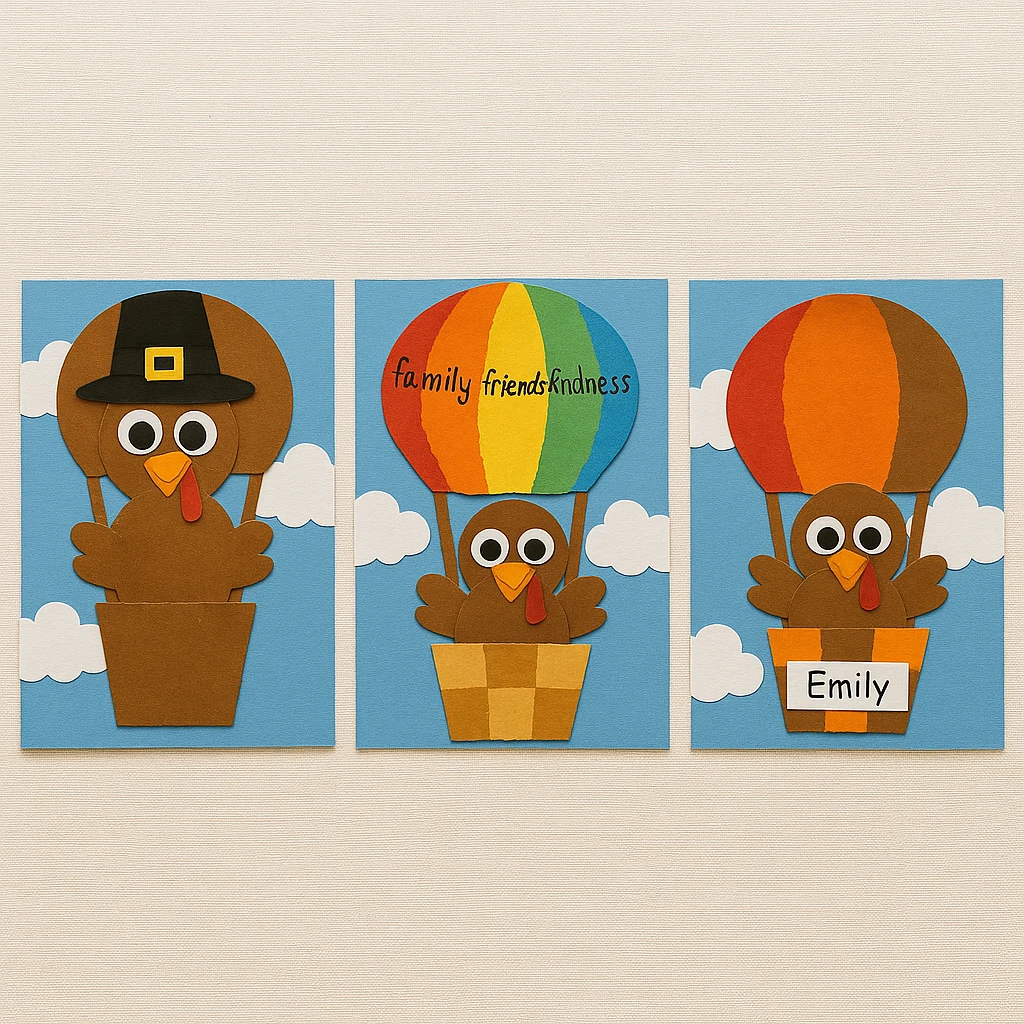
Customization Ideas
Pilgrim Turkey Balloon: Add a black hat with a yellow buckle to your turkey to turn him into a Thanksgiving pilgrim. Swap the balloon panels for dark fall tones like maroon and forest green.
Rainbow Gratitude Balloon: Use rainbow colors for the balloon and have kids write things they’re thankful for on each panel. Great for a group activity or classroom display.
Classroom Display Project: Each student creates a turkey with a unique balloon. Arrange them on a bulletin board to make a sky filled with festive turkeys!
Educational and Seasonal Uses
This craft ties perfectly into Thanksgiving themes. Teachers can pair it with lessons on gratitude, the story of Thanksgiving, or even basic physics concepts about hot-air balloons. It's also a great motor-skill activity and can be adapted for various ages with more or less cutting required. As a seasonal decor piece, it works well on windows, walls, or as part of a homemade card.
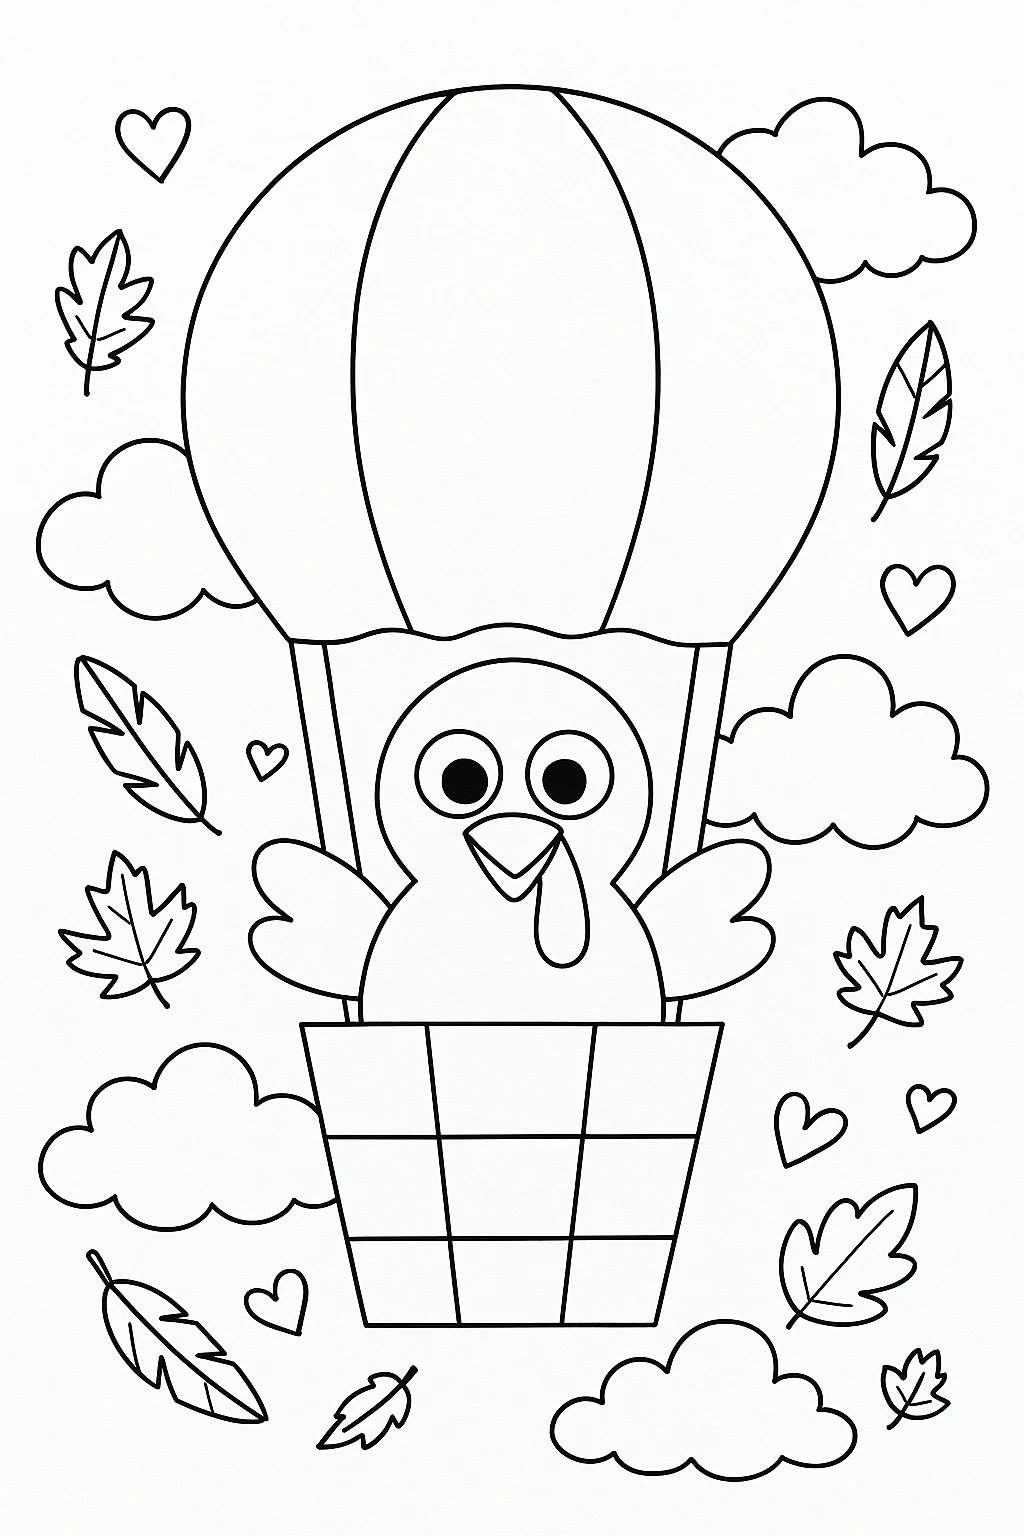
Printable Template
To make crafting even easier, we’ve created a ready-to-print template. Just download and print it on standard 8.5x11" paper. Kids can color the pieces themselves, cut them out, and glue them following the steps above. This option is perfect for classroom settings or when you want a quick and easy craft session.
The template includes the balloon panels, basket base, turkey parts, and even cloud shapes. You can print it on white paper and let kids color it in, or print directly onto colored paper to save time.
Conclusion
The Whimsical Hot-Air Balloon Turkey Craft is more than just a holiday project—it’s a way to blend imagination, learning, and seasonal spirit into one delightful creation. Whether used in a group setting or made one-on-one at home, it’s sure to bring smiles and spark creativity. Don’t forget to proudly display your turkey’s sky-high adventure!

Whimsical Hot-Air Balloon Turkey Craft
Equipment
- Child-safe scissors
- Glue stick or tacky glue
- Pencil
- Ruler (optional)
Materials
Craft Materials
- Colored construction paper or felt (red, orange, yellow, brown, tan, white, black)
- Blue background paper for the sky
- Googly eyes optional
- Cotton balls or white paper for clouds
Instructions
- Start with a blue sheet of paper as your background to represent the sky. Glue on white cloud shapes or cotton balls for a fluffy effect.
- Cut or tear 5–6 curved strips of red, orange, and yellow paper. Arrange them in a semicircle to form the balloon top and glue near the top of the background.
- Cut a 3" x 2.5" brown rectangle for the basket. Add smaller colored squares in a checkerboard pattern to decorate it, then glue in place.
- Create the turkey using brown ovals and circles for the body and head. Add a yellow beak, red wattle, and eyes.
- Glue the turkey so it appears to pop out of the basket. Add wings on each side as if it’s holding the basket edge.
- Cut two brown strips to connect the basket and balloon. Glue one on each side from the basket top to the balloon edges.
- Add extra clouds, falling leaves, or write a Thanksgiving message to finish your design.