
Celebrate creativity and culture with this vibrant Floral Fiesta Sugar Skull Plate Mask DIY. Inspired by the rich traditions of Día de los Muertos, this project transforms a simple paper plate into a dazzling sugar skull mask bursting with color and personality. It's a hands-on activity perfect for kids, families, classrooms, or anyone wanting to explore Mexican cultural arts in a meaningful and festive way.
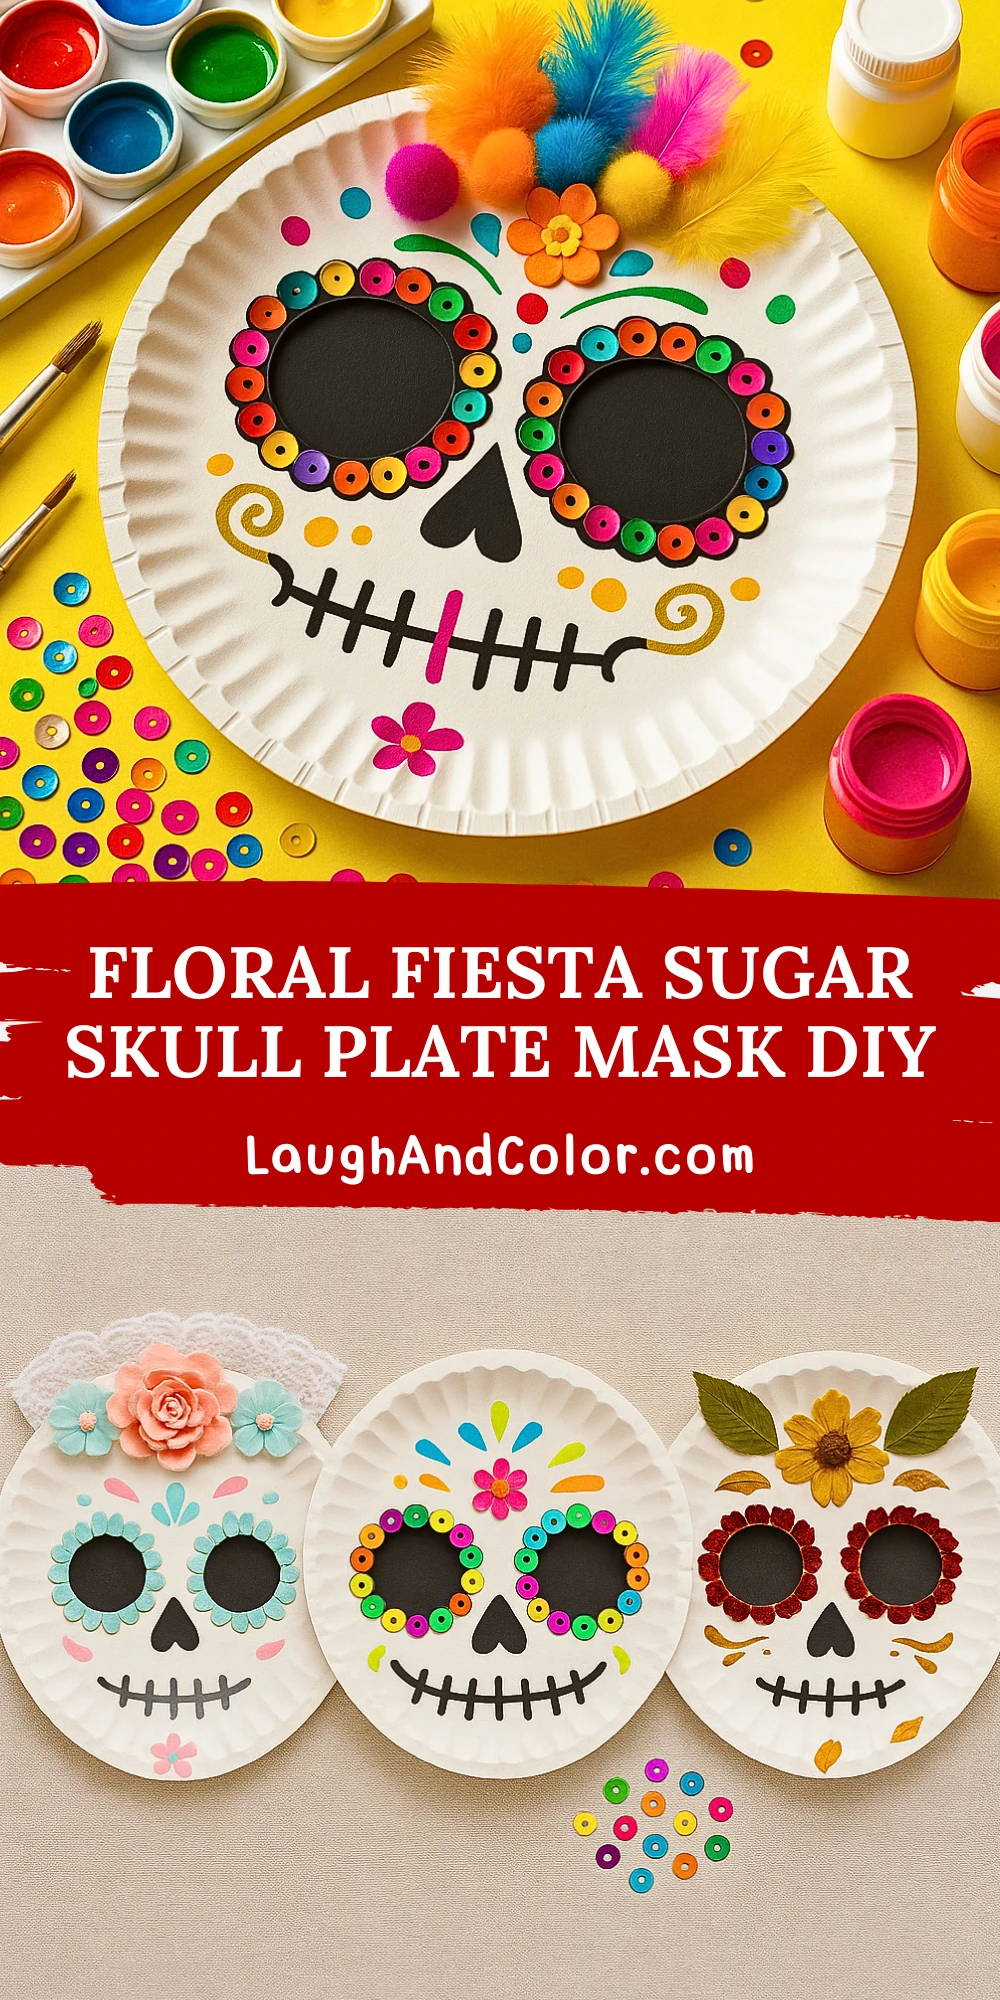
Sugar skulls are traditionally made to honor loved ones who have passed on, and this craft can serve as both a fun activity and a teachable moment. Kids will love using paint, sequins, pom-poms, and feathers to create unique designs that reflect their own style. Whether you're celebrating the Day of the Dead or just looking for an eye-catching seasonal decoration, this sugar skull mask is an engaging and beautiful project.
Let's get started with everything you'll need!
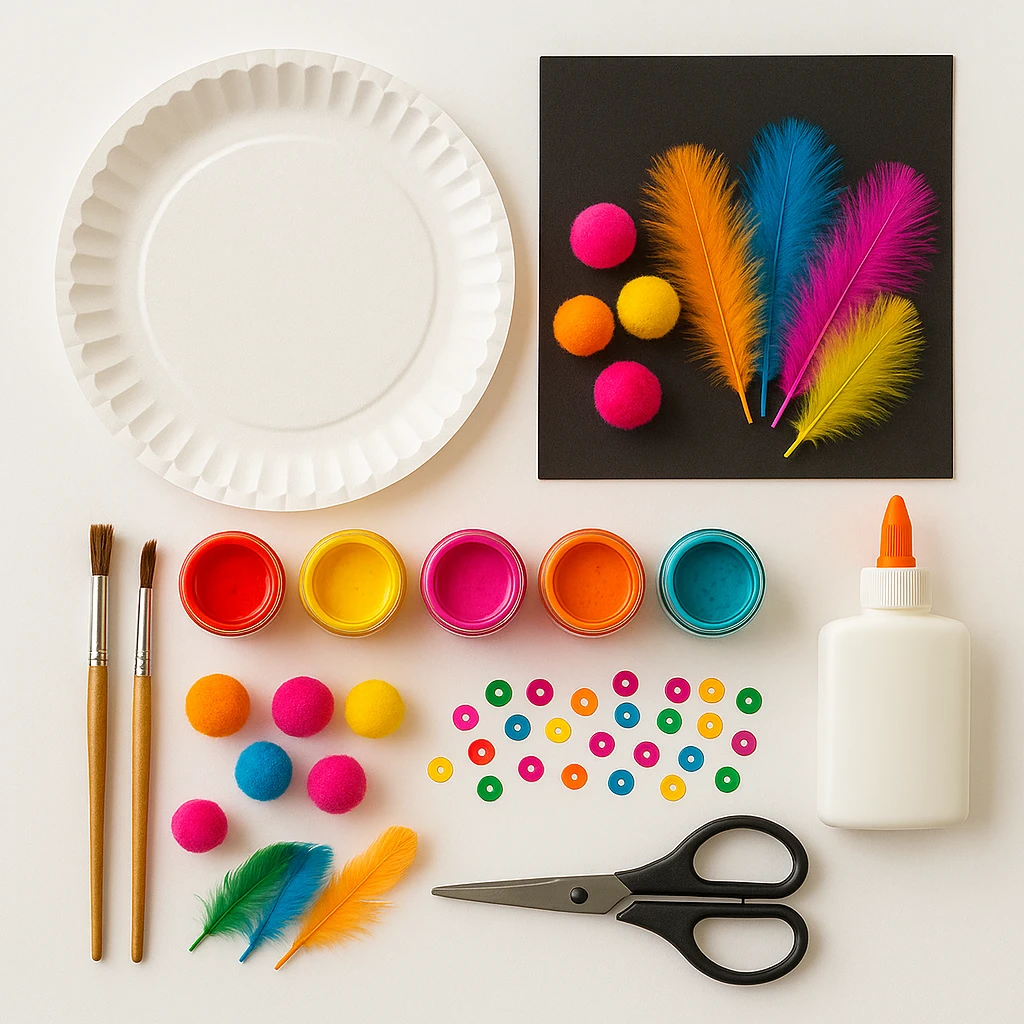
Materials Needed
- 1 white paper plate (standard 9-inch)
- Black construction paper (for eye backing, about half a sheet)
- Colorful sequins (about 30-40)
- Pom-poms in bright colors (5-6 small)
- Assorted craft feathers (5-6)
- Acrylic paint set (especially black, pink, yellow, teal)
- Paintbrushes (small and medium)
- Glue (tacky glue or school glue)
- Pencil
- Scissors
- Optional: foam stickers, glitter glue, floral embellishments
Step-by-Step Instructions
Step 1: Cut Eye Holes
Begin by folding your paper plate gently in half (without creasing it fully) and cutting out two round eye holes. Use a small cup or lid as a guide to trace perfect circles before cutting if needed. The eyes should be about 2 inches in diameter and spaced evenly apart.
Step 2: Paint and Prepare the Base
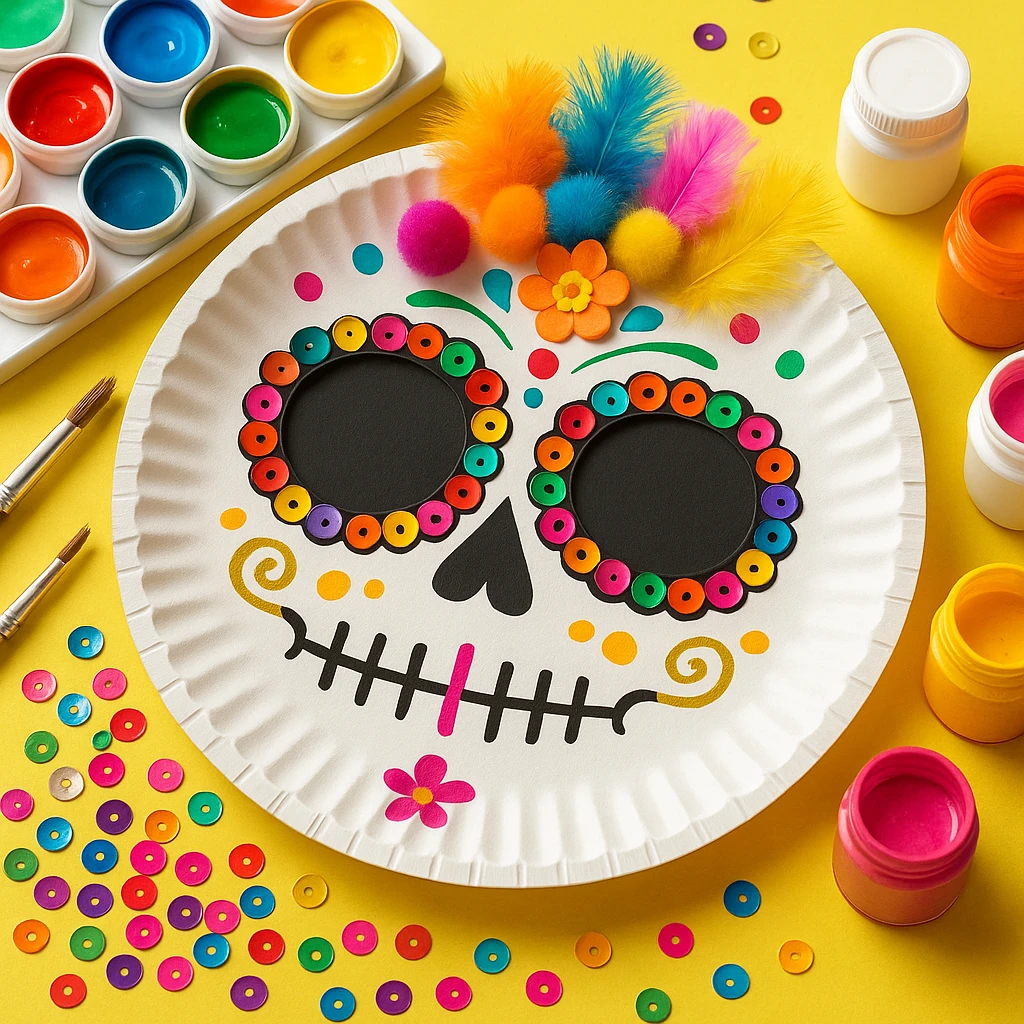
Lay the plate flat on your work surface. Using your chosen colors, paint on a skull face design: start with basic features like the nose and mouth in black, and add colorful swirls, dots, and petals around the face. Allow the paint to dry completely, which typically takes about 15-20 minutes depending on the paint thickness.
Step 3: Decorate the Eyes with Sequins
Cut two black circles slightly larger than your eye holes from the black construction paper and glue them to the back of the plate. This gives the eyes their dark "sugar skull" look. Now glue sequins around each eye hole on the front side of the plate to form colorful frames. Alternate colors for a rainbow effect.
Step 4: Add Nose, Mouth, and Decorative Details
Use black paint or a marker to draw a heart-shaped nose and a stitched smile. Add other Day of the Dead motifs such as swirls, petals, or teardrops around the face with bright paint or glitter glue. This is your chance to get really creative—no two sugar skulls are the same!
Step 5: Glue on Feathers and Pom-Poms
Arrange feathers and pom-poms across the top of the skull to act as a festive headdress. Use glue to attach them securely, and press down gently until the glue begins to set. Consider adding a flower embellishment in the center to complete the look.
Step 6: Final Touches and Dry Time
Let your mask dry fully—ideally for at least 30 minutes. Once it’s dry, you can attach a stick or string to wear it as a mask or hang it up as a vibrant decoration. Don’t forget to sign the back with your name and the date!
Customization Ideas
Boho Chic Skull
Use soft pastel paints and decorate with lace or delicate paper flowers. This version has a more vintage feel and looks beautiful as a wall hanging or part of a photo backdrop.
Neon Fiesta Style
Turn up the brightness with neon paint and sequins. Add glow-in-the-dark elements like paint or stickers to make it shine at night. Great for parties and festivals!
Nature-Inspired Skull
Bring in elements from nature such as dried leaves, mini pinecones, or real flower petals. Earthy tones paired with gold paint can give your skull a rustic yet magical vibe.

Educational or Seasonal Uses
This craft is excellent for teaching children about the cultural significance of Día de los Muertos. In a classroom or homeschool setting, it can be paired with lessons on Latin American history and traditions. Seasonally, it fits perfectly into fall craft time and makes for a beautiful autumn display.
Printable Template
To make this DIY even easier, we’ve included a printable sugar skull template! Kids can color in the design before cutting and decorating. Print the template on cardstock for extra durability, especially if you're using glue or heavier decorations. The template features bold outlines and plenty of open space for creativity.
You can also print multiple copies and use them as a classroom activity station or as party favors for a Día de los Muertos celebration.

Conclusion
The Floral Fiesta Sugar Skull Plate Mask is more than just a craft—it’s a celebration of creativity, culture, and color. Kids will not only enjoy making something beautiful but also learn about a tradition rich with meaning. Once completed, these masks make striking decorations and conversation pieces. Encourage everyone to proudly display their sugar skulls or wear them during festivities to honor this special holiday.
Floral Fiesta Sugar Skull Plate Mask DIY
Equipment
- Paintbrushes
- Scissors
- Glue
- Pencil
Materials
- 1 White paper plate (9-inch)
- 0.5 sheet Black construction paper For eye backing
- 30-40 Colorful sequins
- 5-6 Pom-poms Small, bright colors
- 5-6 Craft feathers Assorted colors
- 1 set Acrylic paint set Include black, pink, yellow, teal
- Optional decorations Glitter glue, floral stickers, foam embellishments
Instructions
- Step 1: Cut Eye Holes – Fold the paper plate gently and cut two eye holes using a cup or lid as a guide.
- Step 2: Paint and Prepare the Base – Paint the plate with skull features and colorful designs. Let it dry for 15–20 minutes.
- Step 3: Decorate the Eyes with Sequins – Glue black paper behind the eye holes and add sequins around each opening.
- Step 4: Add Nose, Mouth, and Decorative Details – Use paint or markers to add traditional skull decorations, like a heart nose and stitched mouth.
- Step 5: Glue on Feathers and Pom-Poms – Arrange and glue feathers and pom-poms across the top of the mask for flair.
- Step 6: Final Touches and Dry Time – Let dry completely for at least 30 minutes. Add a stick or string to use as a mask or decoration.