
Winter brings with it a sense of magic, making it the perfect season for charming crafts that celebrate snow, coziness, and imagination. One of the most delightful ways to welcome the season is by creating a friendly snowman—and not just any snowman, but a tube snowman that stands up on its own with a vibrant scarf and a smiling face. This project blends recycling with creativity, turning an ordinary cardboard tube into an adorable snowy character that kids will love.

Whether you're working on a winter classroom unit or simply spending a cozy afternoon crafting at home, this snowman tube craft is sure to become a seasonal favorite. Kids will enjoy adding personal touches, and the end result makes for a great decoration or playful character in snowy storytelling. The included igloo scene enhances the arctic vibe, transforming this into a full imaginative playset.
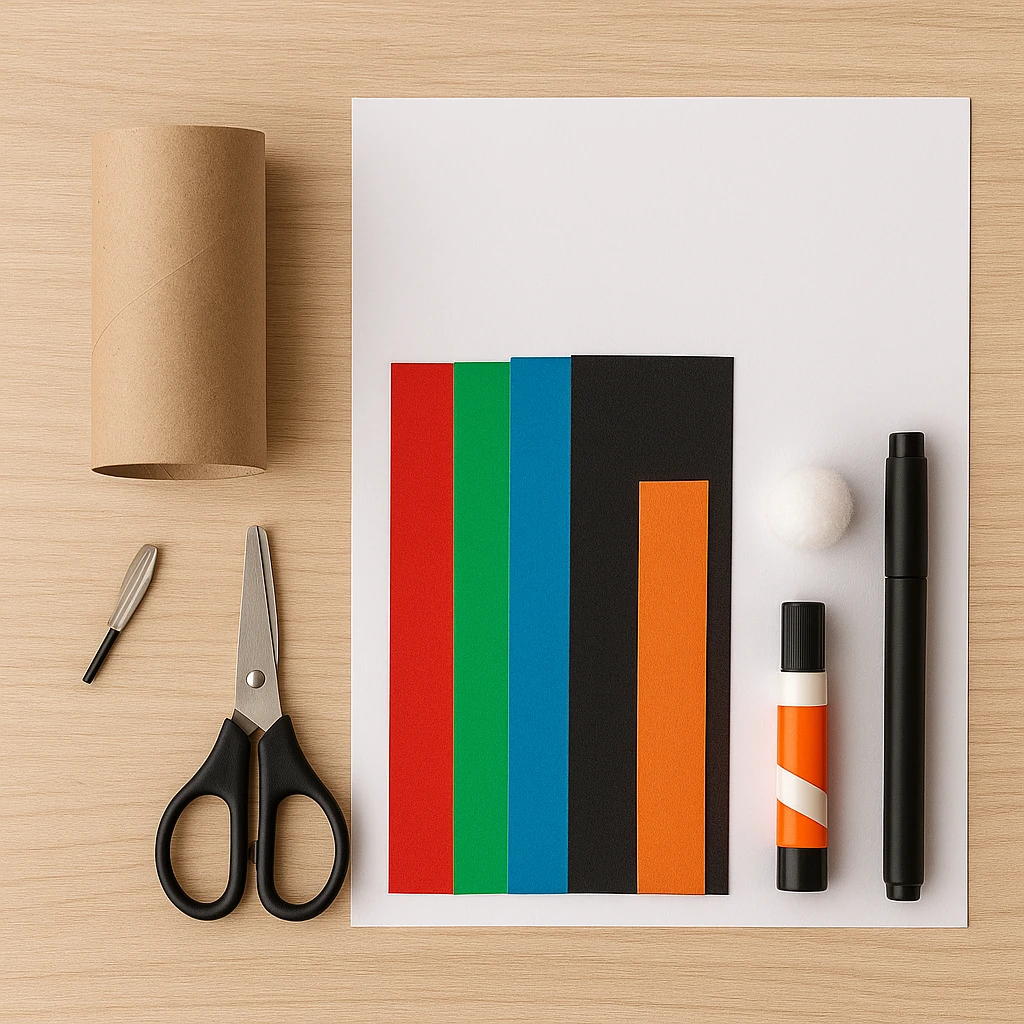
Materials Needed
To make your Arctic Igloo Snowman Tube Craft, you’ll need:
- 1 cardboard toilet paper roll or craft tube
- White cardstock or construction paper
- Colored cardstock (red, green, blue, black, orange)
- Scissors
- Glue stick or white craft glue
- Tape (optional)
- 1 small white pom-pom
- Black marker (optional for details)
Helpful Tip: Pre-cut pieces for younger children or use stickers and googly eyes to simplify assembly.
Step 1: Prepare the Tube Base
Start by choosing a clean, empty toilet paper tube. If you're working with young children, inspect it to ensure there are no sharp edges or rough surfaces. You can also trim the tube slightly if needed to make the snowman shorter and more stable.
Step 2: Wrap with White Paper
Cut a rectangle of white cardstock long and wide enough to cover the tube completely. Wrap it around and glue it in place. This will become the snowman’s body, giving it that iconic snowy look.
Step 3: Make and Attach the Snowman’s Face
Cut two black circles for eyes, an orange triangle for the carrot nose, and two pink or red circles for rosy cheeks. Glue them to the top portion of the white-covered tube. Draw a smiling mouth with a marker, or cut one from black paper for a bolder look.
Step 4: Create the Hat with Pom-Pom
Cut a wide strip of blue paper and wrap it around the top of the tube as the snowman's hat. Secure with glue. Then cut a circle of the same blue paper for the top and glue it on. Attach a small white pom-pom at the center top of the hat for a fluffy finish.
Step 5: Add Scarf and Buttons
Use strips of red and green paper to create a fun scarf. Fringe the ends by snipping tiny cuts with scissors. Wrap around the neck and glue in place. Then, cut three small black circles and glue them down the front of the tube as buttons.
Step 6: Set the Scene with Igloo Backdrop
To complete your snowy setup, create a paper igloo using white and light blue paper, or use the printable template included below. Place your snowman in front of this icy backdrop to bring the arctic scene to life.
Customization Ideas
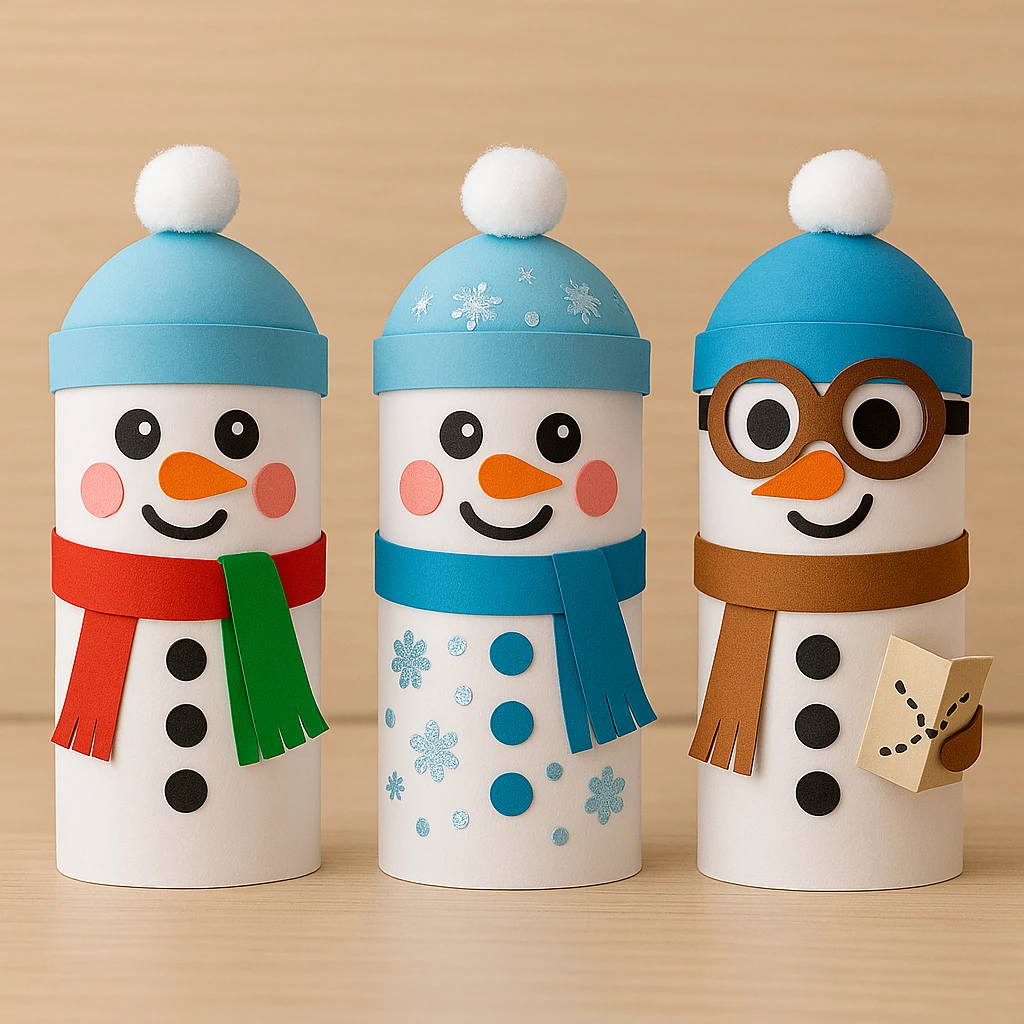
Style 1: Classic Red-and-Green Snowman
Stick with traditional holiday colors like the red and green scarf shown. Add gold or silver buttons for a festive twist.
Style 2: Frosty Glitter Theme
Use glitter paper for the scarf and hat, and decorate the snowman with adhesive snowflake stickers or sparkly sequins.
Style 3: Arctic Explorer Snowman
Make your snowman a little adventurer! Add mini goggles, a backpack (small paper cutout), and give the igloo a flag or map prop.
Educational or Seasonal Uses
This craft is perfect for preschool and elementary classrooms studying seasons, arctic animals, or winter weather. It helps with:
- Fine motor skills through cutting and gluing
- Learning color and shape recognition
- Seasonal storytelling and role-play
It also makes a great December or January bulletin board display or table centerpiece for holiday events.
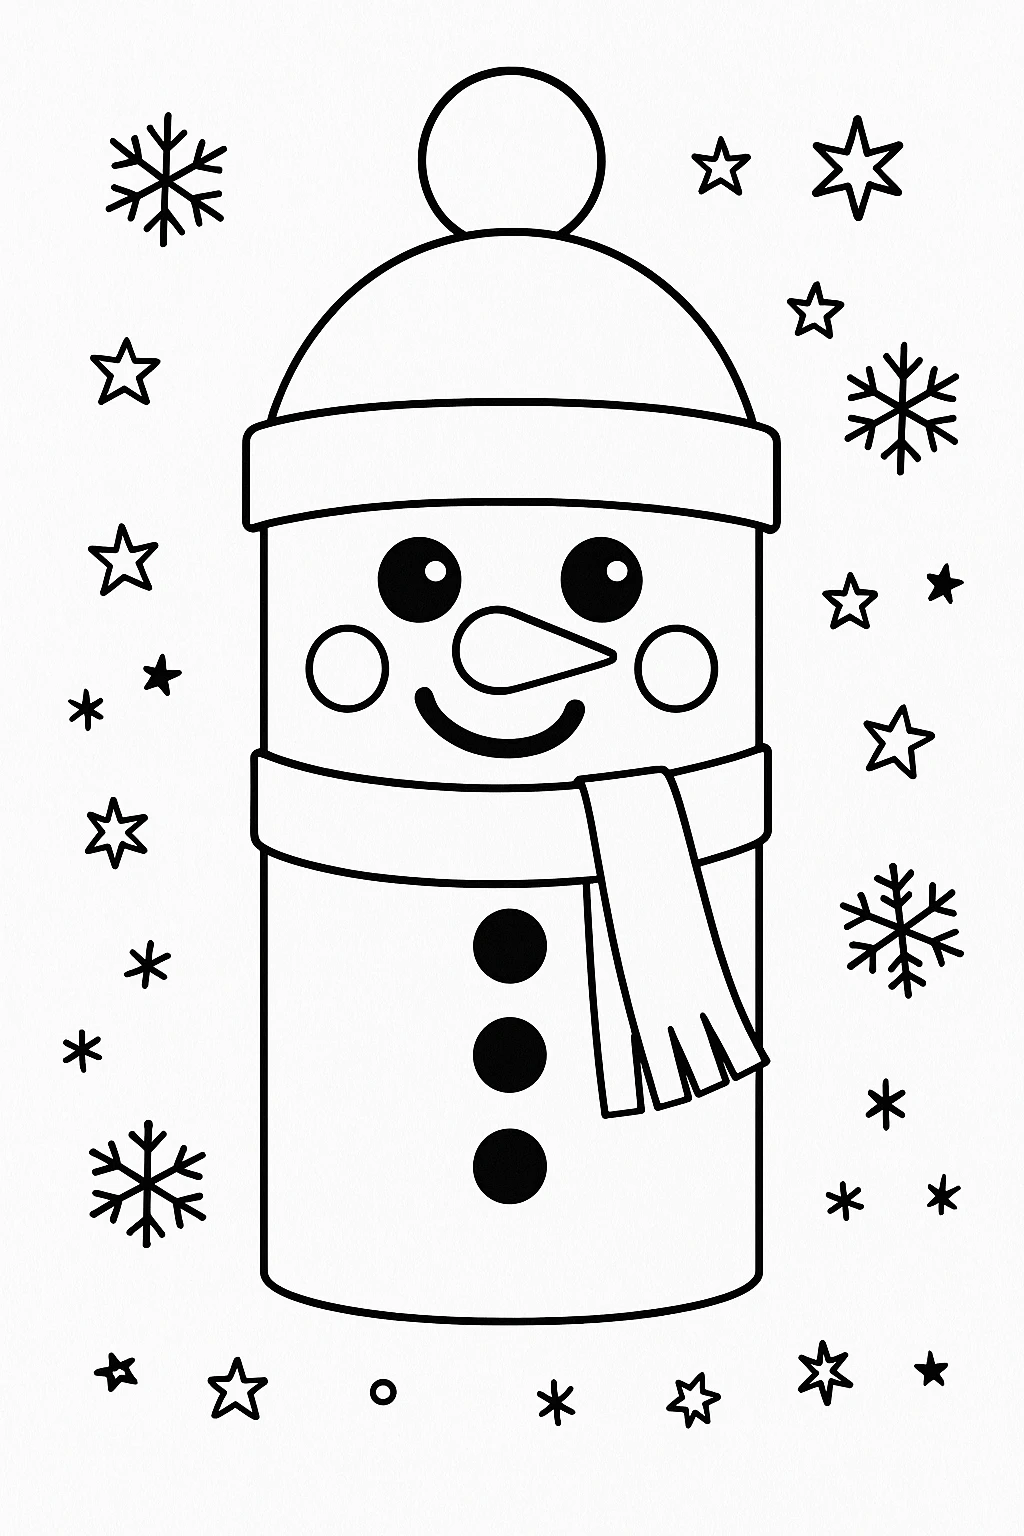
Printable Template Section
To make things even easier, we've included a ready-to-use printable template. Just print it on white cardstock, let kids color in the pieces, and follow the cutting and gluing instructions above.
This version is especially helpful for younger children or group settings, as it ensures consistency and simplifies the preparation. Add your own flair with stickers, crayons, or textured materials.
Conclusion
Making an Arctic Igloo Snowman Tube Craft is more than just a fun afternoon—it’s a chance to bring a bit of winter wonder indoors. This simple but delightful project is easy to customize, fun to display, and offers plenty of opportunities for learning and storytelling. Gather your materials, let creativity lead the way, and watch your snowman come to life in its own snowy world!

Arctic Igloo Snowman Tube Craft
Equipment
- Scissors
- Glue stick
- Marker
Materials
Craft Materials
- 1 Cardboard toilet paper roll
- White cardstock or construction paper
- Colored cardstock red, green, blue, black, orange
- 1 Small white pom-pom
Instructions
- Step 1: Prepare the Tube Base - Start with a clean cardboard tube. Trim if needed for stability.
- Step 2: Wrap with White Paper - Cover the tube in white cardstock to create the snowman body.
- Step 3: Make and Attach the Snowman’s Face - Add eyes, carrot nose, cheeks, and a smile using cut paper or marker.
- Step 4: Create the Hat with Pom-Pom - Use blue paper to make a hat and attach a pom-pom on top.
- Step 5: Add Scarf and Buttons - Make a scarf from red and green paper and add black buttons to the front.
- Step 6: Set the Scene with Igloo Backdrop - Use a printable or create an igloo from paper to complete the arctic setting.