
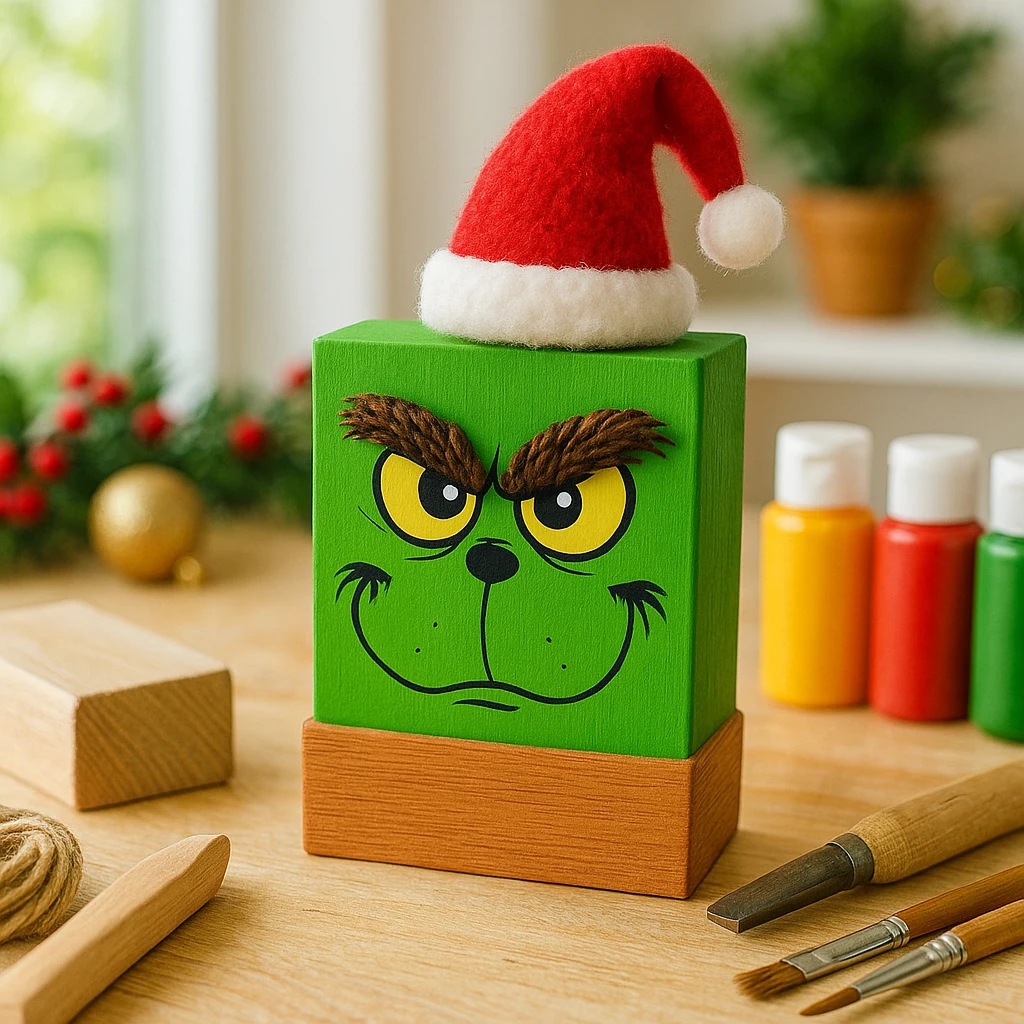
This Wooden Block Grinch Shelf Sitter DIY is a festive and fun craft project that’s bound to steal the show on your holiday display. With its bright green paint, mischievous face, and fluffy red Santa hat, this Grinchy decoration is a cheerful nod to the beloved character. Whether you're looking to add a handmade touch to your seasonal decor or planning a holiday craft session with the kids, this project checks all the boxes.

Perfect for sitting on mantles, bookshelves, or tiered trays, this Grinch shelf sitter is not only adorable but also simple to make. You don’t need any advanced woodworking skills—just a block of wood, some paint, and a little creative flair. In under an hour, you’ll have a crafty companion that adds charm and personality to your Christmas decor.
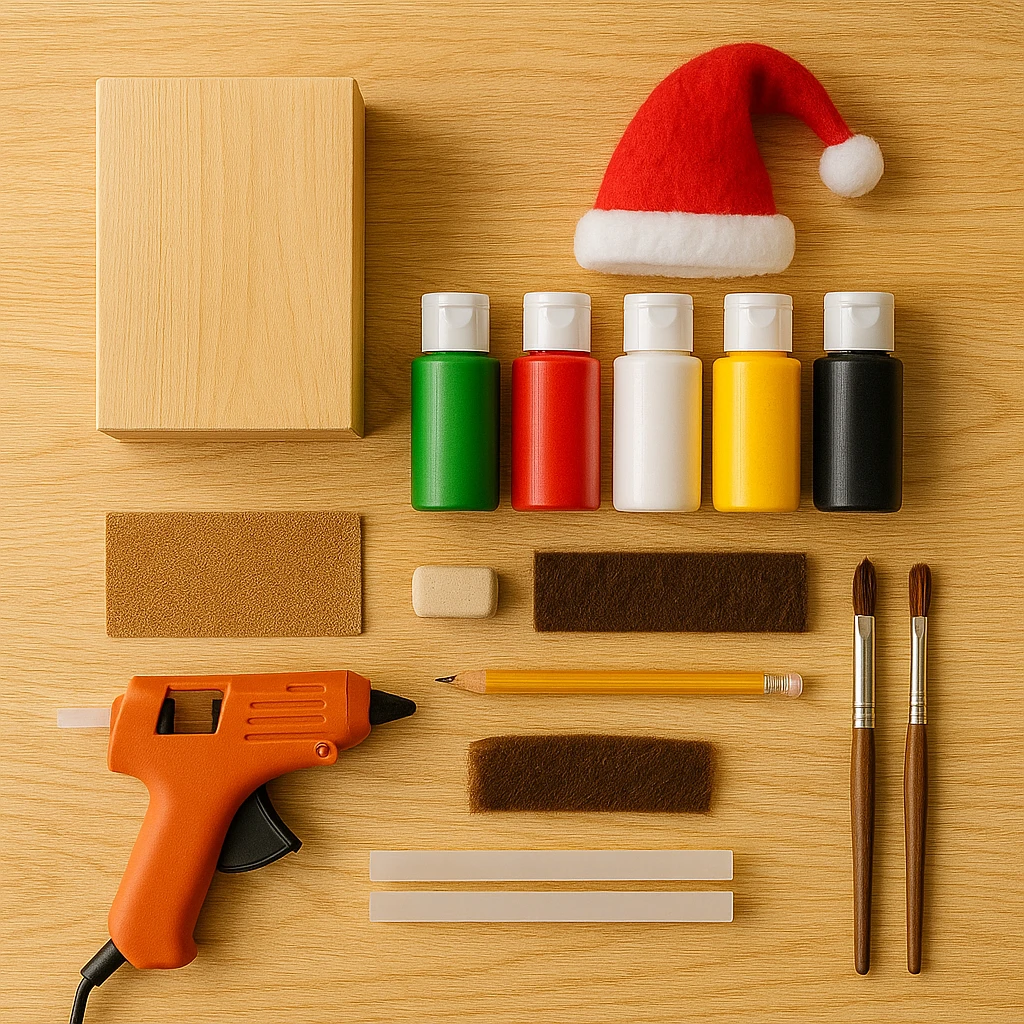
Materials Needed
- 1 wooden block (approximately 3.5 x 5 inches)
- Green acrylic paint
- Red, white, yellow, black, and brown acrylic paint
- Flat paintbrush and fine detail paintbrush
- Black paint pen or permanent marker
- Brown faux fur or felt for eyebrows
- Mini Santa hat (approx. 3 inches tall)
- Hot glue gun and glue sticks
- Pencil and eraser
- Sandpaper (optional for smoothing edges)
Step 1: Prep and Sand the Wooden Block
Start by sanding your wooden block if it has any rough edges or splinters. A smooth surface helps the paint adhere better and gives your project a polished look. Wipe off any dust with a clean cloth before moving on to painting.
Step 2: Paint the Base Colors
Paint the top two-thirds of the block with green acrylic paint—this will be the Grinch’s face. Use even strokes and allow the paint to dry before applying a second coat if needed. Paint the bottom third brown to mimic his shirt. Let everything dry completely before proceeding.
Step 3: Sketch and Paint the Grinch’s Face
Using a pencil, lightly sketch the Grinch’s eyes, nose, and mischievous grin on the green section of the block. Once you're happy with the design, trace and fill in the lines using a black paint pen or fine brush and black acrylic paint. Paint the eyes yellow and add white highlights to give them life. Let each layer dry before adding details to avoid smudging.
Step 4: Add Eyebrows and Hat
Cut two thick eyebrow shapes out of brown felt or faux fur and glue them above the eyes for a playful 3D effect. Then glue the mini Santa hat to the top of the block, tilting it slightly for that extra Grinchy flair. Hold it in place until the glue sets.
Step 5: Let it Dry and Display
Allow all painted and glued areas to dry completely—this should take about 30 minutes. Once dry, your Grinch shelf sitter is ready to take center stage on your holiday shelf, tray, or mantel!
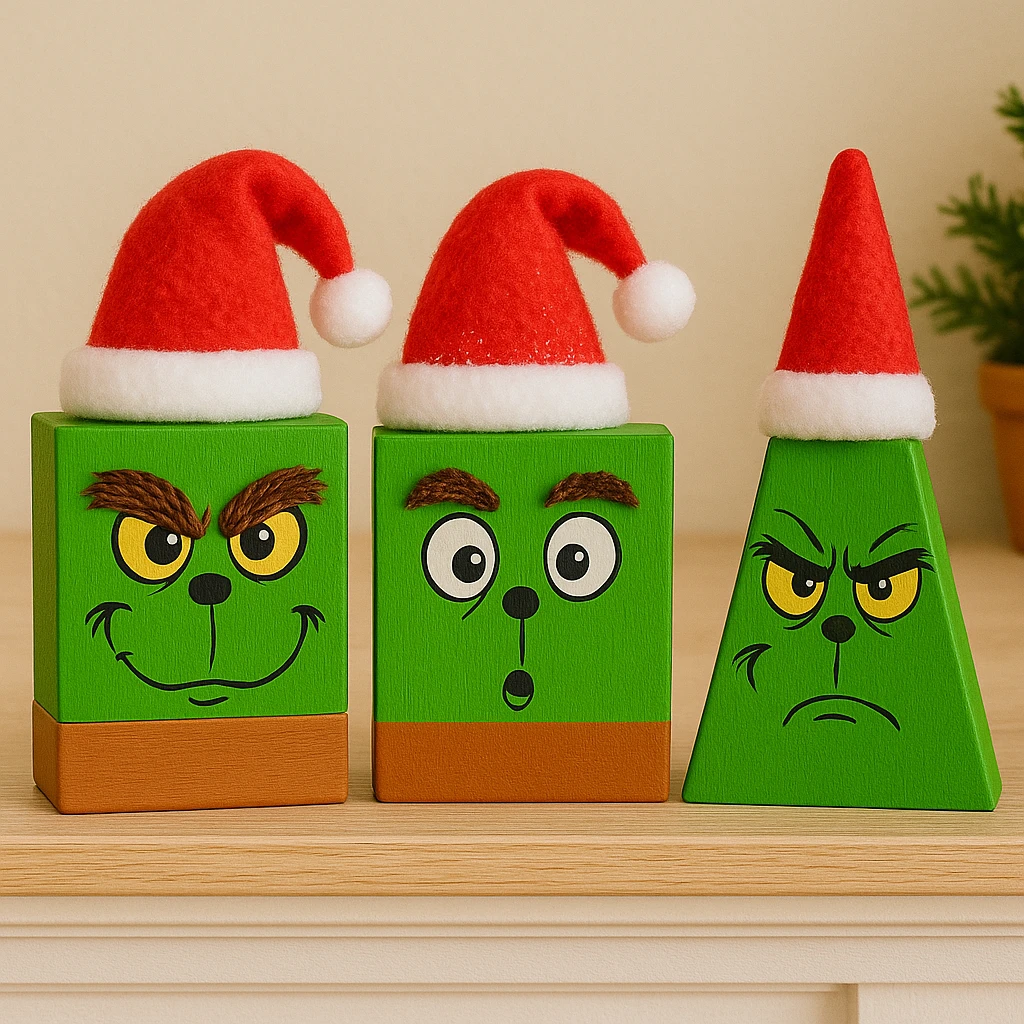
Customization Ideas
1. Expression Variations: Give your Grinch a different personality by changing up his expression. Try a wide, sly grin or a surprised face to create a full Grinch family with different moods.
2. Glam Grinch: Add gold glitter to the hat trim or outline the eyes with shimmer paint for a sparkling twist.
3. Shape Swap: Try using a triangle or circle wooden base instead of a rectangle for a different spin. You can even use a tall, narrow block for a more dramatic silhouette.
Educational/Seasonal Uses
This DIY is ideal for classroom holiday crafts—kids can paint their own Grinch faces using pre-cut wooden blocks. It’s also great for storytime or creative writing prompts. Have children write a short tale about their Grinch shelf sitter's adventures around the house.
These also make sweet handmade gifts or stocking stuffers. With a bit of adult help, even younger children can participate by coloring in a printable Grinch face instead of painting directly on the wood.
Printable Template
To make this project even easier, we’ve included a ready-to-use printable Grinch face template. Just print it out, color it in, and glue it to your wooden block. This option is especially great for younger kids or large group settings where speed and simplicity are key.
The printable includes outlines of the face, eyes, nose, and mouth—just cut and paste. You can also use it as a stencil to trace onto the block before painting.

Conclusion
Creating your own Wooden Block Grinch Shelf Sitter is a delightful way to bring the mischievous holiday spirit into your home. It’s an easy, budget-friendly project that delivers big on charm and creativity. Once complete, it becomes a yearly favorite you’ll love unpacking with your holiday decorations.
So grab your paintbrushes and get crafting—because nothing says "Merry Grinchmas" like a handmade, grumpy green face on your shelf!
Wooden Block Grinch Shelf Sitter DIY
Equipment
- Hot glue gun
- Paintbrushes
- Pencil and eraser
- Sandpaper
Materials
- 1 Wooden block (approx. 3.5 x 5 inches)
- Green, red, white, yellow, black, and brown acrylic paint
- Flat and fine detail paintbrush
- Black paint pen or permanent marker
- Brown faux fur or felt For eyebrows
- 1 Mini Santa hat (approx. 3 inches)
- Glue sticks
Instructions
- 1. Sand the wooden block to smooth any rough edges. Wipe clean.
- 2. Paint the top two-thirds green for the face, and the bottom third brown. Let dry between coats.
- 3. Lightly sketch the face in pencil. Paint the features using black and yellow paint or a paint pen. Let dry.
- 4. Cut and glue on brown faux fur or felt eyebrows. Attach the mini Santa hat with hot glue.
- 5. Allow all parts to dry fully before displaying your Grinch shelf sitter.