
Pumpkin season is the perfect time to break out your crafting supplies and create something festive and fun. This Toilet Paper Roll Pumpkin Man is an easy and adorable fall craft that uses recycled materials and simple supplies. Whether you're decorating for a fall festival, Thanksgiving dinner, or just adding seasonal cheer to your home, this smiling pumpkin character is sure to brighten any space.

Perfect for kids and adults alike, this project blends creativity with tactile play—cutting, gluing, wrapping, and assembling. It's great for developing fine motor skills in young crafters while also providing an opportunity for artistic expression. The best part? You likely have most of the materials at home already, making this an affordable and accessible craft to enjoy with the whole family.
Let’s get started on creating this charming fall decoration with just a few materials and some imagination.
Materials Needed
- 1 empty toilet paper roll
- Orange construction paper (to wrap the roll)
- Green construction paper (for the lid and stem)
- Brown construction paper (for arms/wings)
- Black construction paper (for pupils)
- White construction paper (for eyes)
- Yellow or orange paper (for the beak)
- Twine or yarn
- 2 orange buttons
- Glue stick or craft glue
- Scissors
- Pencil
- Ruler
- Black marker

Step-by-Step Instructions
Step 1: Wrap the Roll in Orange Paper
Measure and cut a piece of orange construction paper approximately 6 inches wide and 4.25 inches tall—enough to wrap completely around the toilet paper roll. Use a glue stick to adhere it securely to the roll, smoothing out any wrinkles.
Step 2: Add the Pumpkin Face
Cut two white circles (about 1.5 inches in diameter) and two smaller black circles for the eyes. Glue them near the top center of the roll. Then, cut a small triangle from orange or yellow paper to form the beak and glue it below the eyes. Use a black marker to draw a happy smile just under the beak.
Step 3: Make the Green Top and Stem
Cut a circle from green paper about 2.5 inches in diameter to fit over the top of the roll like a pumpkin cap. Then cut a short green rectangle (around 1 inch tall) and fold it in half to make the stem. Glue the stem onto the center of the circle, then glue the entire green top onto the top of the roll.
Step 4: Attach Arms and Buttons
Cut two wing-like shapes from brown construction paper for the pumpkin man's arms. Glue one on each side of the roll. Next, glue two orange buttons vertically down the front center of the roll, beneath the face.
Step 5: Tie the Twine Scarf
Wrap a small piece of twine or yarn around the neck area of the roll, right under the face. Tie it into a knot or bow to give your pumpkin man a cozy, rustic scarf. Trim the ends if needed.
Customization Ideas
Want to give your pumpkin man even more personality? Try one of these creative variations:
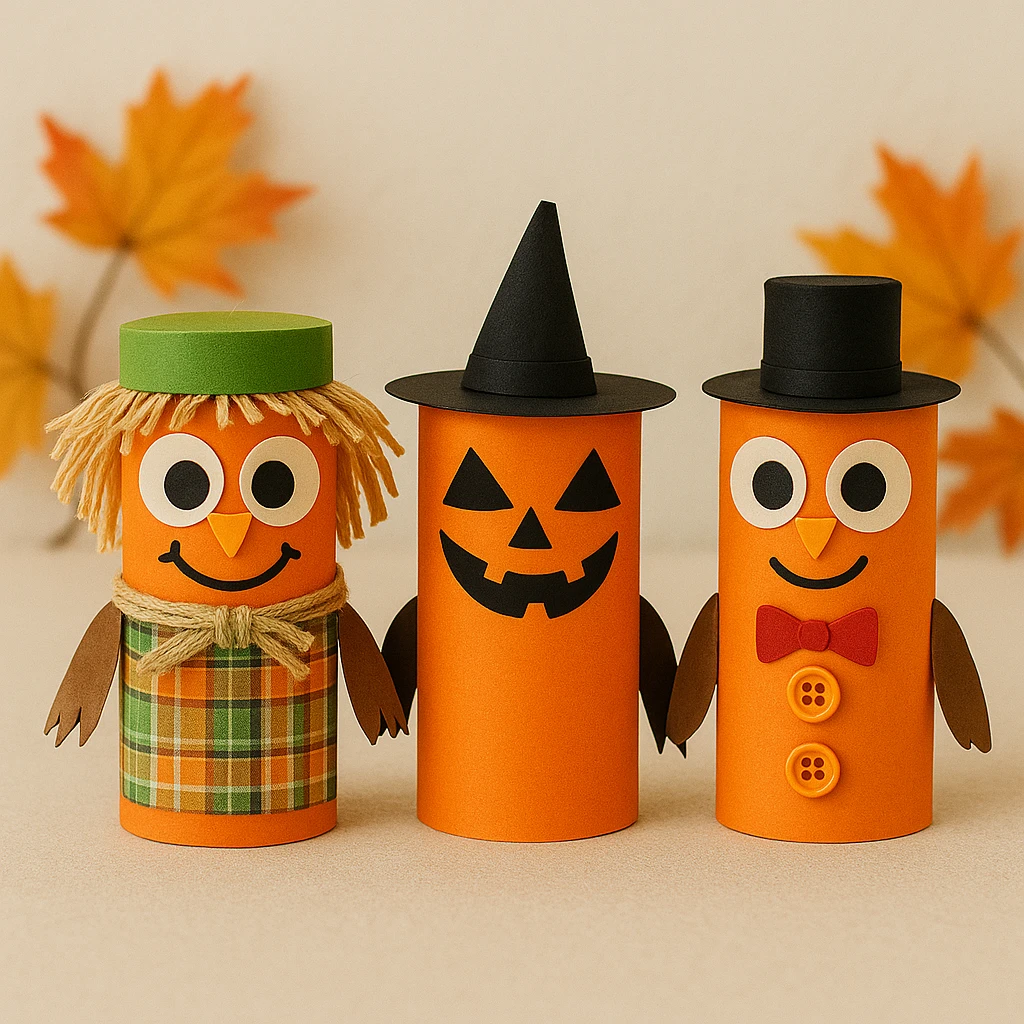
- Scarecrow Pumpkin Man: Add raffia or strips of yellow paper for hair, and glue on a small plaid square for a shirt. Draw stitching marks for a classic scarecrow look.
- Halloween Pumpkin Buddy: Replace the smiling face with a spooky or silly expression. Top it with a mini witch hat made from black paper and glitter.
- Elegant Pumpkin Gentleman: Use a black mini top hat, a red bow tie, and gold buttons for a more refined look—great for a classy Thanksgiving centerpiece.
Educational and Seasonal Uses
This craft is a wonderful addition to fall classroom activities. Teachers can use it to teach about recycling, basic shapes, and color identification. It’s also great for motor skills development in younger children as they cut, glue, and assemble the parts.
At home, these pumpkin men can be part of your autumn decor—lined up on a windowsill, used as table decorations, or featured in a homemade Thanksgiving centerpiece. They’re festive, friendly, and fun to make in batches with kids or friends.
Printable Template
For added convenience, you can print out our ready-to-use template that includes outlines for the eyes, buttons, arms, and hat. Simply print on standard 8.5x11" paper, color the pieces as desired, cut them out, and glue them onto your toilet paper roll base.

This template makes it even easier for younger kids to participate. With everything pre-drawn, they just color, cut, and assemble—no measuring or designing required. It’s a great way to streamline the process for group crafts or classroom use.
Conclusion
Creating a Toilet Paper Roll Pumpkin Man is a joyful and simple craft that brings warmth and charm to the fall season. It’s a fantastic way to engage kids in a hands-on activity that nurtures creativity while also using recyclable materials. Whether displayed as part of a festive arrangement or given as a handmade gift, your pumpkin man is sure to spread smiles wherever he goes.
So grab those toilet paper rolls and start crafting your own pumpkin crew today!

Toilet Paper Roll Pumpkin Man Decoration
Equipment
- Scissors
- Glue stick or craft glue
- Pencil
- Ruler
- Black marker
Materials
- 1 Toilet paper roll
- Orange construction paper for wrapping the roll
- Green construction paper for the lid and stem
- Brown construction paper for arms
- White and black construction paper for eyes
- Orange or yellow paper for the beak
- Twine or yarn for scarf
- 2 Orange buttons
Instructions
- Measure and cut a piece of orange construction paper to wrap around the toilet paper roll. Glue it in place smoothly.
- Cut and glue white and black circles for eyes. Add a triangle beak under the eyes and draw a smile using a black marker.
- Create a green circle for the top and add a small green stem. Glue both on the top of the roll.
- Cut and glue brown arms to the sides of the roll. Add two orange buttons vertically under the face.
- Wrap a short piece of twine or yarn around the neck area and tie it into a scarf. Trim if needed.