
Creating a squirrel paper craft is a delightful way to engage children in a hands-on, seasonal activity that sparks creativity while building fine motor skills. With its adorable woodland design and vibrant autumn colors, this squirrel craft is perfect for fall decorating, classroom projects, or a cozy indoor afternoon. The cute details like the acorn and colorful paper leaves bring the whole project to life, making it a great way to celebrate the changing seasons.

Whether you're a parent, teacher, or craft-loving caregiver, this DIY project is simple to set up and fun for all ages. It allows kids to follow directions, practice cutting and gluing, and explore textures and colors. Plus, with a printable template included, the setup is even easier, allowing more time for creativity and less time for prep. Let’s jump into how you can make your own charming paper squirrel!
Materials Needed
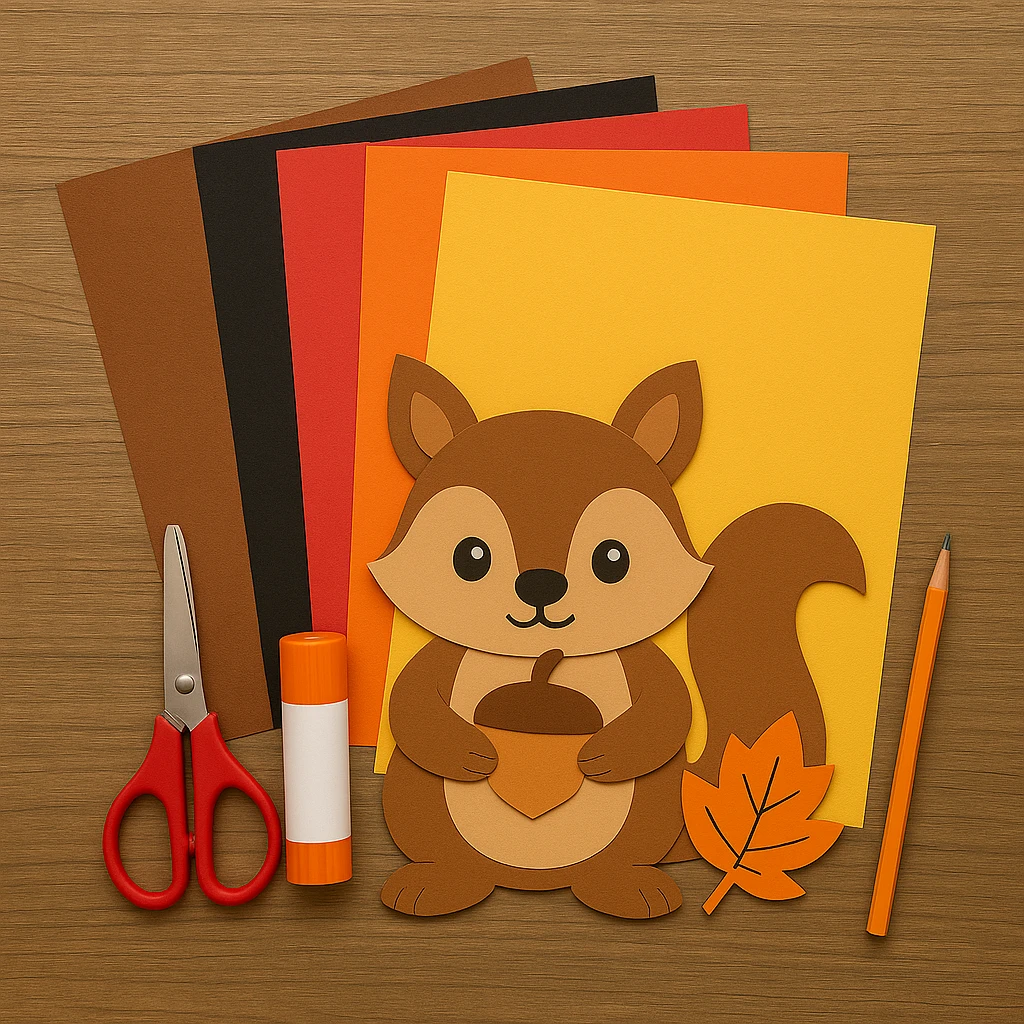
To make your squirrel paper craft with acorn and leaf accents, gather the following supplies:
- Brown cardstock (for body and tail)
- Light brown/tan cardstock (for face and belly)
- Black cardstock or black marker (for eyes and nose)
- Colored cardstock for leaves (red, orange, yellow)
- Glue stick or liquid craft glue
- Scissors (child-safe for kids)
- Pencil
- Printable squirrel template (included below)
- Optional: Googly eyes, glitter glue, or patterned paper for extra flair
Tip: Organize all materials before starting so kids can follow along without delays. Pre-cutting pieces for younger children can also help simplify the process.
Step-by-Step Instructions
Step 1: Prepare Your Materials
Print out the squirrel template on sturdy paper. Lay out your cardstock and tools on a flat, clean surface. Choose the colors you want for your squirrel and leaves. You may also want to protect your workspace with newspaper or craft paper.
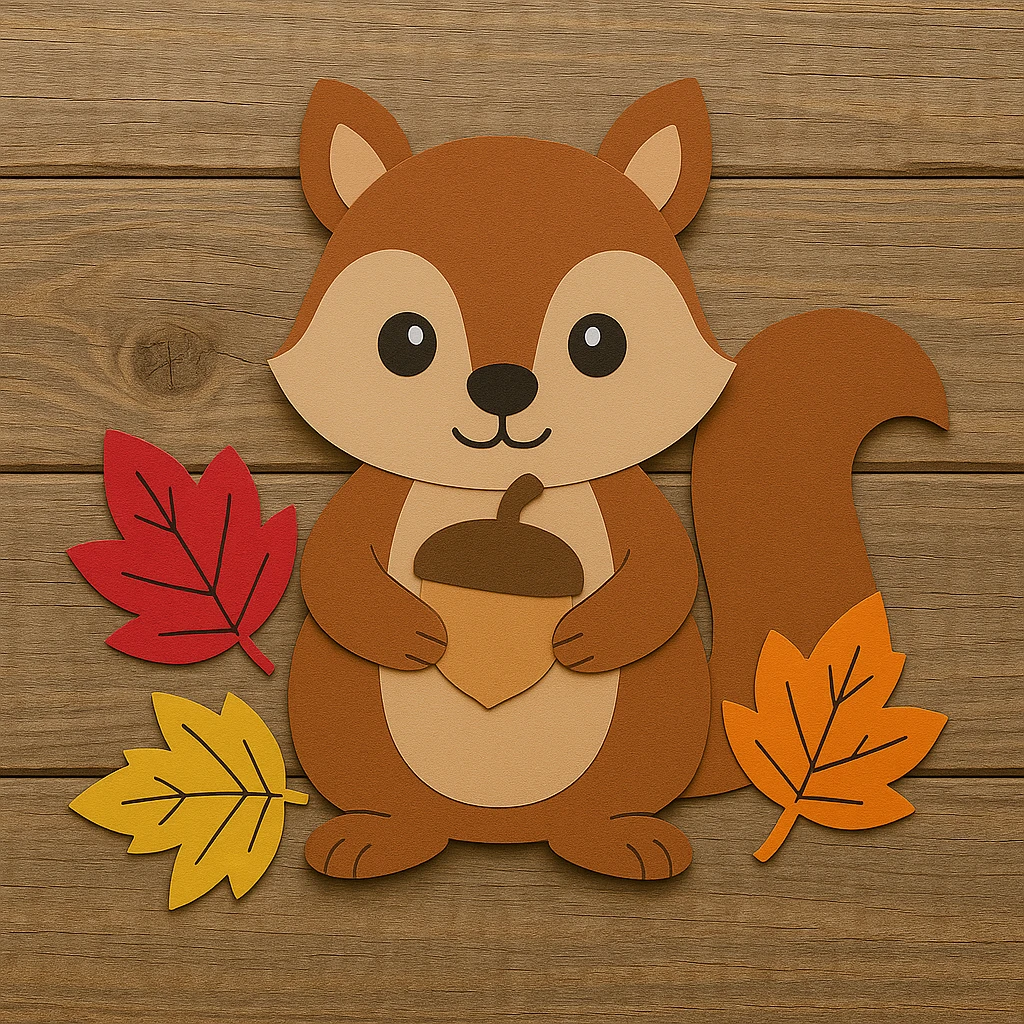
Step 2: Cut Out the Squirrel Body Parts
Using the printed template as your guide, trace and cut out each shape: head, body, tail, belly, inner ear patches, arms, and facial features. Be sure to cut carefully to maintain smooth lines, especially around the tail’s curve.
Step 3: Assemble the Squirrel Base
Begin by gluing the belly piece onto the center of the body cutout. Then, glue the head onto the top of the body so it slightly overlaps. Next, attach the tail to one side of the body, angling it slightly outward for a natural look.
Step 4: Add the Facial Features
Glue the inner ear pieces onto the larger ear shapes. Then, attach the eyes and nose to the face. If you're using googly eyes, apply them last to avoid smudging. Draw on a small mouth with a marker or use the template mouth piece.
Step 5: Attach the Tail and Acorn
Glue the tail firmly in place if it isn’t already. Now assemble the acorn: attach the acorn top to the nut base, then glue it into the squirrel’s arms so it looks like it’s holding it snugly.
Step 6: Decorate with Autumn Leaves
Cut out leaf shapes using red, orange, and yellow cardstock. Add simple vein lines with a black pen for detail. Glue the leaves around the squirrel or place a few near its feet to give the whole piece a forest floor effect.
Step 7: Optional: Add Extra Details or Personal Touches
Kids can personalize their squirrels with names, glitter on the leaves, or even a bow on the tail. Feel free to mount the finished piece onto a larger background to turn it into a fall-themed poster.
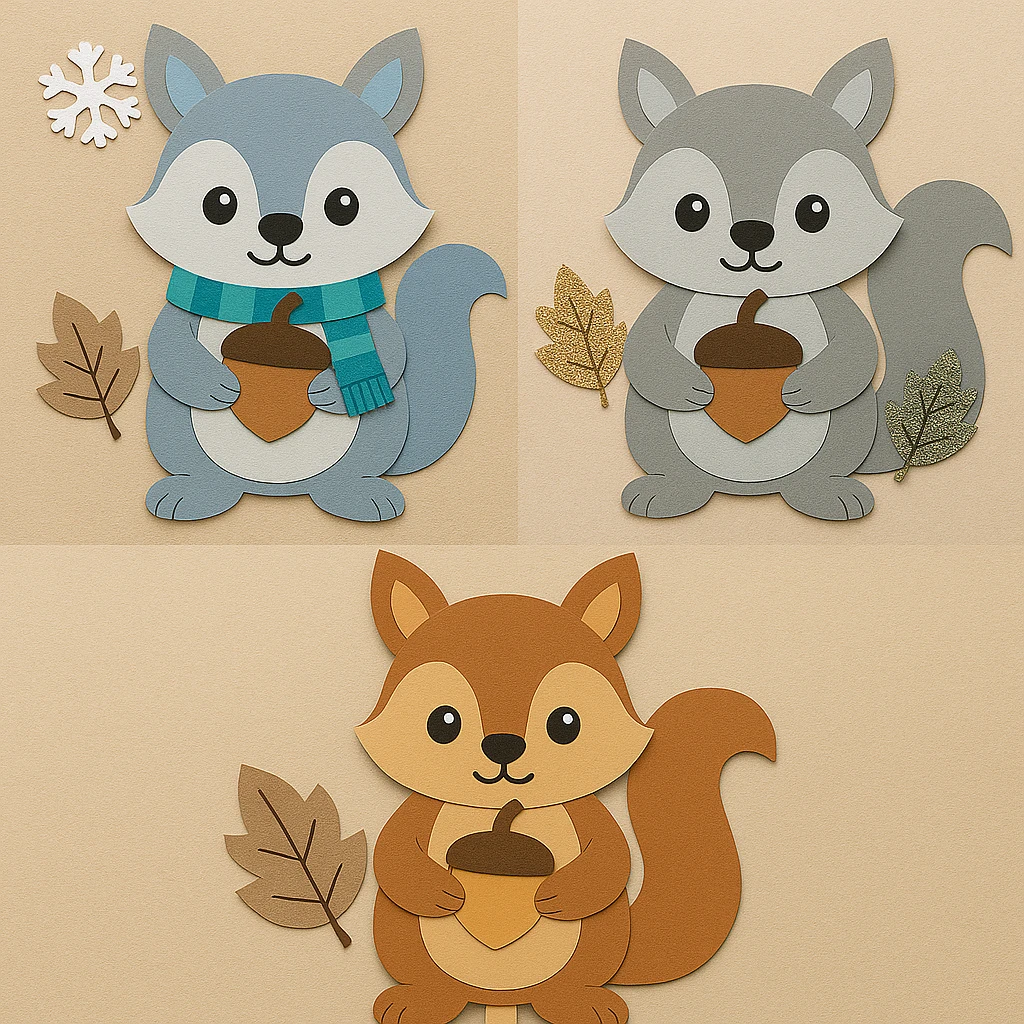
Customization Ideas
1. Woodland Color Theme:
Swap out the classic brown tones for a mix of grays and creams for a soft woodland aesthetic. Use muted shades for the leaves to complement this style.
2. Holiday/Winter-Themed Squirrel:
Transform the squirrel into a winter version by adding a tiny paper scarf, using cool-tone blues and whites, and replacing autumn leaves with snowflakes.
3. Interactive Puppet Version:
Glue your squirrel to a jumbo craft stick to turn it into a puppet. You can also make movable arms using brass fasteners for added fun.
Educational and Seasonal Uses
This squirrel craft is ideal for fall units in preschool or early elementary settings. It ties in well with lessons about woodland animals, hibernation, or seasonal changes. The hands-on nature of the craft supports fine motor skills and following instructions.
For seasonal use, it can be a part of autumn classroom bulletin boards, Thanksgiving decor, or storytime themes. Kids will love seeing their creations displayed with others, making it perfect for group activities.
Printable Template
A printable template is included to help guide your crafting session. Simply print it on cardstock or plain paper and use it as a cutting guide. The shapes are easy for kids to trace and cut, and they can color them in before assembling.
You can also print the template on white paper and let children color each section before gluing them together. This adds a coloring activity to the process and lets each child make their squirrel truly unique.

Conclusion
This squirrel paper craft with acorn and leaf accents is a charming project perfect for the fall season. It's simple enough for young children but can be customized for older kids to enjoy too. With a mix of creativity, motor skills, and fun, this craft is a wonderful way to spend time together during autumn afternoons.
Be sure to save your templates and revisit the project for classroom lessons, seasonal parties, or just to enjoy a cozy craft day with your little ones!
Squirrel Paper Craft with Acorn and Leaf Accents
Equipment
- Scissors
- Glue stick
- Printable template
- Colored cardstock
Materials
- Brown cardstock for body and tail
- Light brown/tan cardstock for face and belly
- Black cardstock or marker for eyes and nose
- Colored cardstock for autumn leaves (red, yellow, orange)
- Glue stick or craft glue
- Pencil for tracing templates
- Optional decorations googly eyes, glitter glue, or patterned paper
Instructions
- Print out the squirrel template and lay out your materials on a clean surface.
- Trace and cut out the squirrel body parts using the cardstock and template.
- Glue the belly onto the body, then attach the head and tail to the body base.
- Add facial features using either cutouts or markers. Glue on the ears, eyes, and nose.
- Assemble and attach the acorn to the squirrel's hands using glue.
- Decorate with red, orange, and yellow leaves around the squirrel.
- Customize your squirrel with glitter, a name tag, or mount it on a background paper.