
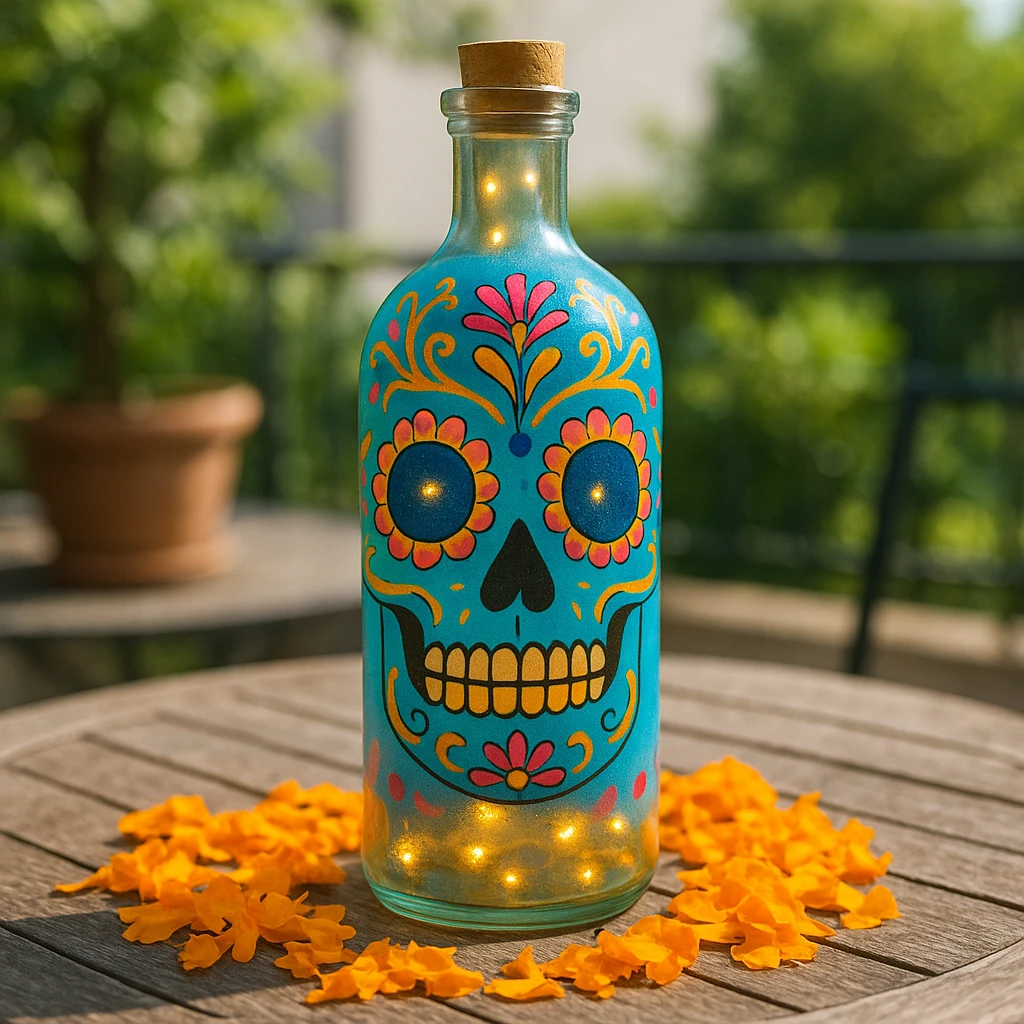
Celebrate the vibrant spirit of Día de los Muertos with a glowing glass bottle lamp that brings tradition to life in a modern, colorful way. This handmade project combines cultural symbolism with practical creativity, turning a simple glass bottle into a radiant sugar skull lantern. Whether you're crafting for a family altar, seasonal home decor, or a festive centerpiece, this Day of the Dead bottle lamp adds a warm and meaningful touch to your celebration.

This craft is ideal for all skill levels, especially those who enjoy painting and working with recycled materials. Not only does it reuse everyday objects like glass bottles, but it also offers a beautiful opportunity to explore color, detail, and cultural appreciation through the iconic sugar skull design. Plus, the added fairy lights give it a magical glow that's perfect for altars and evening ambiance.
Materials Needed
- 1 empty glass bottle (clear, label removed)
- Acrylic paints: black, blue, pink, yellow, orange, white
- Fine-tipped paintbrushes
- LED fairy lights (battery-operated)
- 1 cork or bottle stopper
- Rubbing alcohol and cotton pads
- Optional: Clear sealant spray for protection

Step 1: Clean and Prepare the Bottle
Start by thoroughly washing your glass bottle to remove any labels or adhesive residue. Once clean, dry it completely. Then, wipe the surface with rubbing alcohol using a cotton pad—this step ensures the paint adheres properly by removing any oils or lingering residue.
Step 2: Sketch the Skull Design
Before applying any paint, lightly sketch your sugar skull design onto the bottle using a washable marker or grease pencil. You can use a reference image or printed stencil to help guide the placement of the eyes, nose, teeth, and floral motifs. Keep the design centered and symmetrical for a traditional look.
Step 3: Paint the Skull Details
Begin by outlining the key features in black—like the eyes, nose, mouth, and decorative swirls. Let the base dry before filling in with vibrant colors like blue, pink, orange, and yellow. Use fine-tipped brushes for intricate details like flower petals and dots. Allow each color layer to dry before adding another to avoid smudging.
Helpful Tip: Rotate the bottle slowly as you work to maintain symmetry and avoid touching wet paint. If needed, rest the bottle on a folded towel to keep it stable.
Step 4: Add the Fairy Lights Inside
Once your paint is completely dry, insert a string of LED fairy lights into the bottle. Push the lights down carefully so that they spread evenly. The warm white lights will illuminate the design from within. Place the battery pack at the mouth of the bottle and cover it with a cork or stopper for a clean finish.
Step 5: Seal and Finish the Bottle
(Optional but recommended) Lightly spray the painted bottle with a clear acrylic sealant to protect your design from scratches and fading. Let it dry in a well-ventilated area. Your bottle lamp is now ready to display and enjoy.
Customization Ideas
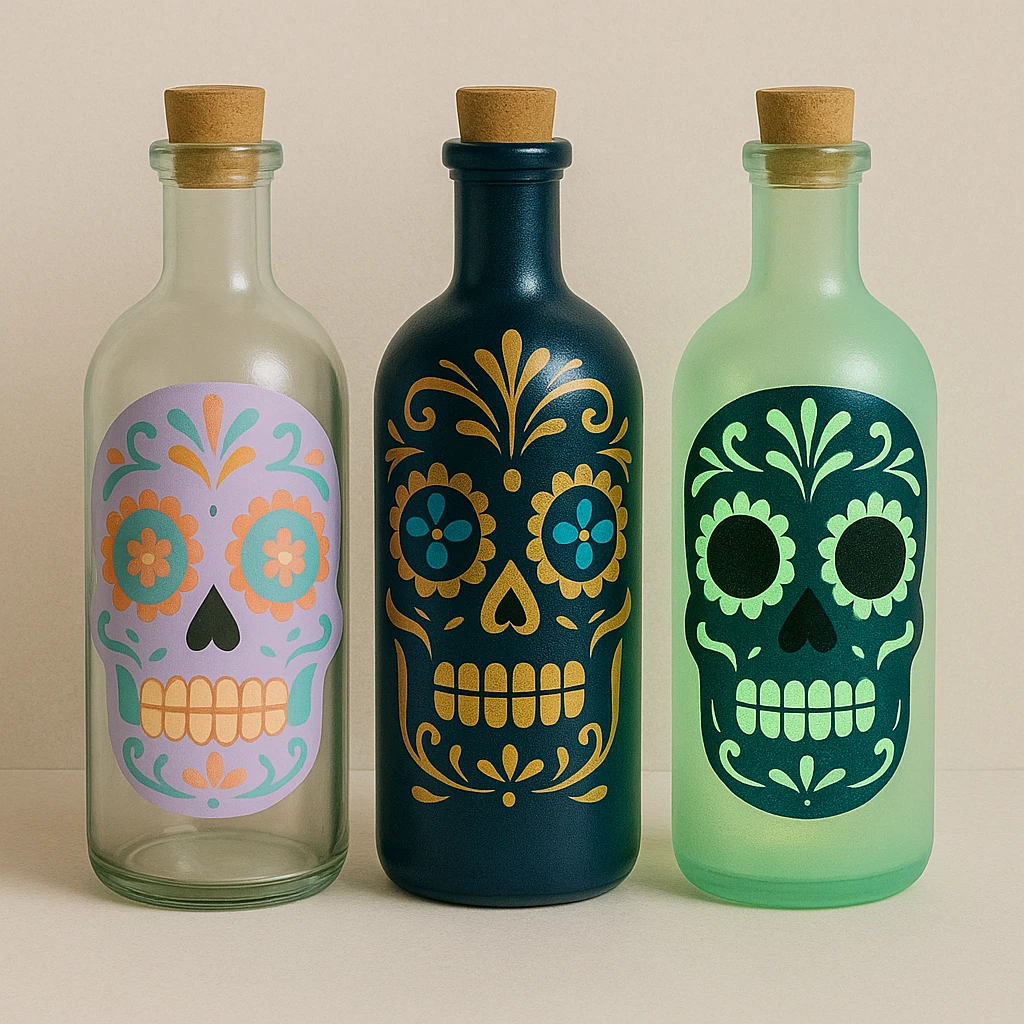
Pastel Sugar Skull Style: Use softer tones like lavender, mint green, and peach for a gentler, more romantic version of the skull design. Perfect for spring or as a decorative keepsake.
Metallic Accents: Swap traditional colors for gold, bronze, or silver acrylic paints to give the lamp a luxurious, glowing edge. Metallics also pair beautifully with deep blue or black backgrounds.
Glow-in-the-Dark Skull: Try glow-in-the-dark paint for select design elements like the eyes and floral borders. It adds an eerie, magical touch once the lights are off—ideal for nighttime altars.
Educational or Seasonal Uses
This DIY craft is a wonderful hands-on way to teach children about the cultural significance of Día de los Muertos. It encourages discussion about Mexican traditions, the meaning behind the sugar skull, and the importance of honoring loved ones. It’s also great for classrooms, after-school programs, or family crafting nights leading up to the holiday.
Beyond seasonal decor, this project nurtures artistic skills such as pattern making, brush control, and color coordination. It also introduces recycling practices and inspires creativity through personalization.
Printable Template
To help make this project even more accessible, we've included a printable sugar skull outline that you can use as a painting guide or stencil. Simply print, cut, and trace it onto your bottle, or let kids color it in and glue it to a paper lantern for their own version of the craft.
The template is also perfect for beginners who prefer guided painting. Just print it out, tape it inside the bottle to trace from the outside, or use it as a coloring page for non-glass versions of the lamp.

Conclusion
Creating your own Day of the Dead glass bottle lamp is more than just a craft—it's a meaningful tribute to a cherished tradition. With just a few materials and your own artistic flair, you can create a glowing piece of decor that honors the past while lighting up the present.
Whether placed on an ofrenda or as a glowing table centerpiece, this painted skull bottle lamp brings warmth, culture, and creativity together in one beautiful DIY.
DIY Day of the Dead Glass Bottle Lamp with Painted Skull Design
Equipment
- Glass bottle
- Fine-tipped paintbrushes
- LED fairy lights
- Cork or bottle stopper
- Cotton pads
Materials
- 1 Clear glass bottle
- Acrylic paints (black, blue, pink, yellow, orange, white)
- Rubbing alcohol for cleaning the bottle surface
- Clear sealant spray optional
Instructions
- 1. Clean the glass bottle thoroughly, removing any labels. Use rubbing alcohol on a cotton pad to wipe down the surface and let dry completely.
- 2. Lightly sketch your sugar skull design using a washable marker. Use a printed template for guidance if needed.
- 3. Paint the outlines with black acrylic, then fill in vibrant colors like pink, blue, and yellow. Let each layer dry before adding the next.
- 4. Insert a string of LED fairy lights into the bottle. Spread them evenly inside and secure the battery pack with a cork or stopper.
- 5. Optionally spray the bottle with clear sealant to protect your artwork. Let dry and display your finished bottle lamp proudly.