
Celebrate color, culture, and creativity with this beautiful Floral Skull Vase craft. Inspired by the iconic sugar skulls associated with Día de los Muertos, this DIY combines festive skull imagery with vibrant paper flowers to create a cheerful decoration that works just as well on a seasonal altar as it does on a sunny picnic table. Whether you're crafting for a classroom celebration or simply adding charm to your home decor, this project is bursting with personality.

This craft is simple enough for older kids to do with minimal supervision and makes a fun weekend art project. It’s also a wonderful way to talk about traditions, introduce some floral crafting techniques, and explore color theory with little ones. Once complete, this skull vase becomes a centerpiece that draws smiles and starts conversations.
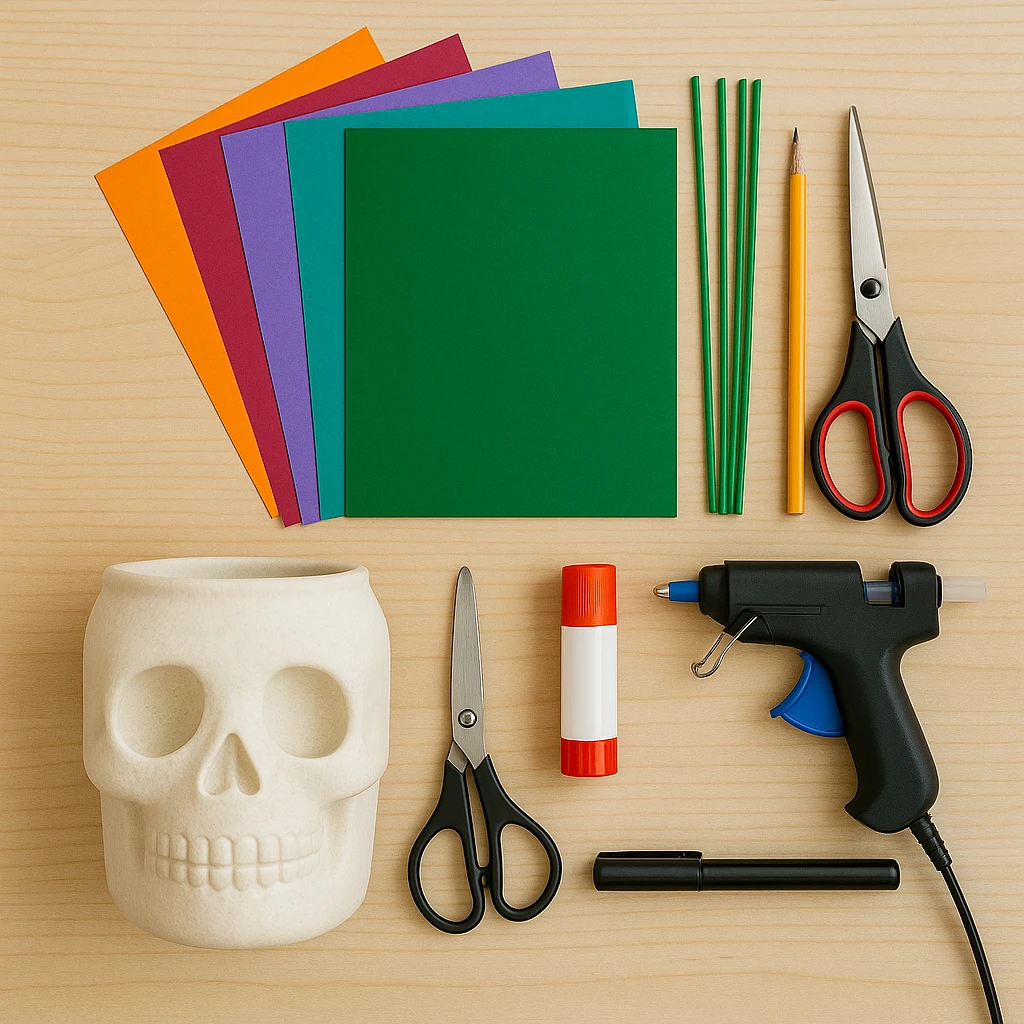
Materials Needed
- 1 skull-shaped vase, white jar, or mason jar (can be painted white if needed)
- Colored construction paper or cardstock (variety of bright colors)
- Green paper for leaves
- Scissors
- Craft glue or hot glue gun
- Pencil
- Black marker or black paper (for eyes, nose, and mouth)
- Floral wire, straws, or skewers (for flower stems)
Step 1: Prepare the Skull Vase Base
If your jar isn’t already white, start by painting it a light color and letting it dry fully. This will help the face details and flowers stand out. Clean the surface so the decorations stick better.
Step 2: Design and Cut Out the Skull Face Elements
Using a pencil, sketch out two large black circles for eyes, a triangle for the nose, and simple teeth shapes for the mouth. You can use black paper or color in white paper with a marker. Cut out each element carefully.
Step 3: Assemble and Attach the Skull Face
Glue the eye shapes where they would naturally go on a face. Add colorful flower shapes around the eyes to give that classic sugar skull look. Position the nose just below and center, and glue the mouth shape underneath. You can curve the teeth slightly to match the jar’s shape.
Step 4: Create Colorful Paper Flowers
Draw several flower shapes in different sizes on your colored paper. Cut them out and layer two to three shapes to make dimensional flowers. Curl the petals slightly using a pencil for a lifelike effect. Glue the layers together and add a small center circle.
Step 5: Make and Attach Leaves
Cut out leaf shapes from green paper. You can add veins with a pencil or a light-colored marker for detail. Glue the leaves to the back of each flower or to the stems.
Step 6: Insert the Paper Flowers into the Vase
Glue each flower to a straw, floral wire, or skewer to make a stem. Once all flowers are ready, arrange them in the skull vase like a bouquet. Bend or trim stems to create different heights and volume.
Step 7: Optional: Decorate the Vase with Extra Floral Details
Add small paper flowers or details directly onto the vase for extra flair. Try mixing in a few glittery accents or sequins if you want sparkle. These little touches make the piece feel even more festive.
Customization Ideas
Bright Festival Skull with Metallic Details
Use gold or silver paper for flower centers or face elements. Add metallic washi tape or sequins around the eyes to make it shimmer in the sunlight.
Pastel Flower Skull for Spring
Choose soft pastel tones like baby blue, blush, and mint. Add tiny butterflies or bees to turn it into a spring-themed vase.
Monochrome Goth-Inspired Floral Skull
Use all-black flowers with deep purple or blood red accents. A black-painted jar can give it a dramatic look for Halloween or gothic decor fans.

Educational or Seasonal Uses
This craft is perfect for Día de los Muertos activities, allowing students to learn about the holiday's symbols and meanings. It can also be adapted for spring floral studies or as a project in color theory and shape recognition. Teachers can integrate it into lessons on cultural appreciation or creative storytelling.
Printable Template Section
To make this project even easier, we’ve included a printable template featuring flower shapes, skull face parts, and leaves. Simply print, color, and cut — then glue to your jar and stems to assemble.
This printable is great for kids’ art stations or classrooms where time is limited. Children can personalize their creations by coloring each flower and skull face before building their own bouquet.

Conclusion
This Floral Skull Vase with Bright Paper Blossoms is the perfect mix of fun and tradition. It’s a cheerful, creative activity that brings families or classrooms together while producing a keepsake-worthy piece of art. With endless ways to customize, it’s a project you can return to year after year, each time with a new twist of color and imagination.

Floral Skull Vase with Bright Paper Blossoms
Equipment
- Scissors
- Glue or hot glue gun
- Pencil
Materials
- 1 White jar or skull-shaped vase
- Colored construction paper or cardstock assorted bright colors
- Green paper for leaves
- Black marker or black paper for facial features
- Floral wire, straws, or skewers for flower stems
Instructions
- Paint the jar white if it's not already. Let dry completely before starting.
- Sketch and cut out black facial features: two large eyes, one triangle nose, and a toothy smile.
- Glue the facial features onto the jar. Decorate around the eyes with small paper flowers for a festive look.
- Draw and cut various sizes of flower shapes in multiple colors. Layer them and curl the petals for dimension. Glue them together with a center circle.
- Cut leaf shapes from green paper. Add details if desired and glue to the flower backs or stems.
- Glue flowers to straws or skewers to create stems. Arrange them inside the vase at varying heights.
- Optionally, add more mini flowers, sequins, or glitter to the vase for extra detail and shine.