
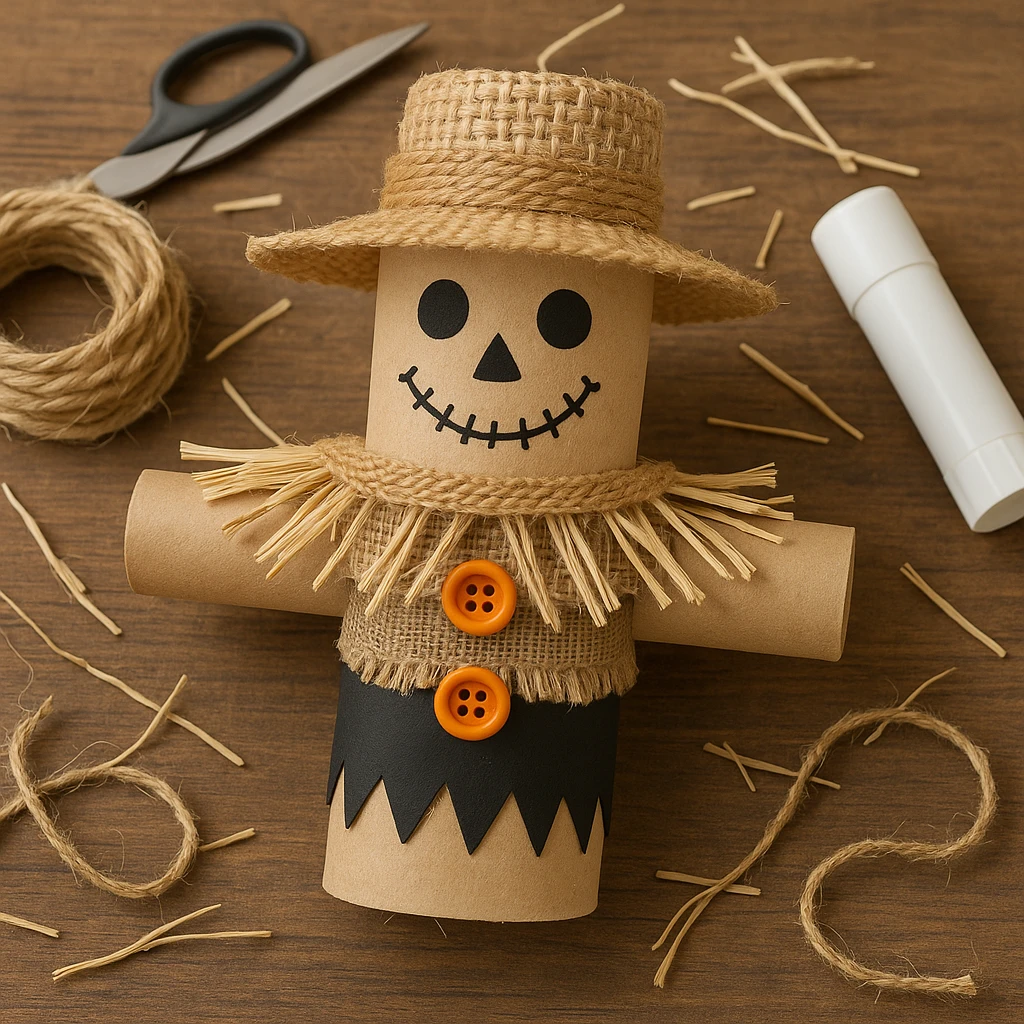
There’s something irresistibly charming about scarecrows when fall rolls around. From cozy harvest displays to spooky Halloween setups, they bring warmth and whimsy to seasonal décor. This Toilet Paper Roll Scarecrow with Straw Hat is not only adorable but also budget-friendly and incredibly easy to make. It uses simple craft supplies and is a fantastic activity for kids, classrooms, or a quiet afternoon at home.

This DIY craft turns an empty toilet paper roll into a cheerful little scarecrow with character. With a burlap "shirt," raffia straw sticking out at the edges, and a miniature straw hat, this scarecrow is ready to steal the spotlight on your autumn display table. The best part? It’s completely customizable with the materials you have on hand.
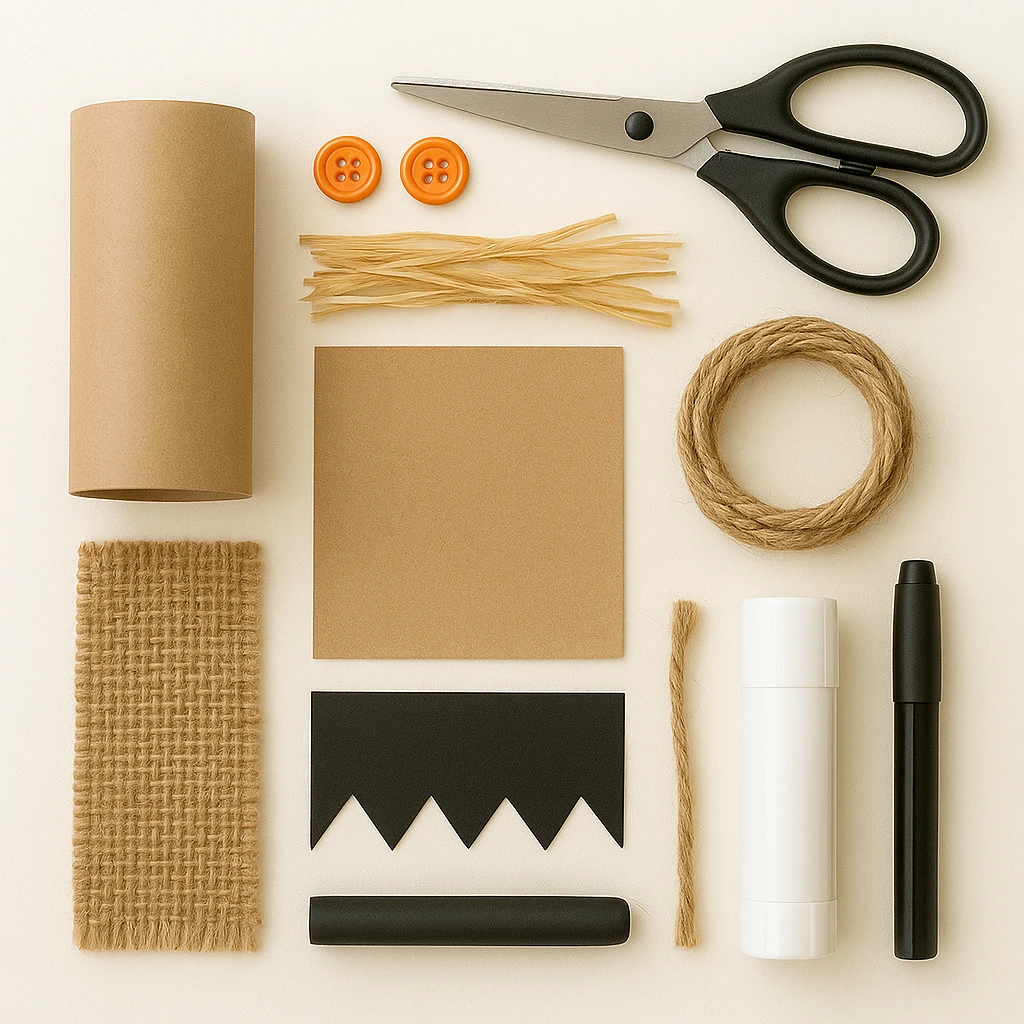
Materials Needed
To create your toilet paper roll scarecrow, gather the following materials:
- 1 empty toilet paper roll
- Brown kraft paper or brown construction paper (approx. 5" x 6")
- Black cardstock or construction paper (approx. 1.5" x 6")
- Small piece of burlap (about 2" x 6")
- Raffia or artificial straw
- 2 orange buttons (approx. ½" diameter)
- Twine or jute rope
- Glue stick or craft glue
- Scissors
- Black marker or pre-cut scarecrow face stickers
- Optional: Hot glue gun (for stronger adhesion)
Step-by-Step Instructions
Step 1: Wrap the Toilet Paper Roll
Start by cutting a piece of brown kraft paper to fit the toilet paper roll. Wrap it snugly around the roll and secure the ends with glue. This forms the body of your scarecrow.
Step 2: Create the Arms
Cut a small cardboard tube (or split another toilet paper roll in half lengthwise). Glue it horizontally across the back of the main roll to form the scarecrow’s arms. Make sure it's well balanced so it doesn't tip over.
Step 3: Design the Face
Using either black markers or precut stickers, draw on two eyes, a triangle nose, and a stitched smile to bring your scarecrow to life. Keep the expression fun and friendly.
Step 4: Add the Shirt and Buttons
Wrap a small piece of burlap around the lower half of the roll and secure it with glue. Glue two orange buttons onto the burlap to look like shirt buttons. This adds texture and color.
Step 5: Glue on the Straw Details
Take a handful of raffia or cut straw and glue it around the neckline and the edges of the arms. This mimics the look of straw stuffing peeking out of the scarecrow’s clothes.
Step 6: Make and Attach the Hat
To create the hat, you can use woven straw or a piece of coiled jute rope shaped into a brim and crown. Glue it securely onto the top of the roll. Add a bit of twine around the base of the hat for extra detail.
Step 7: Add Final Touches
Tie a small piece of twine around the scarecrow's neck like a scarf. Adjust the arms and straw until everything looks balanced and well-positioned. Let everything dry completely before moving or displaying.
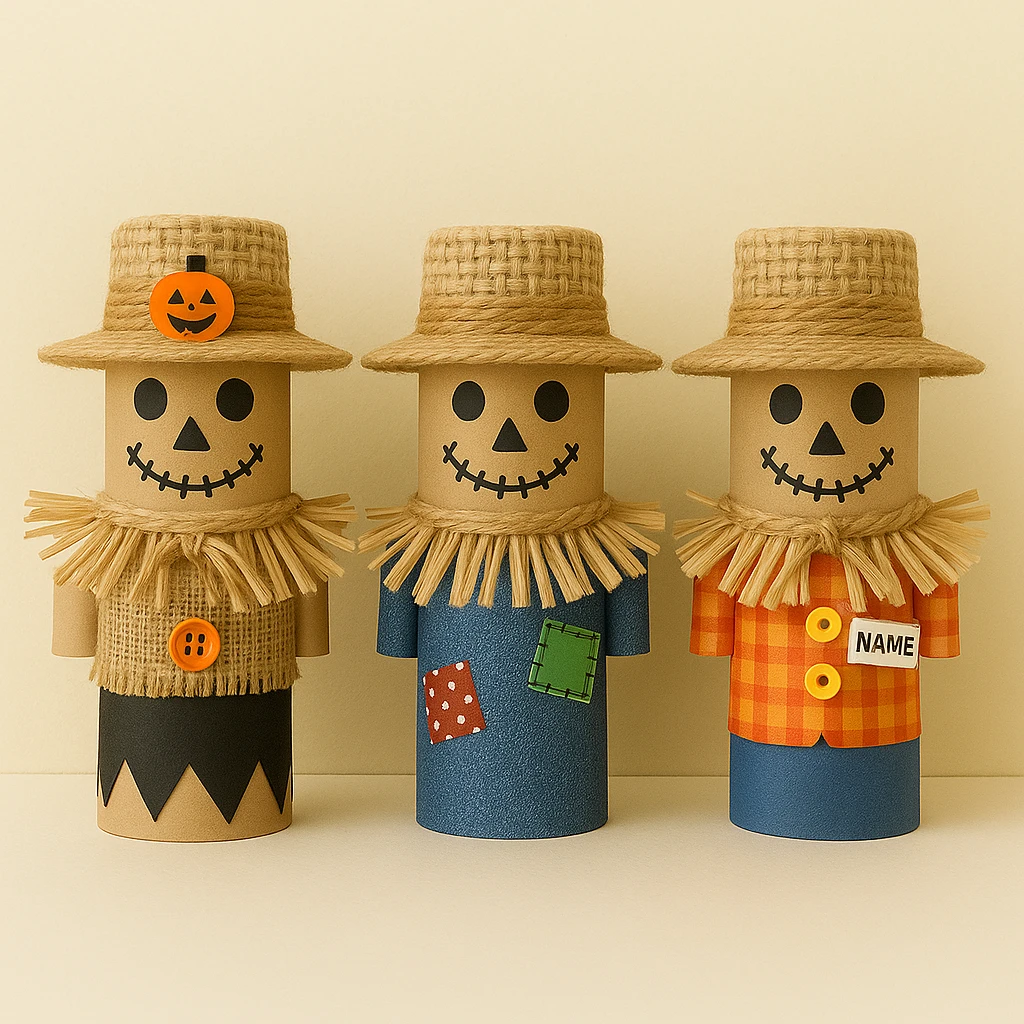
Customization Ideas
Style 1: Halloween Scarecrow
Paint the kraft paper black or purple and add tiny bats or pumpkin stickers for a spooky effect. Swap the orange buttons for glow-in-the-dark ones and give the scarecrow a stitched mouth with a white gel pen.
Style 2: Farmyard Friend
Use a denim-like blue paper for the body and glue on mini fabric patches to mimic a patchwork shirt. Add a tiny fabric bandana or pocket for a rustic look.
Style 3: Classroom Buddy
Attach a name tag or a small backpack made from paper to turn the scarecrow into a school-themed character. Great for back-to-school bulletin boards.
Educational & Seasonal Uses
This scarecrow craft fits beautifully into fall-themed educational activities. In classrooms, it can accompany lessons on farming, harvest season, or autumn traditions. It also works wonderfully as a Thanksgiving craft where kids can write something they’re thankful for on the back.
Use it as part of a seasonal centerpiece, place setting marker, or DIY puppet for a fall storytime session. It brings hands-on creativity and seasonal cheer into any environment.
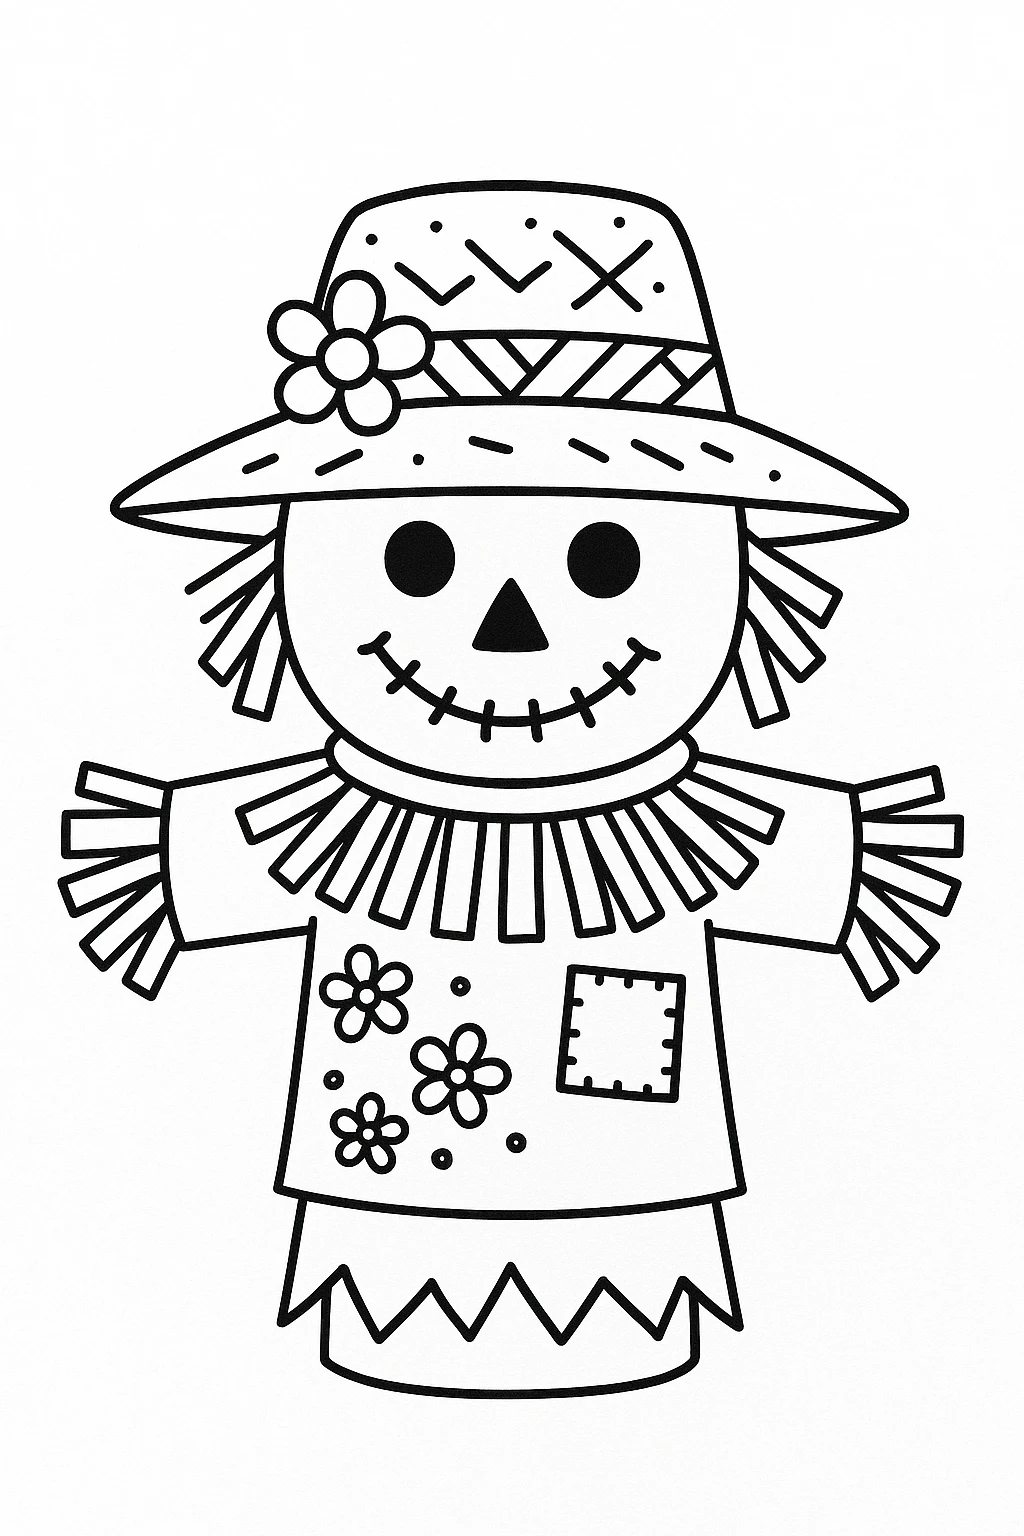
Printable Template
To make this craft even easier, a printable template is available. It includes patterns for the scarecrow's face, shirt trim, and hat pieces. Simply print, color, cut out, and glue onto your toilet paper roll to jumpstart your project.
This option is perfect for younger children or group activities where prep time needs to be minimized. The template also encourages creativity, allowing kids to decorate their scarecrows with their own unique flair.
Conclusion
Crafting a Toilet Paper Roll Scarecrow with a Straw Hat is a delightful way to welcome fall. It's simple, customizable, and filled with personality—perfect for kids and adults alike. Whether you’re decorating your home, teaching a fall unit, or just spending quality time crafting, this project will bring joy and creativity to your autumn season. Give it a try and see your little scarecrow come to life!
Toilet Paper Roll Scarecrow with Straw Hat
Equipment
- Scissors
- Glue stick or craft glue
- Optional: Hot glue gun
Materials
Main Materials
- 1 Empty toilet paper roll
- 1 sheet Brown kraft paper or brown construction paper (5" x 6")
- 1 strip Black cardstock or construction paper (1.5" x 6")
- 1 piece Burlap (2" x 6")
- 1 small bunch Raffia or artificial straw
- 2 Orange buttons (½" diameter)
- 1 piece Twine or jute rope For scarf and hat detailing
- 1 Black marker or scarecrow face stickers
Instructions
- Wrap brown kraft paper around the toilet paper roll and glue it in place to form the scarecrow body.
- Cut a small cardboard tube or another roll and glue horizontally for the arms across the back of the main roll.
- Draw or glue on facial features such as eyes, a triangle nose, and a stitched smile using a black marker or stickers.
- Wrap a strip of burlap around the middle of the roll and glue orange buttons on it to resemble a shirt.
- Glue raffia or straw around the neckline and sleeve ends to mimic straw stuffing.
- Create a hat using coiled jute or straw, then glue it on top of the scarecrow's head.
- Tie a piece of twine around the neck as a scarf, adjust final details, and let it all dry completely before displaying.