
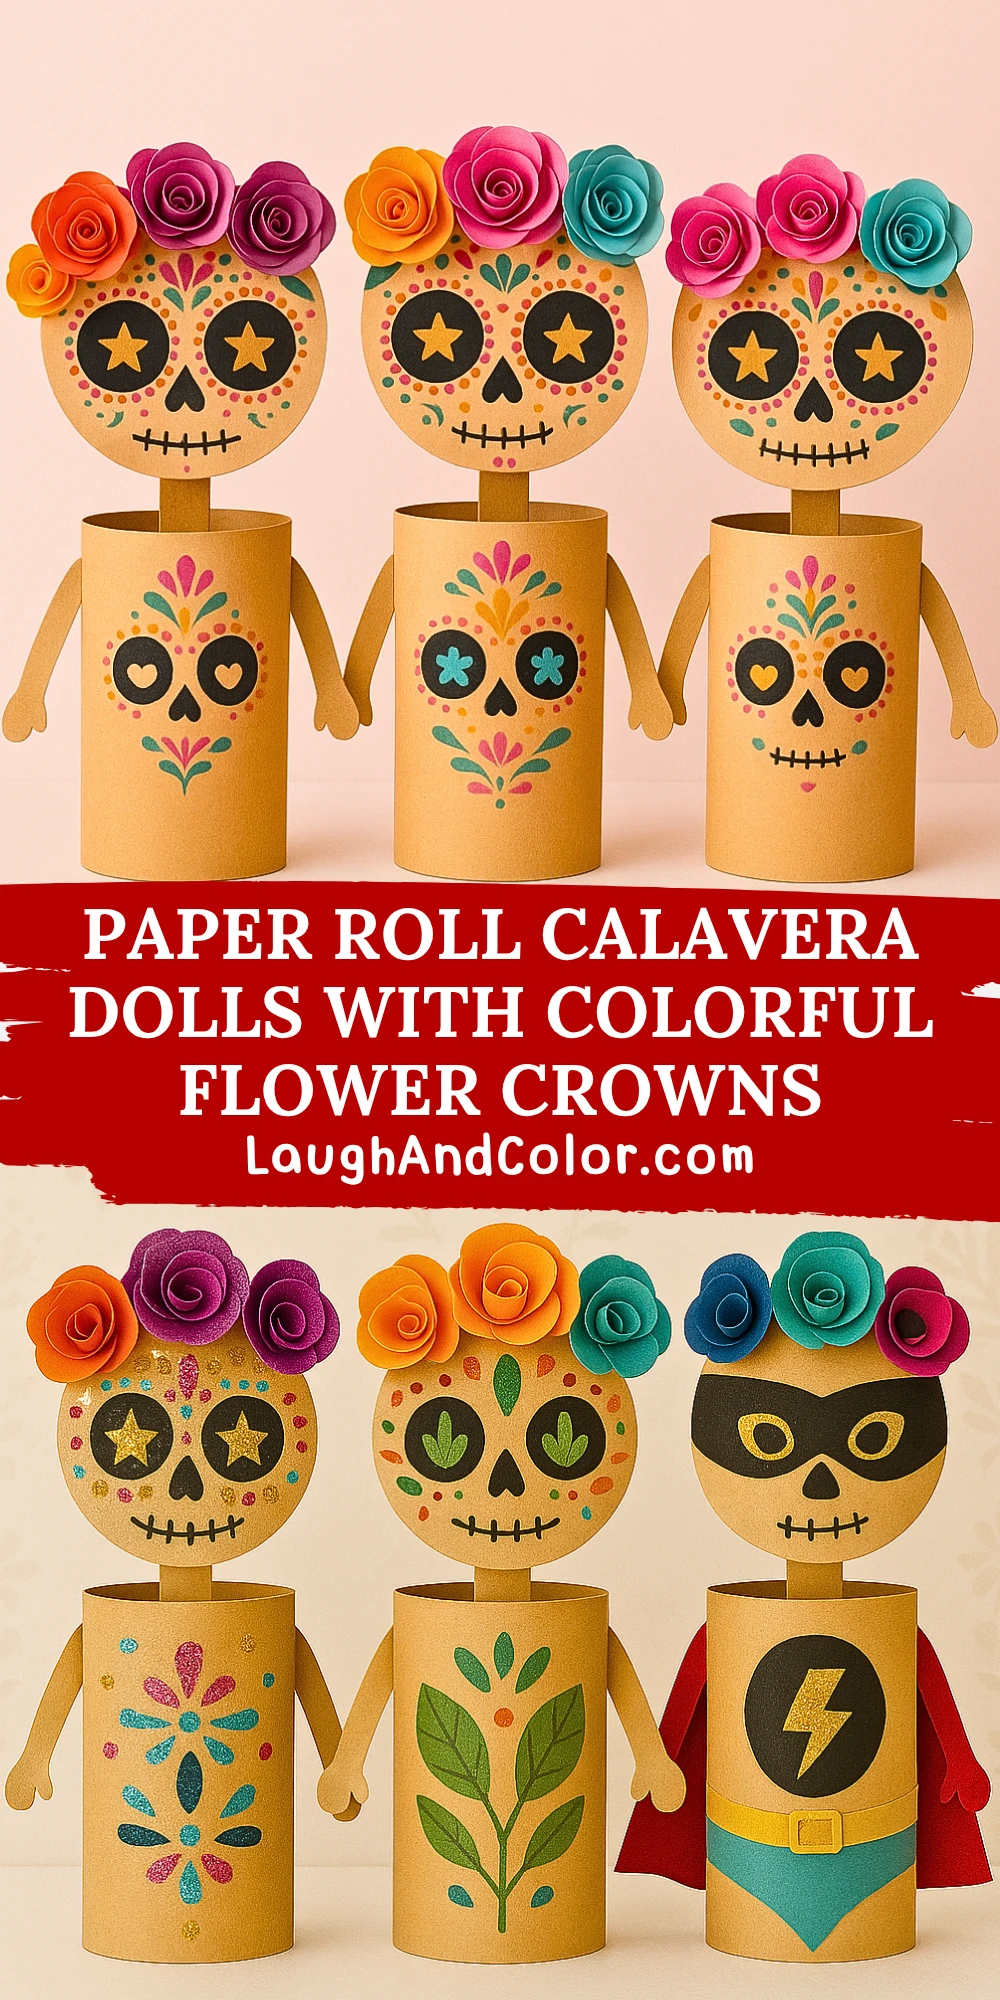
Celebrate the vibrant traditions of Día de los Muertos with a fun and colorful craft that brings Calavera imagery to life! These paper roll Calavera dolls are a fantastic way to introduce kids and adults alike to the joy, symbolism, and artistry behind Day of the Dead decorations. Using simple materials like cardboard tubes and construction paper, you can create charming skeleton figures adorned with bold designs and paper flower crowns.
Whether you are looking to decorate your classroom, add flair to your home altar, or simply engage in a meaningful art activity, this DIY project is accessible for all skill levels. With plenty of room for personalization, these dolls are both a delightful art project and a great teaching tool to explore cultural traditions in a creative way.
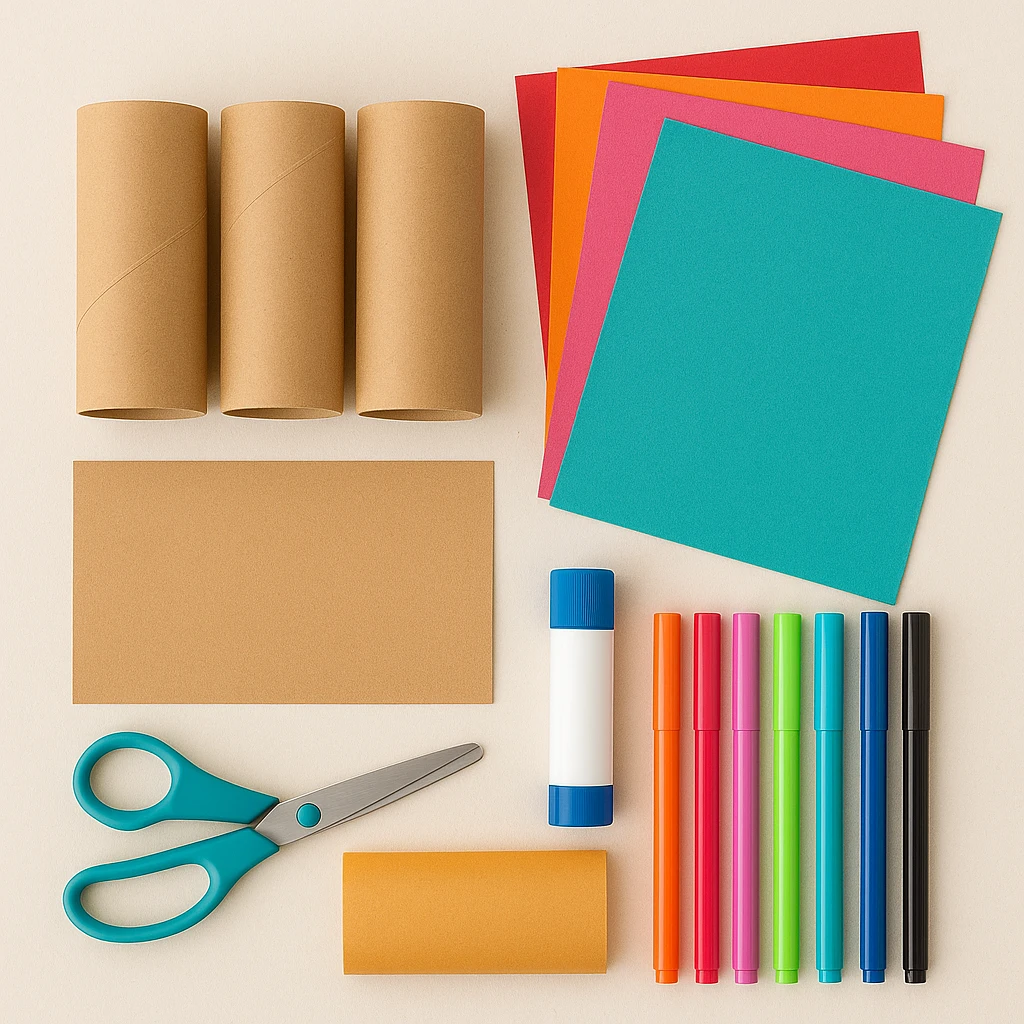
Materials Needed
- Empty toilet paper rolls or cardboard tubes (1 per doll)
- Tan or brown craft paper (to wrap the rolls)
- Colored construction paper (assorted colors for flower crowns)
- Markers or paint pens (black, teal, pink, orange, yellow, etc.)
- Scissors
- Glue stick or craft glue
- Optional: printed skull face template (or draw your own!)
Step 1: Prepare the Paper Roll Base
Start by wrapping your toilet paper roll in a piece of tan or brown craft paper. This gives your doll a neutral body tone and a smooth surface for decorating. Secure the paper with glue and trim any excess.
Step 2: Cut and Attach the Arms
Using the same or coordinating paper, cut out two small arms for your Calavera doll. These can be simple rounded stick shapes. Glue one on each side of the paper roll, positioning them slightly lower than the top edge so the arms sit naturally.
Step 3: Create the Skull Face
Draw a round skull shape onto white or tan cardstock—about 3 inches in diameter. Add facial features like round black eyes (or star-shaped ones), a triangle nose, and stitched mouth. You can get creative with hearts, dots, and swirls around the eyes to mimic traditional Calavera designs.
Step 4: Add Calavera Details
Now decorate the "body" of the roll with colorful patterns, hearts, dots, flowers, or symmetrical designs. Use paint pens or markers for bright, crisp results. This is a great time to let kids explore their creativity!
Step 5: Make Paper Flowers for the Crown
Choose 3–5 colors of construction paper to create your flower crown. Cut small spirals or strips, then roll and fold them into roses. Secure each flower with a dab of glue. Tip: Mix colors for a traditional and vibrant look!
Step 6: Attach the Head and Flowers
Glue the skull face onto the top back of the roll so it extends above the tube like a head. Then arrange and glue the flowers along the top of the skull to form a crown. Press and hold each flower until secure.
Step 7: Final Touches
Check your doll for any loose edges and add any final decorative details. You can even give each doll a name tag or add accessories like paper earrings or a small paper shawl.
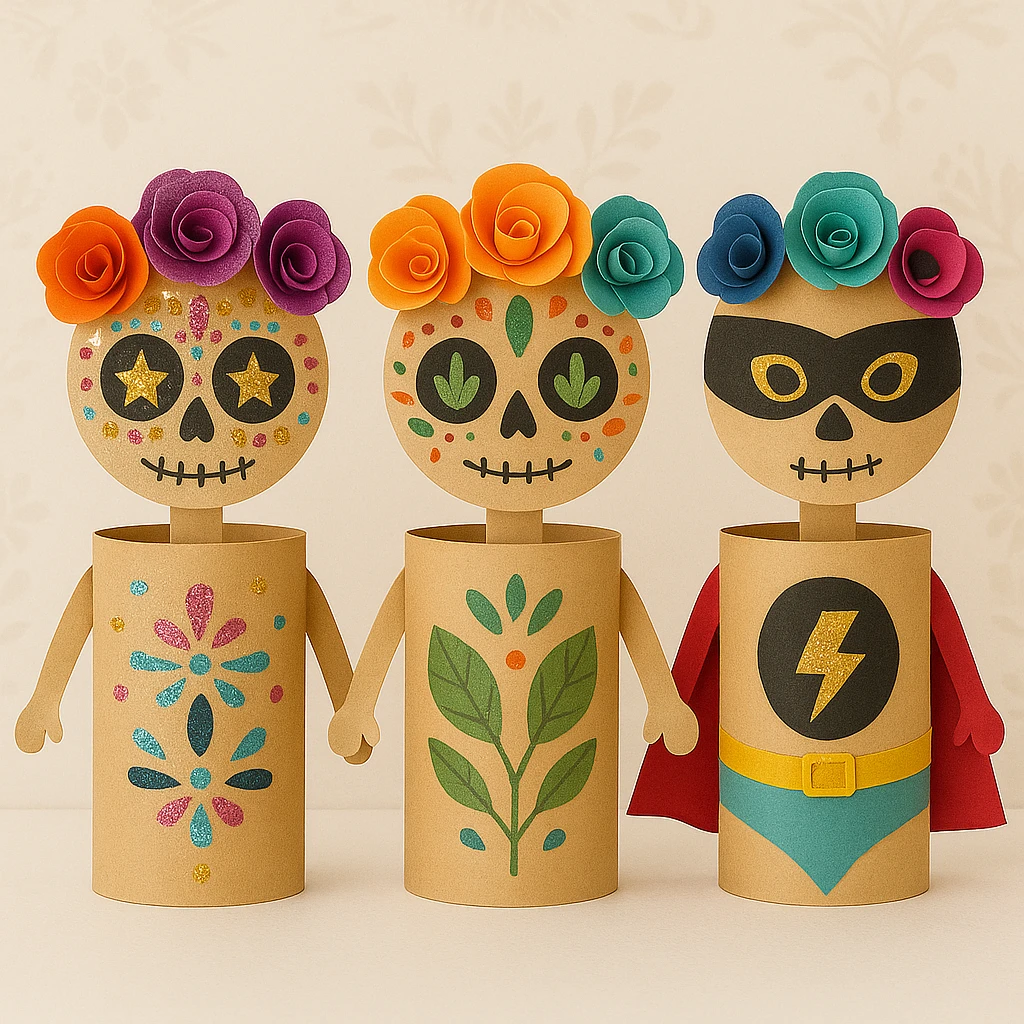
Customization Ideas
Style 1: Glittery Glam Calaveras
Add sparkle with glitter glue, metallic markers, or adhesive gems to give your Calavera dolls a glam finish. This style is perfect for older kids or party decor.
Style 2: Nature-Inspired Floral Skulls
Use flower patterns, earth tones, and green leaves made from paper to reflect natural themes. Ideal for a more subdued and elegant take on the craft.
Style 3: Kids’ Character Theme Calaveras
Customize each doll to look like a favorite cartoon or superhero character with themed color palettes and accessories. This is a fun twist that keeps kids especially engaged.
Educational & Seasonal Uses
These Calavera dolls are a great craft to pair with lessons on Mexican culture and the meaning of Día de los Muertos. In classrooms, they can support cultural awareness and artistic exploration. Around the home, they make excellent additions to seasonal displays, altars (ofrendas), or windowsills during the fall.
They also serve well in puppet shows or as storytelling props for classrooms and families who want to bring stories to life through art.
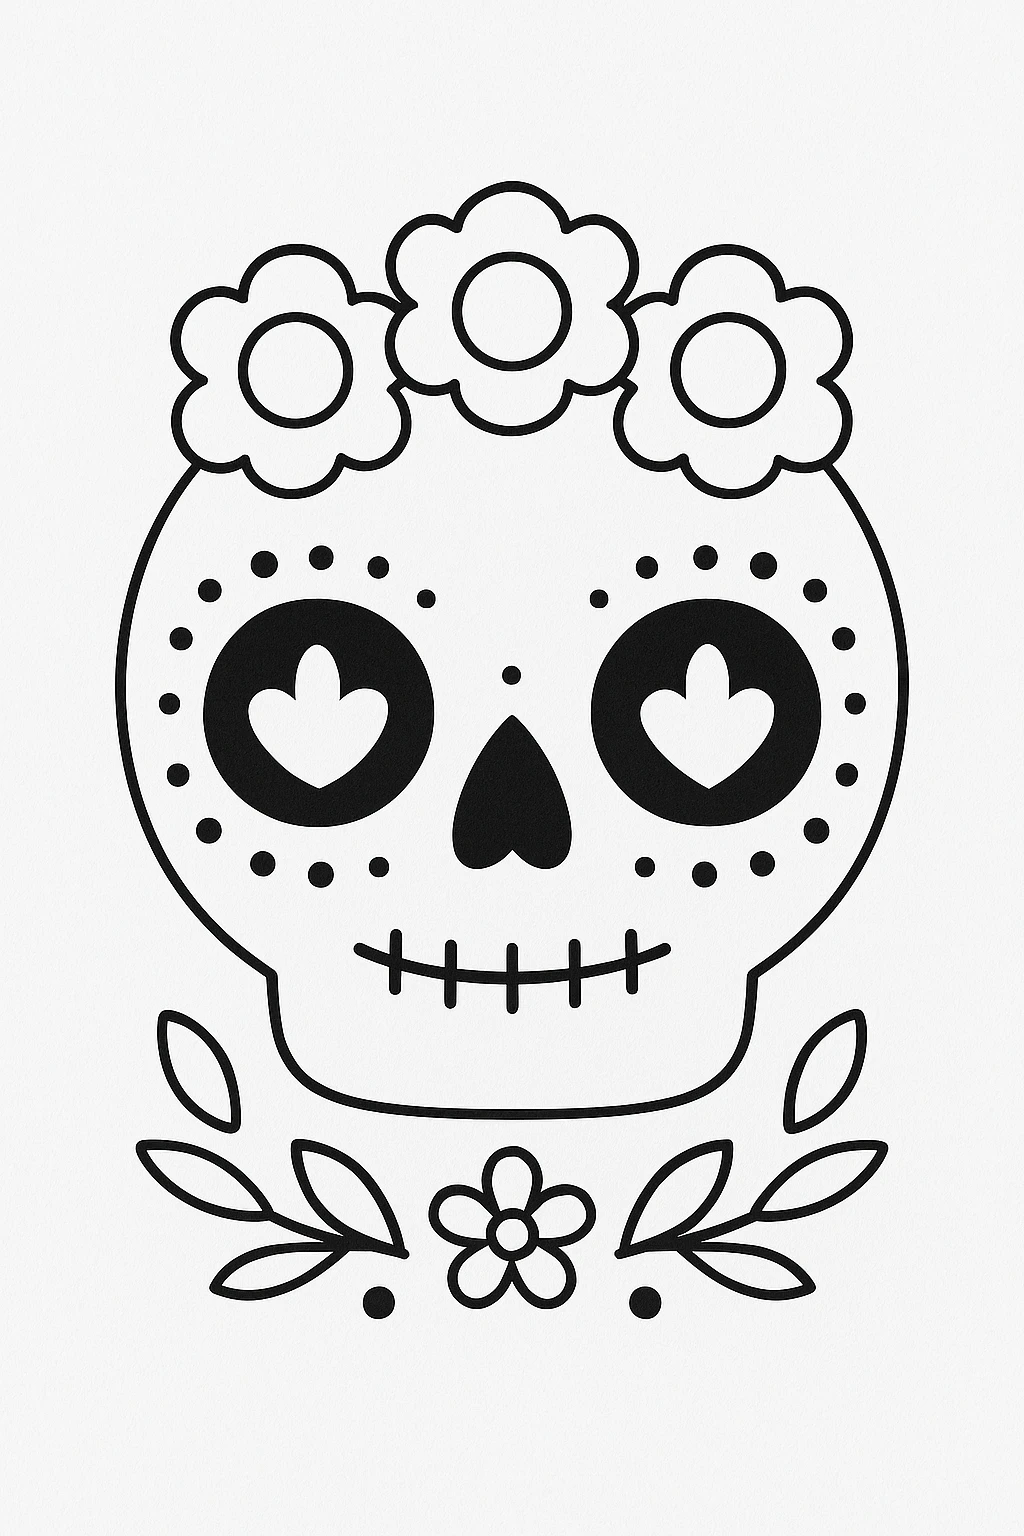
Printable Template
To make this craft even easier, we’ve created a printable template with a skull face outline and floral decorations. Simply print, color, cut, and assemble! This is a great option for younger children or quick prep in group settings.
You can print the skull on cardstock, color it with your favorite vibrant shades, then use the dotted lines to cut and glue it into place. The flower crown pieces are also included in the template for faster assembly.
Conclusion
Making Paper Roll Calavera Dolls is a heartwarming and colorful way to honor tradition while sparking creativity. Each doll tells its own story through its colors and patterns, and the process invites children and adults alike to participate in a meaningful celebration of life.
So grab your glue sticks and get ready to craft a piece of culture you can proudly display during Día de los Muertos and beyond!
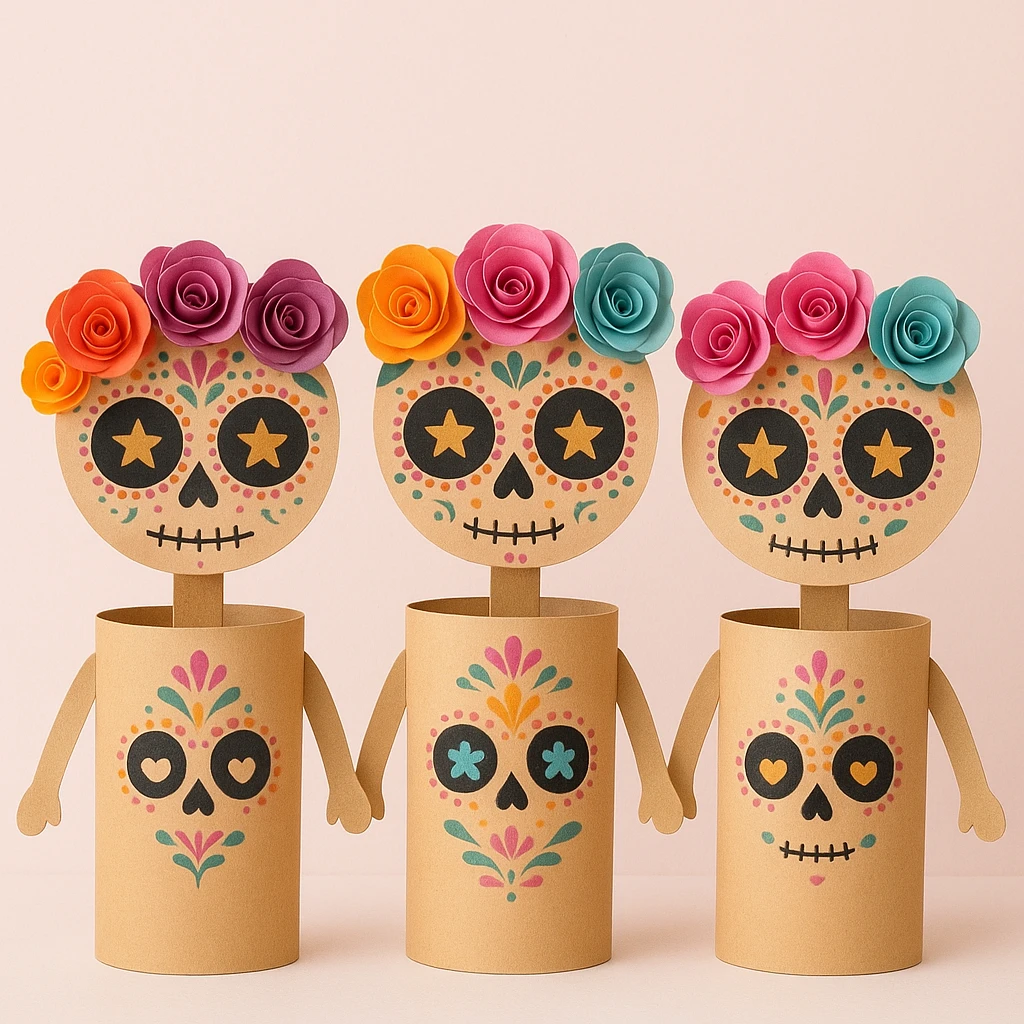
Paper Roll Calavera Dolls with Colorful Flower Crowns
Equipment
- Glue stick or craft glue
- Scissors
- Markers or paint pens
Materials
Main Materials
- 1 Empty toilet paper roll per doll
- Tan or brown craft paper for wrapping the roll
- Colored construction paper assorted for flowers
- Cardstock for skull face
Instructions
- Wrap the toilet paper roll with tan or brown craft paper and glue it in place.
- Cut two small arms from paper and glue to the sides of the roll.
- Draw or print a skull face on cardstock, cut it out, and decorate it.
- Decorate the body of the doll with colorful designs using markers or paint pens.
- Make flowers from colored paper by rolling spirals or folding petals, then glue them together.
- Glue the skull face to the back top edge of the roll, and attach the flower crown on top.
- Add final touches, name tags, or small accessories to personalize your doll.