
Creating a bat mobile is a perfect hands-on activity that blends fun and creativity, especially during the Halloween season. This DIY Bat Mobile Craft for Kids brings a touch of spooky charm to any room while also serving as a great motor skills and coordination activity. Whether you're decorating a classroom, setting up for a party, or simply enjoying a quiet craft day at home, this mobile will capture attention and delight.

Made from simple materials like black cardstock and string, this project is beginner-friendly and easy to customize. Children can explore their creative sides by decorating the bats in their own styles, adding details like glitter, googly eyes, or even tiny capes. The mobile’s lightweight design makes it safe and perfect for hanging above desks, in windows, or from the ceiling.
Let’s dive into the list of materials and then go step-by-step through the process of making your very own DIY Bat Mobile.
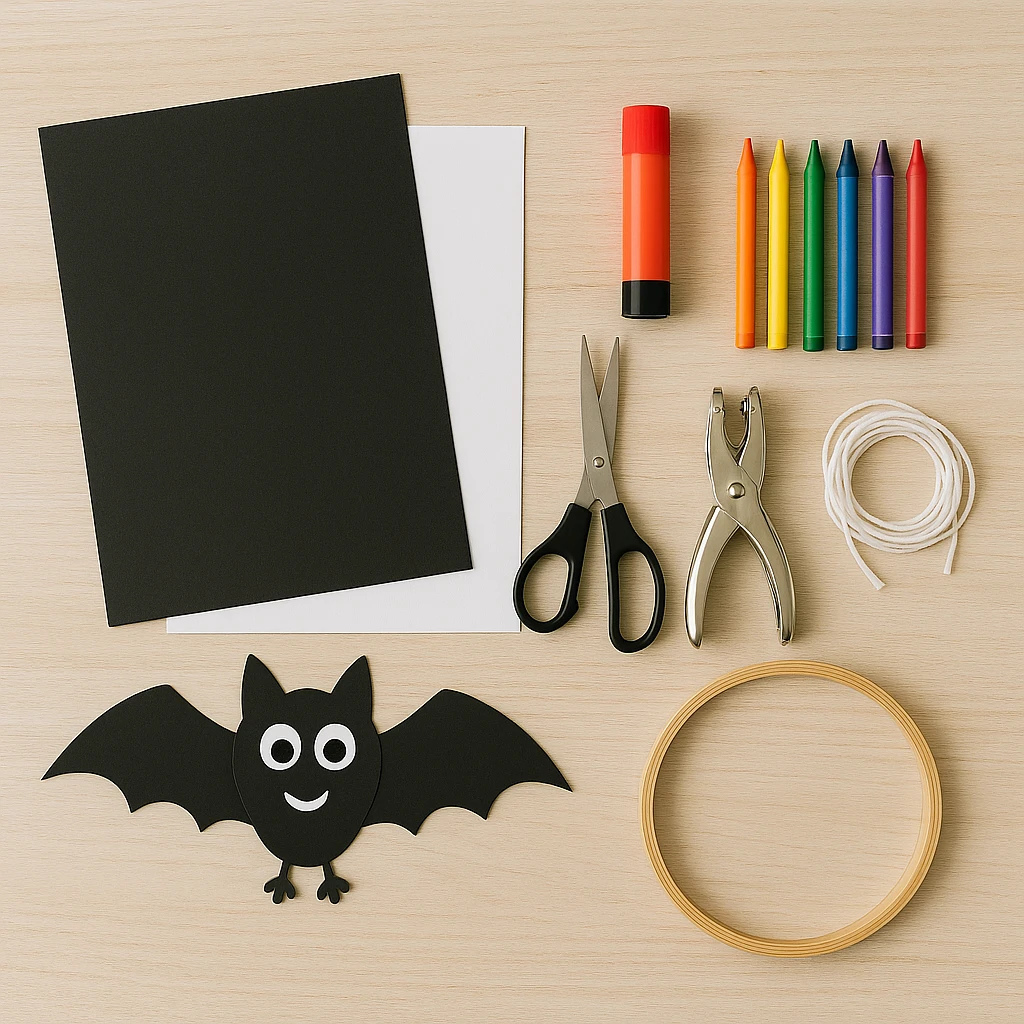
Materials Needed
- Black cardstock or construction paper (8.5" x 11")
- White cardstock (for eyes or templates)
- Scissors
- Glue stick or craft glue
- White string or thin twine
- Wooden embroidery hoop or craft ring (8-10" diameter)
- Hole punch or sharp pencil (to make string holes)
- Markers or crayons (optional for decorations)
- Tape (optional, for securing string)
Step-by-Step Instructions
Step 1: Trace and Cut Bat Shapes
Start by drawing or printing out a simple bat template on white cardstock. Use this template to trace six bats onto black cardstock. Carefully cut out each bat. Make sure the wings are symmetrical and sturdy enough to hang without flopping.
Step 2: Add Eyes and Faces
Cut out small white circles from the white cardstock for eyes, or use googly eyes for a fun touch. Glue them onto each bat. Draw on smiles, fangs, or other expressions with a white marker or gel pen to give each bat its own personality.
Step 3: Attach String to Each Bat
Cut six pieces of white string, each approximately 12 inches long. Use a hole punch or the tip of a sharp pencil to create a small hole at the top of each bat's head. Thread the string through the hole and tie a knot to secure it. This will be how the bats hang from the mobile.
Step 4: Prepare and Balance the Wooden Ring
Take your wooden embroidery hoop or craft ring and cut three equal lengths of string (about 18 inches each). Tie these evenly around the ring to create a tripod that will allow it to hang flat and balanced. Bring the three strings together at the top and tie a knot, creating a single loop for hanging.
Step 5: Assemble the Hanging Mobile
Now it’s time to attach the bats to the wooden ring. Space them evenly around the hoop, tying each string to the ring at different heights for visual interest. Make sure to double-knot or tape the string ends to prevent slipping.
Step 6: Hang and Display Your Bat Mobile
Choose a spot where the mobile can turn gently in the air—near a window or from the ceiling in a playroom or classroom. Use a ceiling hook or command strip to hang the mobile securely. Step back and admire your spooky creation!
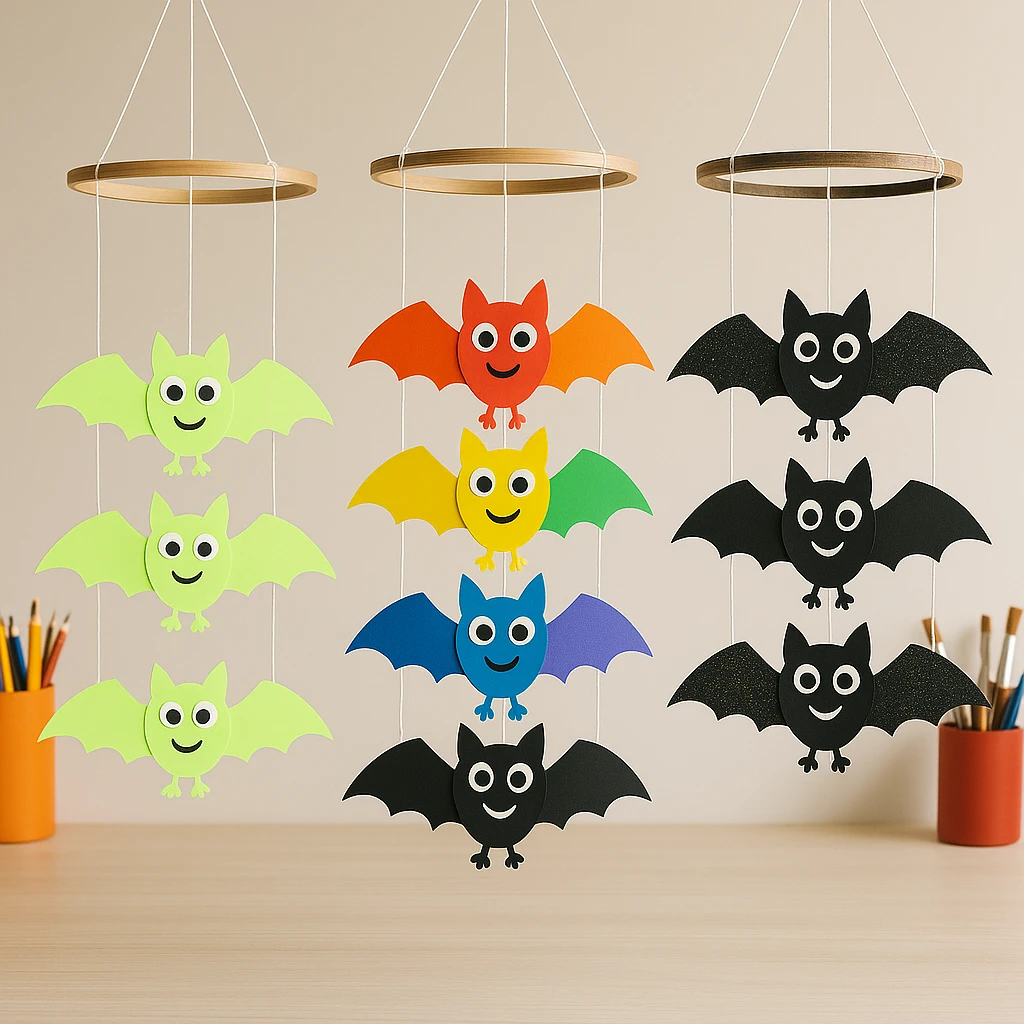
Customization Ideas
Style 1: Glow-in-the-Dark Bats
Use glow-in-the-dark paint or paper to make your bats shine at night. This is especially fun for bedtime rooms or Halloween parties.
Style 2: Rainbow Bat Party Mobile
Swap out black cardstock for bright neon or rainbow colors. Add glitter or confetti wings for a festive, playful twist.
Style 3: Spooky Bats with Glitter Wings
Give each bat a glamorous upgrade by brushing glue on the wings and sprinkling fine black or silver glitter over them.
Educational and Seasonal Uses
This craft makes an excellent teaching tool for discussing nocturnal animals, bats' role in ecosystems, or the symbolism of bats in different cultures. In classrooms, the bat mobile can be part of a Halloween theme or autumn nature study. It also supports hand-eye coordination, tracing, cutting, and threading—essential skills for young learners.
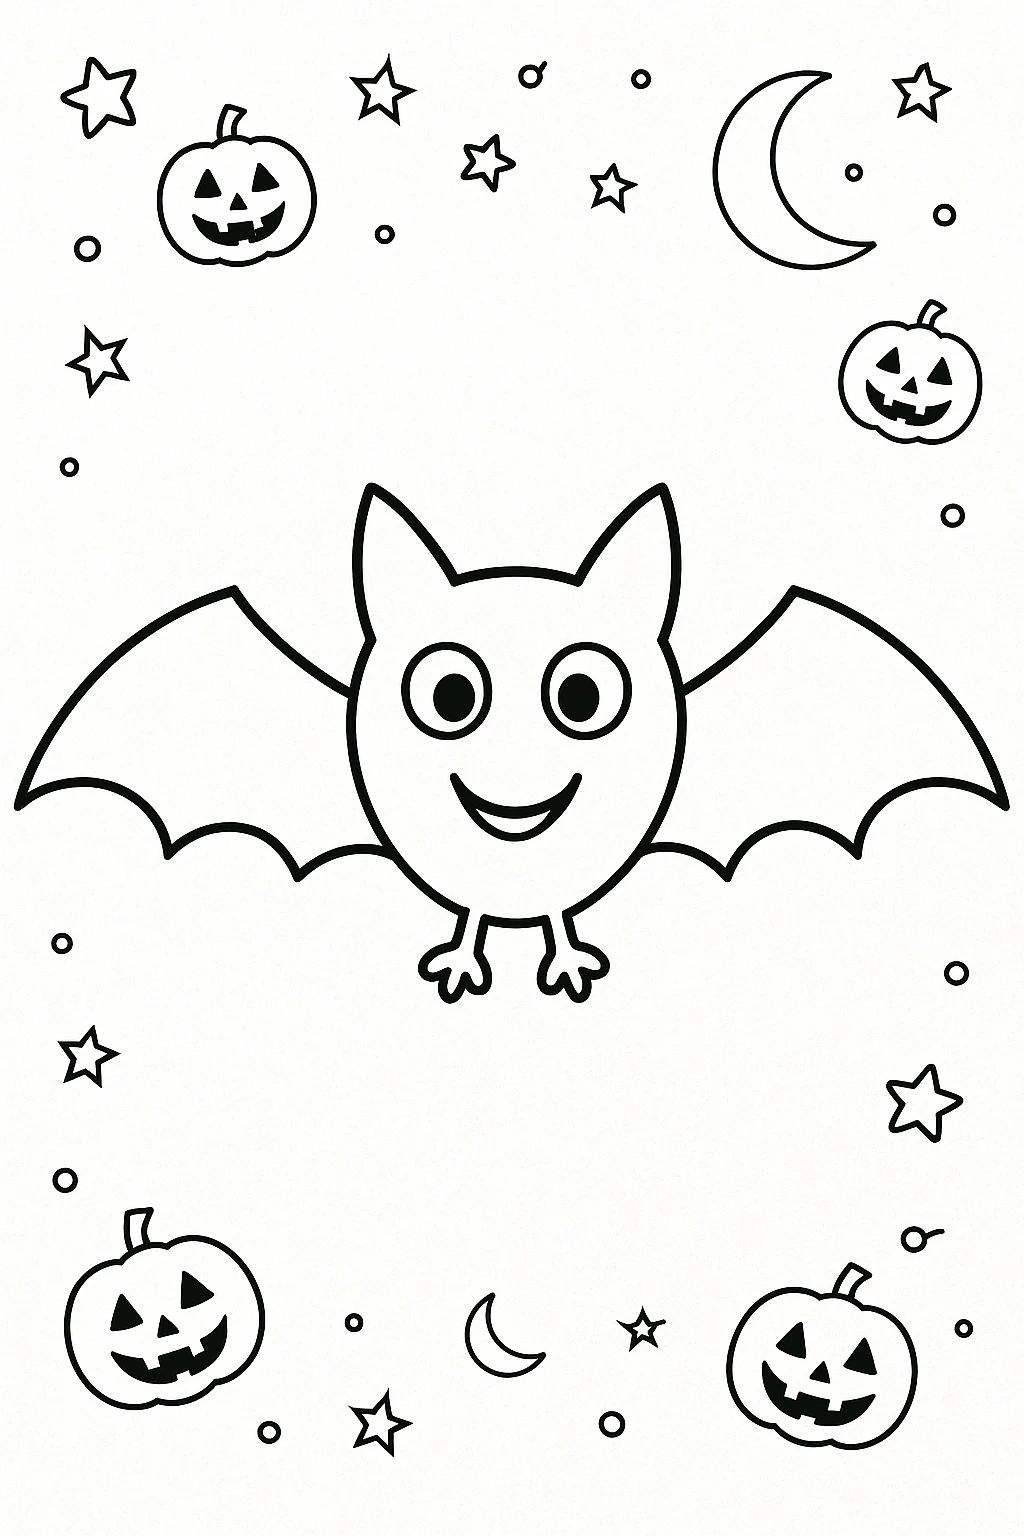
Printable Template
To make this craft even easier, use the printable bat template provided below. Simply print the outline on cardstock, cut out the shapes, and you’re ready to color, decorate, and assemble. This reduces the prep time and ensures perfectly shaped bats every time.
Kids can use crayons, markers, or colored pencils to design their bats before cutting and hanging them. It’s an ideal option for younger crafters or group activities where uniform shapes are helpful.
Conclusion
This DIY Bat Mobile Craft is more than just a Halloween decoration—it's a fun, engaging activity that encourages creativity and learning. Whether made solo or as a group project, the finished mobile is sure to be a hit with kids and adults alike. Try different styles, hang it proudly, and celebrate the spooky season in handmade style!

DIY Bat Mobile Craft for Kids
Equipment
- Scissors
- Hole punch
- Glue stick
- Wooden Embroidery Hoop
Materials
Main Materials
- Black cardstock or construction paper 8.5" x 11" sheets
- White cardstock For eyes or templates
- White string or thin twine Cut to various lengths
- Markers or crayons Optional for decorations
Instructions
- Step 1: Trace and Cut Bat Shapes - Trace bat shapes on black cardstock using a template and cut them out carefully.
- Step 2: Add Eyes and Faces - Glue on white paper circles or googly eyes, and draw facial expressions using a white marker.
- Step 3: Attach String to Each Bat - Punch a hole at the top of each bat and tie a string through the hole.
- Step 4: Prepare and Balance the Wooden Ring - Tie three strings around the wooden ring to balance it evenly for hanging.
- Step 5: Assemble the Hanging Mobile - Tie each bat string to the wooden ring at different lengths and secure.
- Step 6: Hang and Display Your Bat Mobile - Hang the mobile from a ceiling hook or string in your desired location.