
Bring a touch of cosmic charm to your Halloween decor with these DIY Glowing Galaxy Bats. This fun and slightly spooky project combines simple crafting with a magical glow, making it a perfect activity for kids, classrooms, or anyone looking to add a little sparkle to the season. Not only are they eye-catching when hung around a room, but they’re also surprisingly easy to make using basic craft supplies and a bit of imagination.
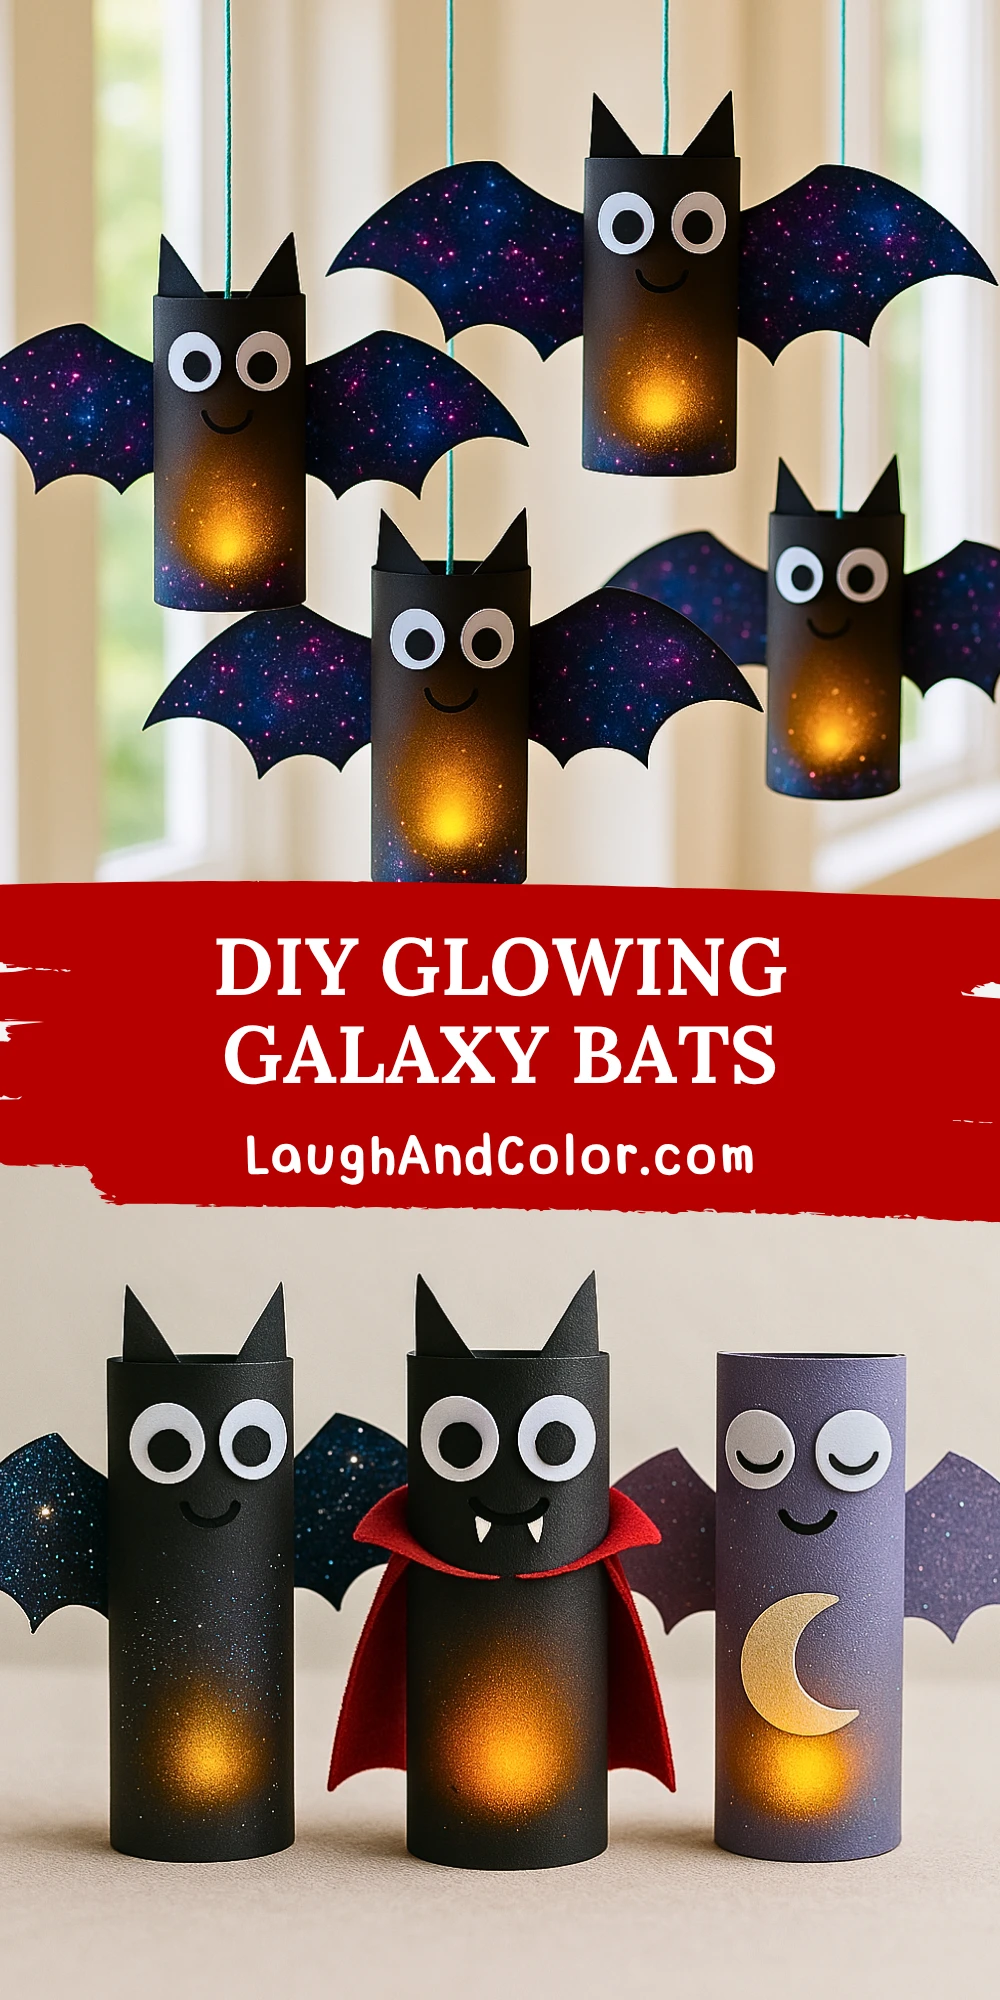
The best part about these glowing bats is the galaxy theme. The deep blues and purples of the wings combined with glowing LED lights make them feel like they’ve flown straight out of a starlit sky. Whether you're decorating for a party or just want a unique Halloween vibe at home, this project is sure to impress.
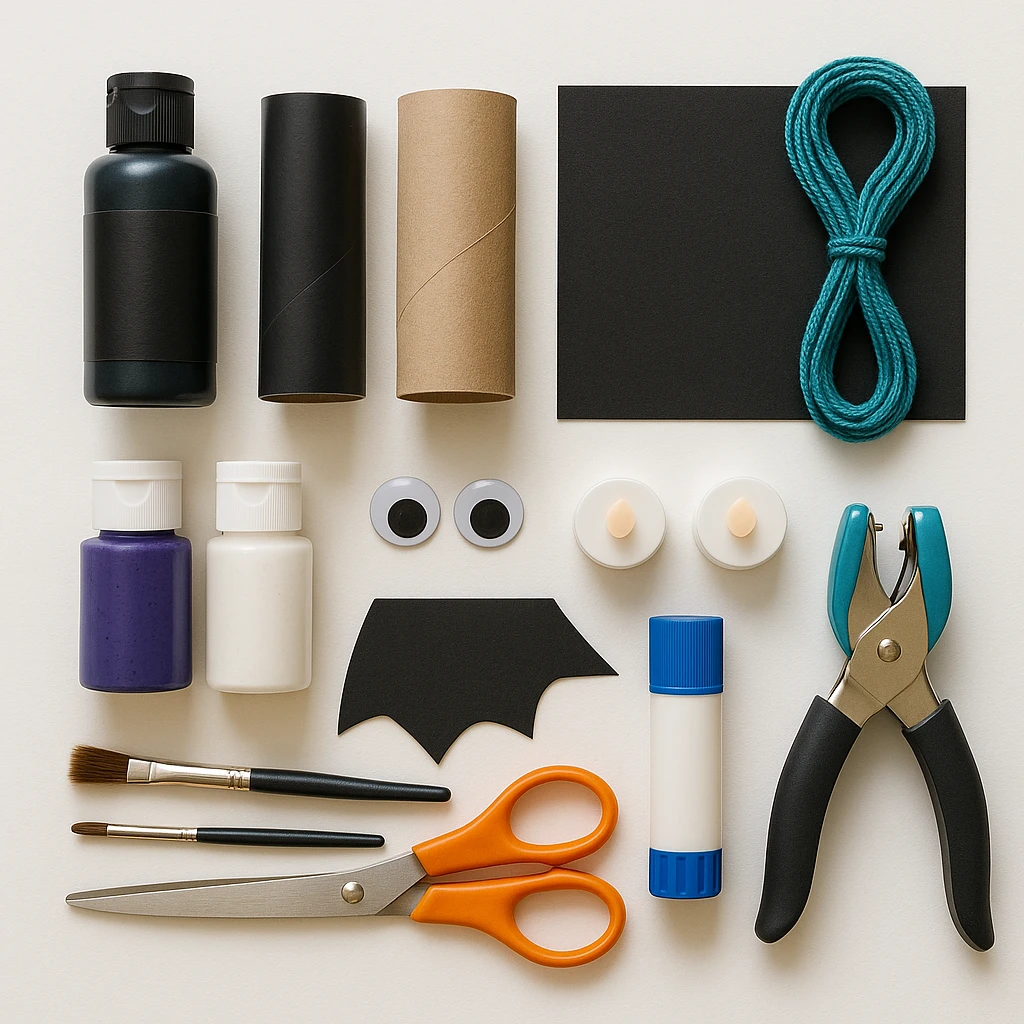
Materials Needed
- Empty toilet paper rolls or black cardstock rolled into tubes (4–6 inches in height)
- Galaxy-patterned paper or printable galaxy background
- Black cardstock (for ears)
- Googly eyes or white paper to make eyes
- Glue stick or hot glue gun
- Scissors
- Hole punch
- String or fishing line for hanging
- Battery-operated LED tealights
- Pencil
Step-by-Step Instructions
Step 1: Gather and Prepare Materials
Start by collecting all your materials in one place. Pre-cutting the galaxy wings and preparing small pieces of black cardstock for the ears can help streamline the process, especially if you're working with a group or children.
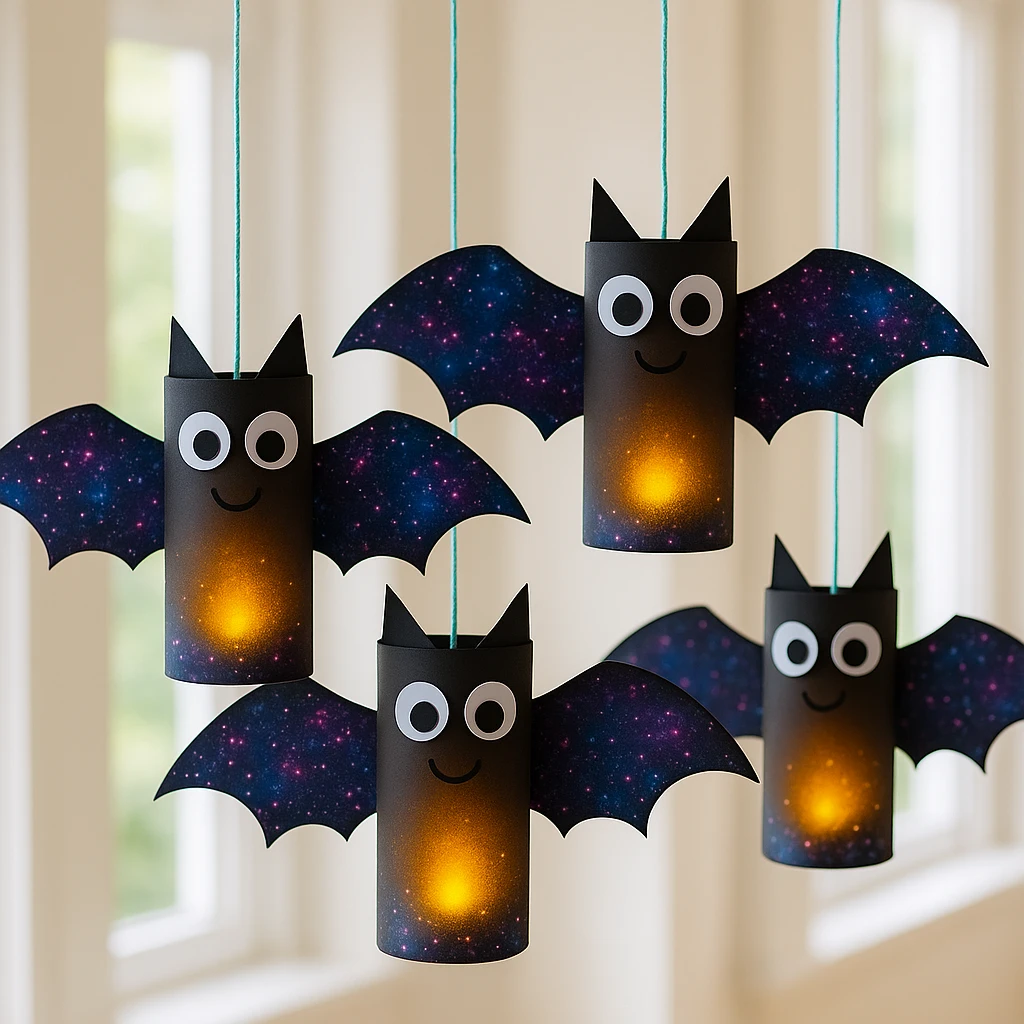
Step 2: Create the Bat Body
Use an empty toilet paper roll as the body of the bat. If you're using cardstock, roll it into a 2-inch wide cylinder and glue the edge. Make sure it's sturdy enough to hold the wings and light.
Step 3: Cut and Attach Galaxy Wings
Draw and cut out bat wings from the galaxy paper. Each wing should be around 6 inches wide and 2.5 inches tall. Attach one wing to each side of the bat body using glue. Ensure they are symmetrical and positioned slightly toward the top.
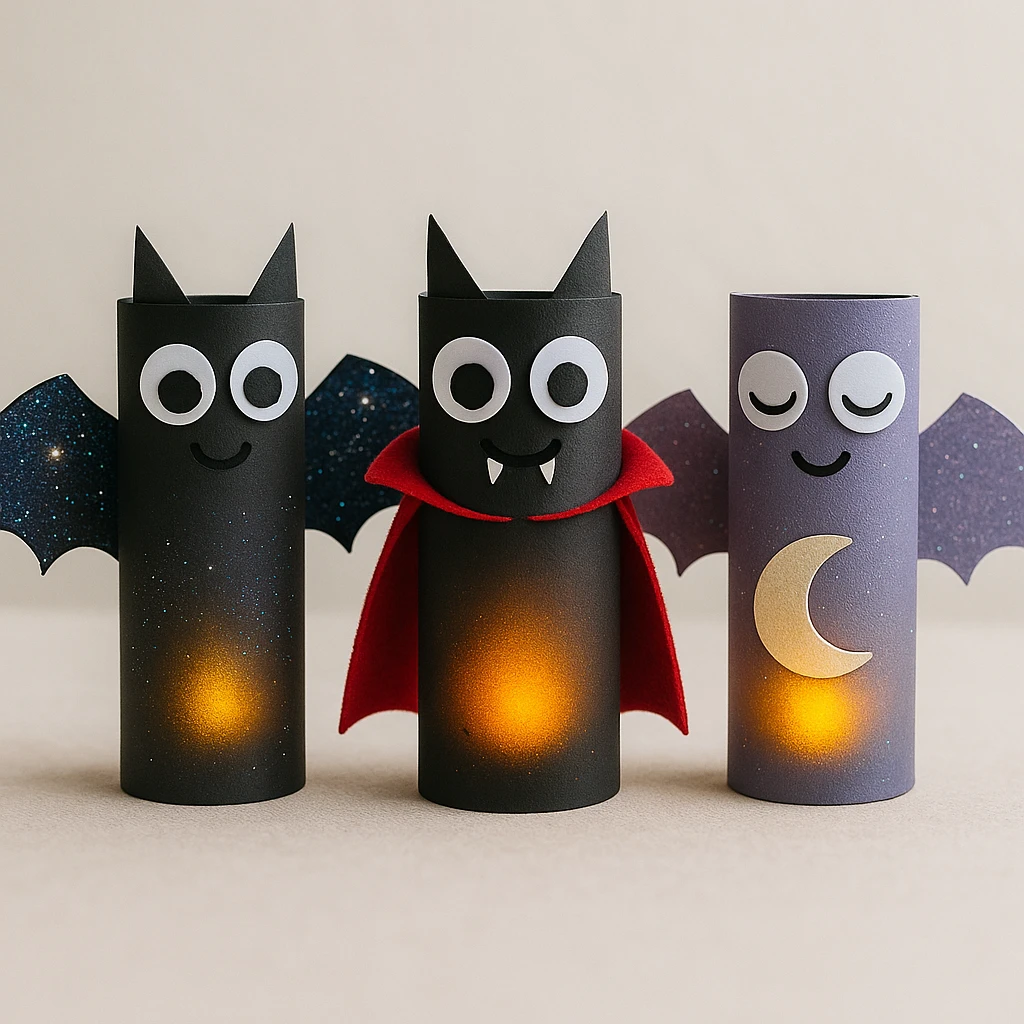
Step 4: Add Face and Ears
Cut out two small triangles from black cardstock to form the ears and glue them to the inside top edge of the cylinder. Then, glue on two googly eyes and draw a small smile using a black marker or glue on a cut-out paper mouth.
Step 5: Insert the Glowing Light
Turn on the LED tealight and place it inside the cylinder. For safety, always use flameless lights. The soft glow will shine through the bottom of the tube, giving the bat a magical appearance.
Step 6: Hang the Glowing Bats
Punch a small hole in the top of the bat body and thread a piece of string or fishing line through. Tie a knot and hang your bat from the ceiling, a curtain rod, or a decorative branch.
Customization Ideas
For a truly magical effect, consider adding glow-in-the-dark paint to the wings or body. You could also use glitter cardstock or embellish with star-shaped stickers to emphasize the galaxy theme. Try mixing wing colors—navy, deep violet, and magenta all look stunning. Another fun idea is to give each bat a unique expression or personality by varying the eye size, mouth shape, or adding little fangs.
Educational or Seasonal Uses
These galaxy bats aren’t just for Halloween—they make an excellent addition to space-themed learning units. Teachers can use this craft to introduce lessons about nocturnal animals, galaxies, or even environmental reuse (using cardboard tubes). They're also perfect for October STEM activities or decorating classrooms and libraries.
Printable Template
To make this project even easier, download our printable template that includes the bat body, wings, and face parts. Just print on white cardstock, color with your favorite galaxy shades, and assemble! This version is perfect for younger kids who want to color their own designs before cutting and gluing.
Once colored and assembled, the printable bats can be used in the same way—just insert the LED tealight and hang them up. The combination of personalized artwork and glowing light makes each one unique.
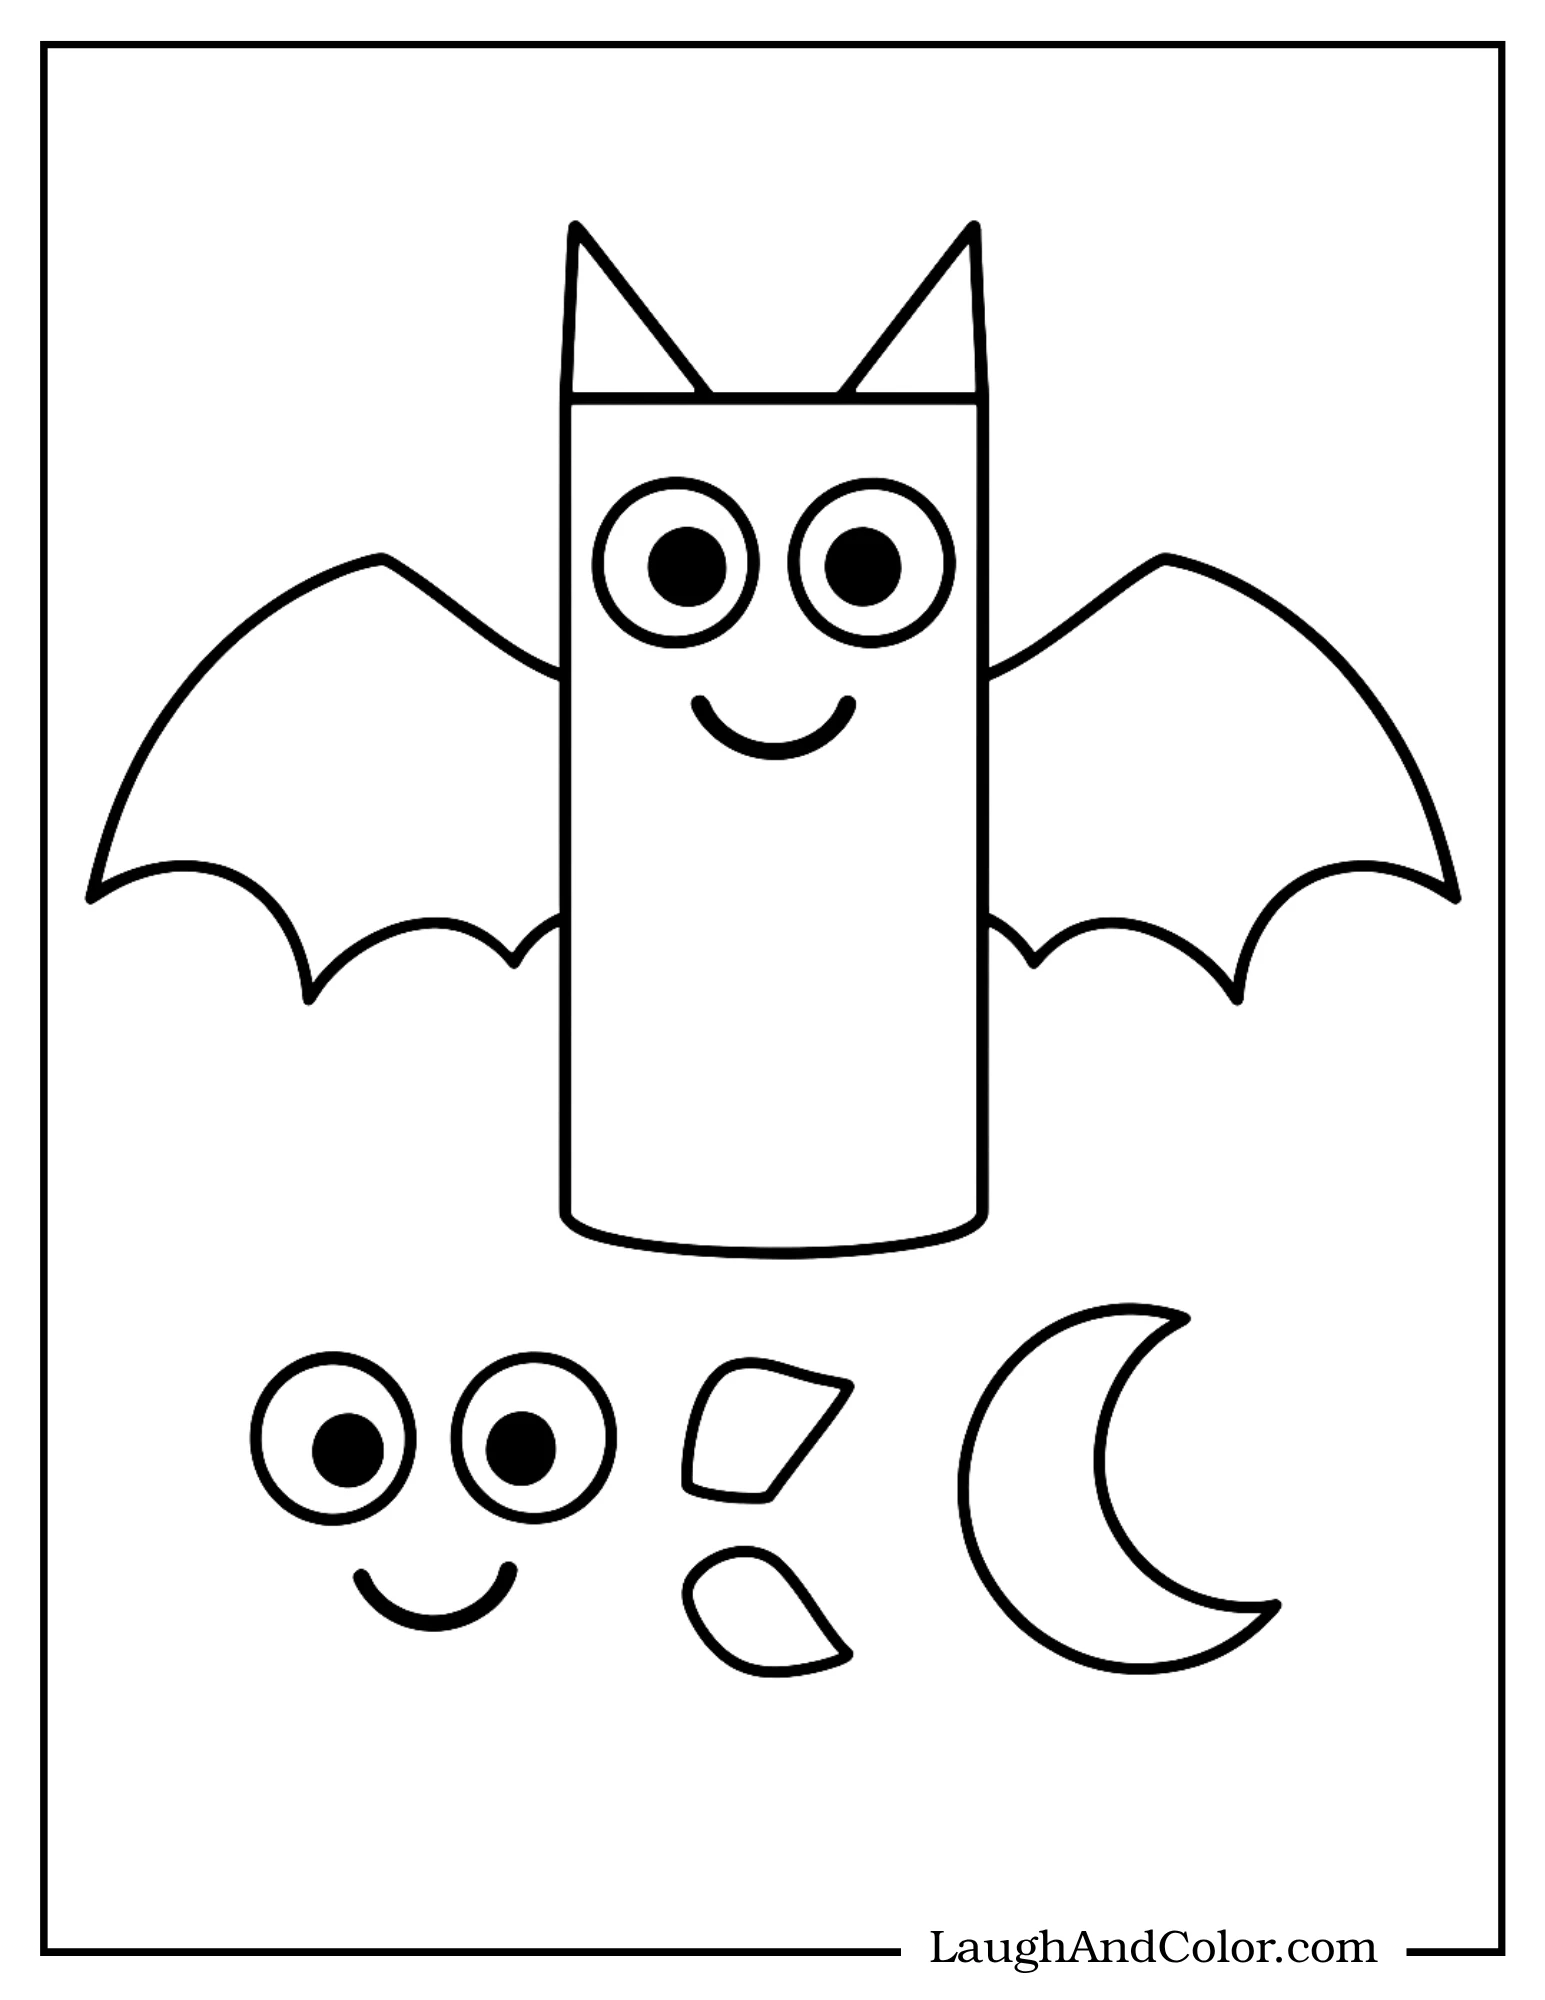
DIY Glowing Galaxy Bats - Printable Template
Conclusion
Creating DIY Glowing Galaxy Bats is a fun way to celebrate the spooky season with a cosmic twist. With just a few materials and a splash of creativity, you can transform simple supplies into enchanting decorations. Whether made in a classroom, at home, or during a Halloween party, these bats are sure to shine. Try them out and enjoy a glowing galaxy of your own making!
DIY Glowing Galaxy Bats
Equipment
- Glue stick or hot glue gun
- Scissors
- Hole punch
Materials
- 4–6 inch Toilet paper rolls or black cardstock cylinders
- Galaxy-patterned paper
- Black cardstock (for ears)
- 2 Googly eyes per bat
- 1 Battery-operated LED tealight per bat
- String or fishing line For hanging
Instructions
- Gather all materials in one workspace. Pre-cut galaxy wings and ear pieces if working with kids or groups.
- Create the bat body using a toilet paper roll or rolled black cardstock. Make a cylinder about 2 inches wide and glue securely.
- Cut wings from galaxy paper, each about 6 inches wide. Glue one wing to each side of the bat body near the top.
- Cut out two small black triangles for ears and glue them inside the top rim of the tube. Add googly eyes and draw or glue on a smile.
- Place an LED tealight inside the bat body and turn it on. The glow will shine from the bottom for a magical look.
- Punch a hole at the top and thread string through. Tie and hang your glowing bat where desired.